Update Guide
Updated 5 months ago
The latest theme version see in the changelog.
Create a backup before updating the theme.
In case of updating issues, deactivate all 3rd-party plugins and rerun the update.
How to Create a Backup? #
You can create backups via your hosting.
As an alternative solution, you can use the guide below.
Download the All-in-one WP Migration plugin and install it. Navigate to All-in-one WP Migration > Export.

Click on Advanced options to expand them. Pick irrelevant items to exclude from the backup to reduce the final file size.

Click on the Eхport button to start exporting.
Restore #
Navigate to All-in-one WP Migration > Import. Then, drag and drop the backup file to upload it.

That's it!
Fast Theme Update #
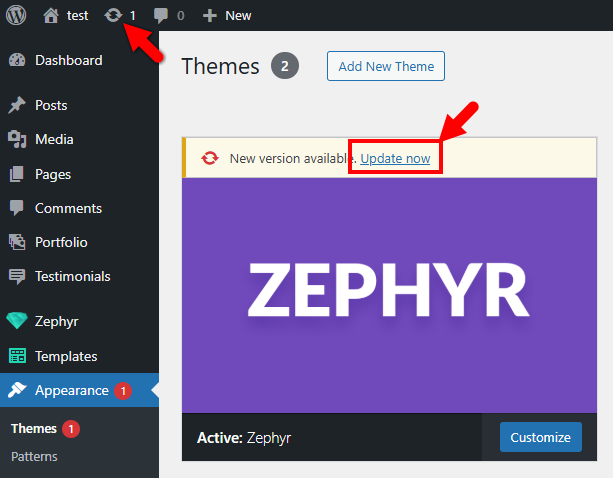
One-click theme update is available only if the theme is activated. Go to the Appearance > Themes admin page and click the Zephyr "Update now" link.

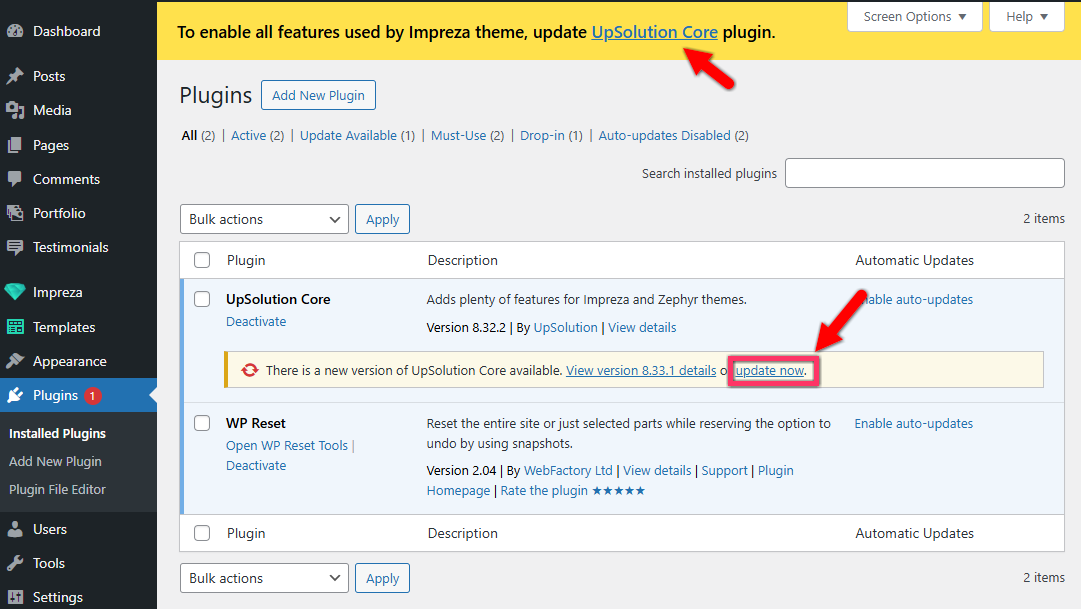
After updating the Zephyr, update the Upsolution Core plugin on the Plugins admin page.

What Should I Do if the Update Link is Missing? #
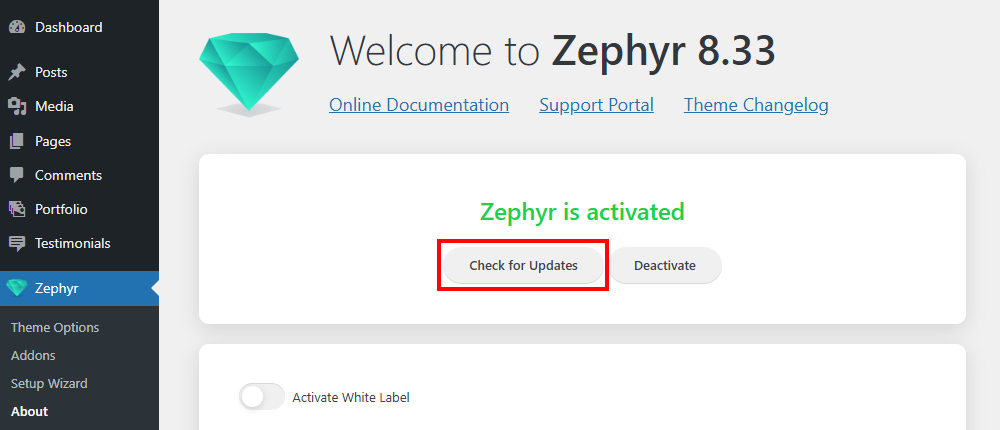
- Ensure your theme is activated.
- Go to Zephyr > About and press the "Check for Updates" link.

Manual Update #
The latest Zephyr version will be available on ThemeForest 2-7 days after the release.
Download the Zephyr.zip at your ThemeForest Downloads page.

After downloading, follow one of the instructions below.
Update via WordPress #
- Navigate to Appearance > Themes.
- Activate one of the default WordPress themes.
- Delete the current version of the Zephyr installed on the site. Select the Theme Details and then click the Delete (Right Bottom Corner). This won't remove the previous theme options, those will remain in place upon the latest version installation.
- Add a new theme by pressing the relevant button and picking the Upload Theme option. Navigate to the Zephyr.zip file and click the Install Now button.
- After activating the Zephyr, update the UpSolution Core plugin to the latest version.
Update via FTP #
- Connect to your hosting via FTP software.
- Unzip the Zephyr.zip file on your computer.
- Upload the extracted folder to wp-content/themes/Zephyr, overwriting all files.
Updating the 1.0 - 1.11 Version #
For correct updating to the latest Zephyr version, you need to update to the 2.0.2 version first. Create a ticket, and our support team will help with this process.
- DO NOT update the WordPress and PHP to their latest versions.
- Make a full backup.
- Delete the Zephyr theme (we recommend to delete the Zephyr folder via FTP).
- Install the Zephyr version 2.0.2 via the ZIP provided by our support team.
- Go to the "Appearance > Themes" admin page and ensure that the Zephyr theme is active, not a child theme.
AFTER installing the Zephyr version 2.0.2: #
- Check if your website works fine right after the update. If it has major issues and is the production environment website, restore your website backup and read the blue box below.
- If everything works fine, make the full site backup (if you did not before the update).
- Deactivate ALL plugins.
- Delete the WPBakery Page Builder (formerly Visual Composer) plugin. You can install its latest version later.
- Delete the Header Builder plugin. It will be replaced by the UpSolution Core plugin later.
- Start the migration process via the big red message box in your WP admin dashboard. This process will change all shortcode parameters and values to be compatible with the new options.
- If everything works fine, continue further. Install and activate the Force Regenerate Thumbnails plugin (screenshot), then go to Tools > Force Regenerate Thumbnails and click the button (screenshot). It will regenerate thumbnails of all uploaded images and delete the extra ones.
- If you use any caching plugins or CDN, purge all the website cache.
- Check your website once again. Everything apart from image sizes should be just fine. If it has major issues and is the production environment website, restore the backup and roll back to Zephyr 1.6.2 using the corresponding section below.
When you complete the steps above, ensure all your site pages are displayed correctly and working as in the previous Zephyr version. In case of issues, restore the backup and downgrade Zephyr to the previous version 1.6.2. Most likely, the issue is due to some custom modifications on your site that are incompatible with the new version. In this case, read the further instructions.
If you have some custom modifications (using a child theme or Quick CSS), do the following: #
- Clone your live site using some "duplicator" plugin and create its duplicate at your local environment OR a separate domain or subdomain (example: dev.your-site.com).
- Rename the old theme folder and install Zephyr 2.0.
- Follow all the steps regarding the update to version 2.0 described above.
- If you have some CSS modifications provided by our Support Team that are not working, please create a ticket describing the issue. We will help with providing the correct CSS code.
- Analyze every modification in your child theme: find theme files that modifications might overload, compare new and old versions of this file, and try to fix it. You can create a private ticket with the issue description in that case. Our support team will review modifications and help you figure out possible solutions. Please note that fixing custom modifications is beyond the support scope.
- When all the customizations start working as expected - migrate your site to a main live version.
If you don’t want to spend time fixing customizations for Zephyr 2.0 (or there are no features essential for you), you do not have to update. At the same time, please note: we won't provide support to old Zephyr versions (1.6.2 and previous), and the 1x versions won't be updated separately. So it's better to migrate, and we'll be glad to help with what we can so you can do it the easiest way!
Updating the 2.0 - 6.8 Version #
If you have the Zephyr version below 7.0, follow the steps below to exclude possible issues after the update.
- Make a full backup.
- Deactivate ALL plugins.
- Update the WordPress to the latest version.
- Activate the Zephyr theme itself, not a child theme.
- Update the theme to the latest version.
- Activate the UpSolution Core plugin and update it to the latest version.
- Process the content update via the yellow notification box.
- Check your site.
- Update and activate the needed plugins again.
If you notice issues during the process, please create a support ticket.
