Typography
Updated 1 month ago
All global typography settings are availabe at Zephyr > Theme Options > Typography.
If the Live Builder is enabled, you can edit those typography settings within the live preview. Click the "Edit Live" link in this case.
Changing the "Font Size" option of global text affects the sizes of all website areas/elements specified via "rem" units.
Typography settings can be changed separately for every theme element via their Design settings.
Which Fonts Can I Use? #
Use web-safe fonts, free Google Fonts, or the ones you upload yourself.
Web-safe Font Combinations #
Web-safe fonts are the ones that are already assumed to be on the vast majority of users' devices, without the need to load them from the internet. Other fonts might appear similar but not exactly the same on different devices.

Google Fonts #
Google offers a library of hundreds of free fonts to work with. If any Google font is selected, its files will be loaded from Google servers.

Uploaded Fonts #
In case you need specific fonts or you don't want to load selected fonts from Google servers, you can upload font files manually to create a separate font.
Zephyr supports only woff/woff2 font types. To convert your font files to woff/woff2 use the web font generators, for example:
By default, WordPress blocks the upload of custom files with font formats. You can allow such uploads by opening your site via FTP and adding the line of code below to the wp-config.php file:
define('ALLOW_UNFILTERED_UPLOADS', true);
Upload font file(s) at Zephyr > Theme Options > Typography > Uploaded Fonts. Use the added group for it.
If you need different font weights of the same font, upload weights as separate groups and set the same Font Name for these groups. Check the example screenshot:

Regular font files correspond to 400, and bold font files - to 700, but the Font Name is the same in both groups. This combination will generate one font with two weights. This font will appear in the font selection option of theme elements.
Uploaded fonts are available at:
- Design settings of all elements
- Theme Options > Typography > Customize Live
- Theme Options > Button Styles (after a page refresh)
- Theme Options > Fields Style (after a page refresh)
- any element via custom CSS:
.your_element { font-family: Font Name; }
How to Add Extra Fonts to the Elements #
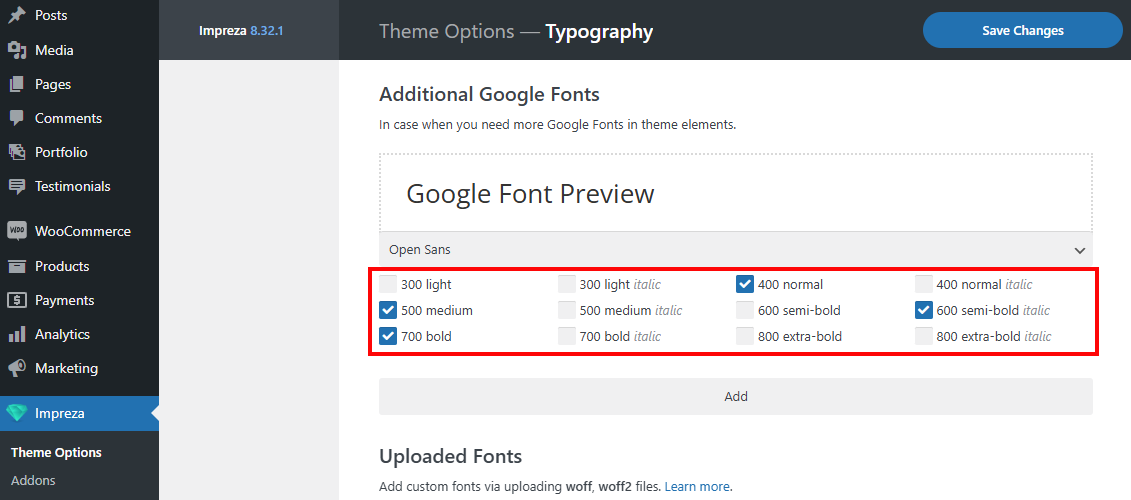
In case you need an additional font (or font weight) not listed in the typography settings add it at Theme Options > Typography > Additional Google Fonts.

Selected Additional Google Fonts will be available in the Design settings of any element.

How Can I Use Multiple Font Weights for the Fonts from Typography Settings? #
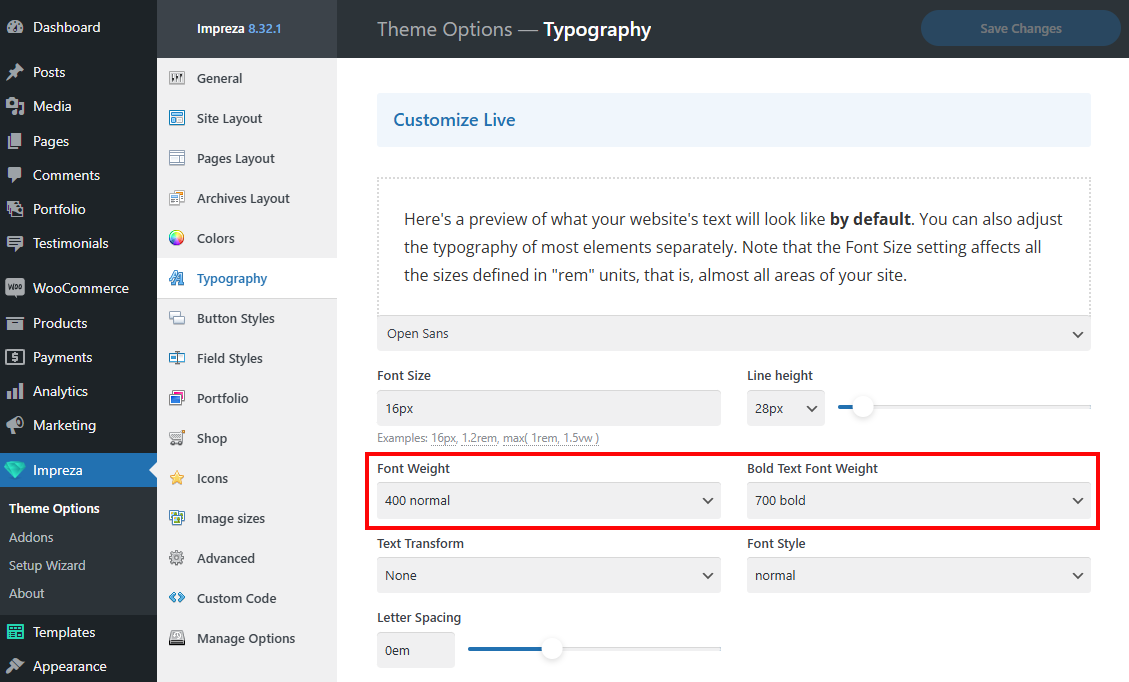
In most cases, using two Font Weights is enough for the fonts you specify in Theme Options > Typography settings. One for regular and another - for the bold text style:

To improve the site loading speed, styles for other Font Weights are not loading by default.
If you need more than two Font Weights for a specific font, add this font via "Additional Google Fonts" and activate the checkboxes for needed Font Weights:

If your site page loads fonts that not specified in the Typography settings, most probably those fonts are used for icons, learn more.
