Cart, Checkout, and Thank You Pages
Updated 8 months ago
Impreza allows customizing WooCommerce-related pages, similar to the product catalog and product page. You can customize these supplement pages via a visual editor and built-in elements without extra plugins.
Cart Page #
What is a Cart page? #
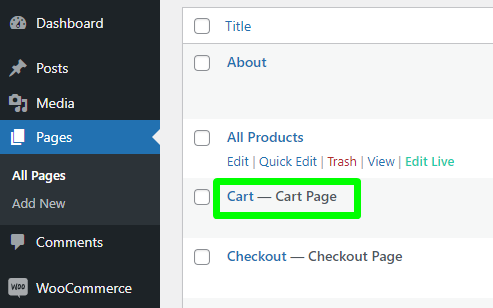
Cart is the required page of the site with WooCommerce if you want to sell online. It's created automatically after installation WooCommerce plugin, and you can easily find it in the list of pages.
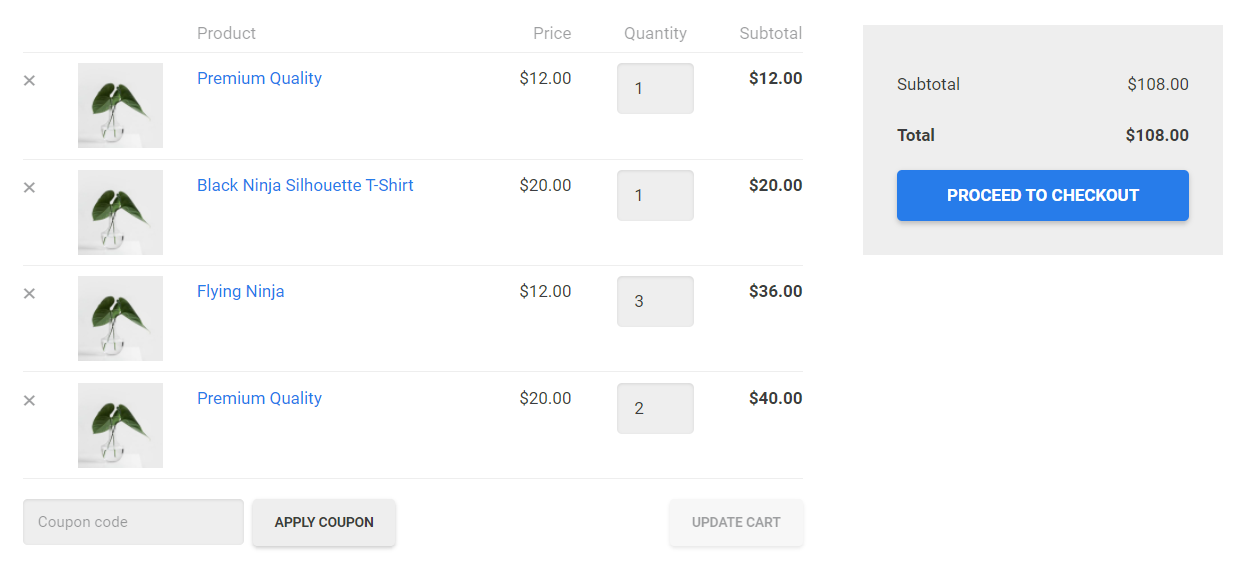
By default, the cart page has the [woocommerce_cart] shortcode/element, which shows the predefined WooCommerce template for the cart elements.
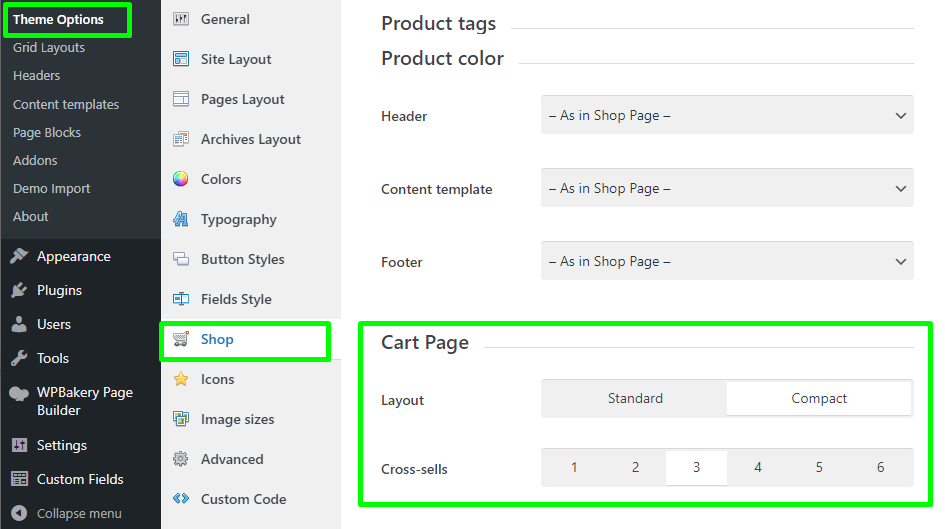
The default WooCommerce template for the cart page could be adjusted at Theme Options > Shop > Cart Page.
How to Customize the Cart Page #
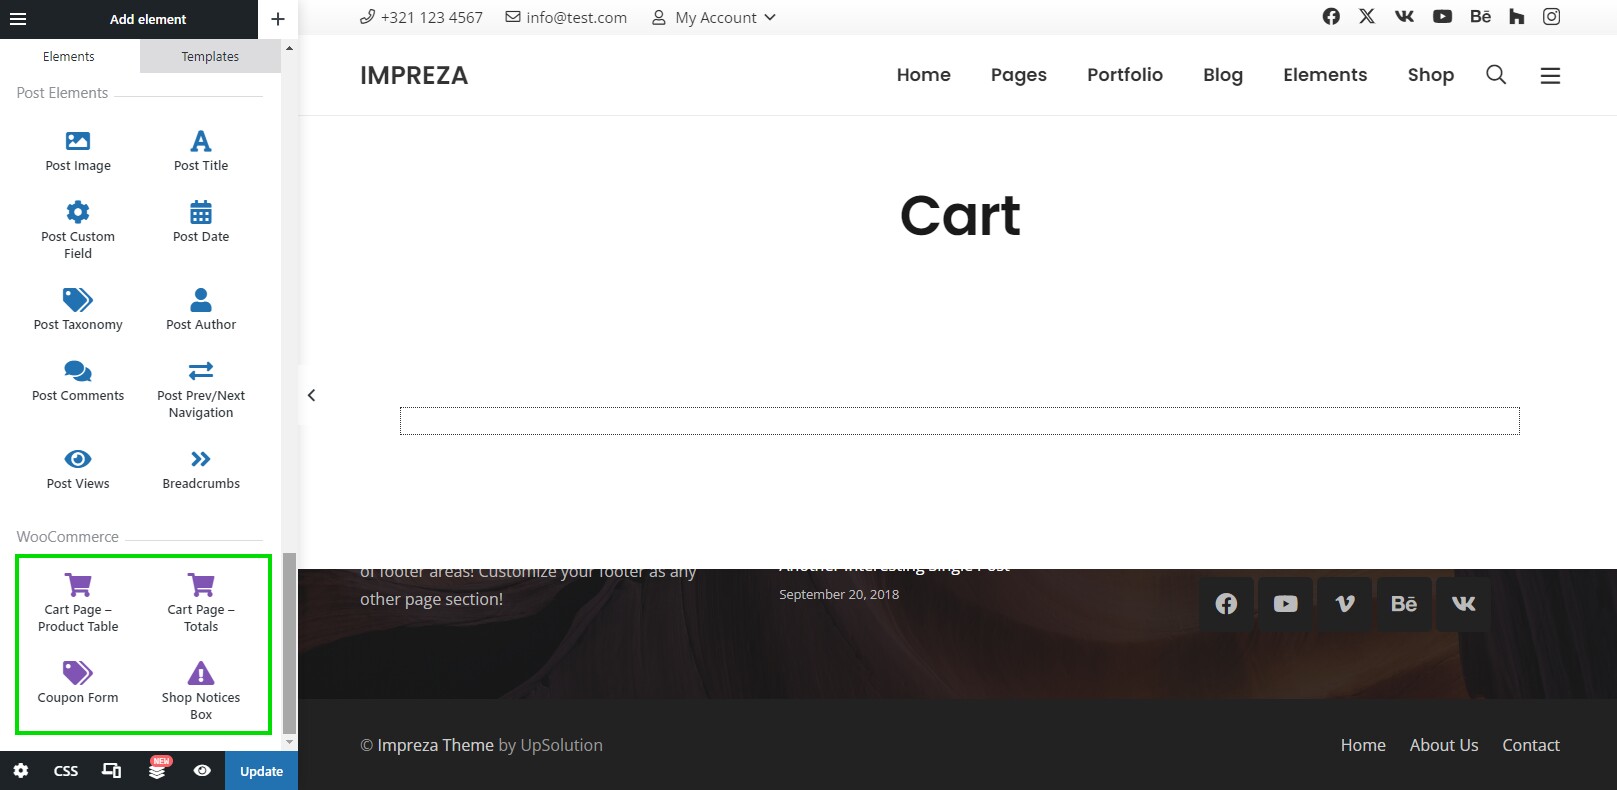
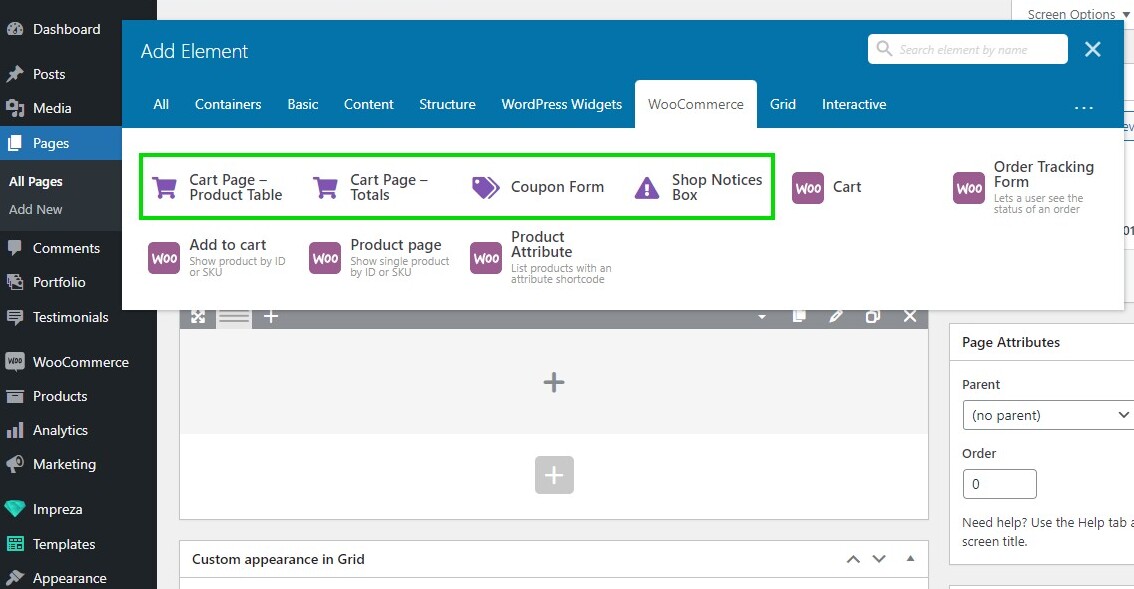
You can customize the Cart Page like any other page with WP Bakery page builder or the Theme's Live Builder. You can add rows, columns, and other elements of content and structure as you like.
Start customizing by removing the default [woocommerce_cart] shortcode/element and using the relevant cart elements from the Theme's library:
- Cart Page - Product Table
- Cart Page - Totals (required element for the work of the Cart page).
- Coupon Form
- Shop Notices Box
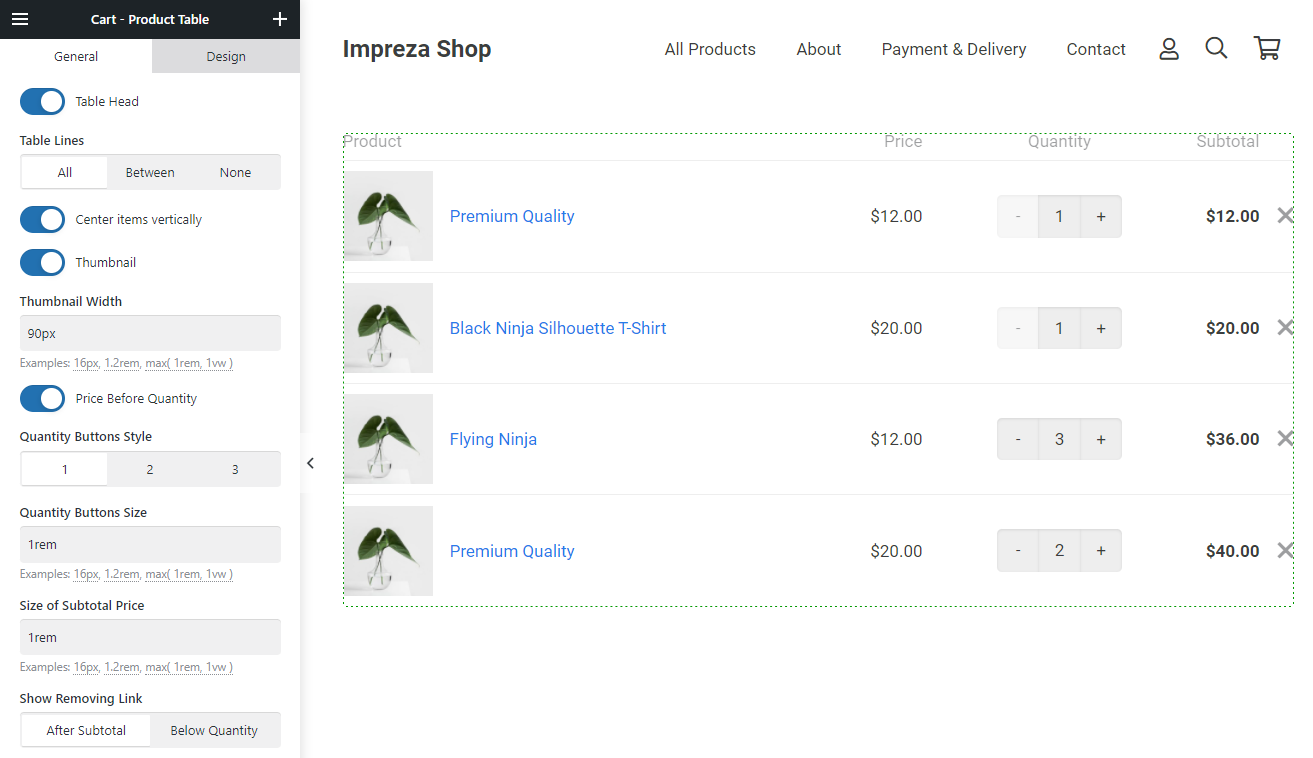
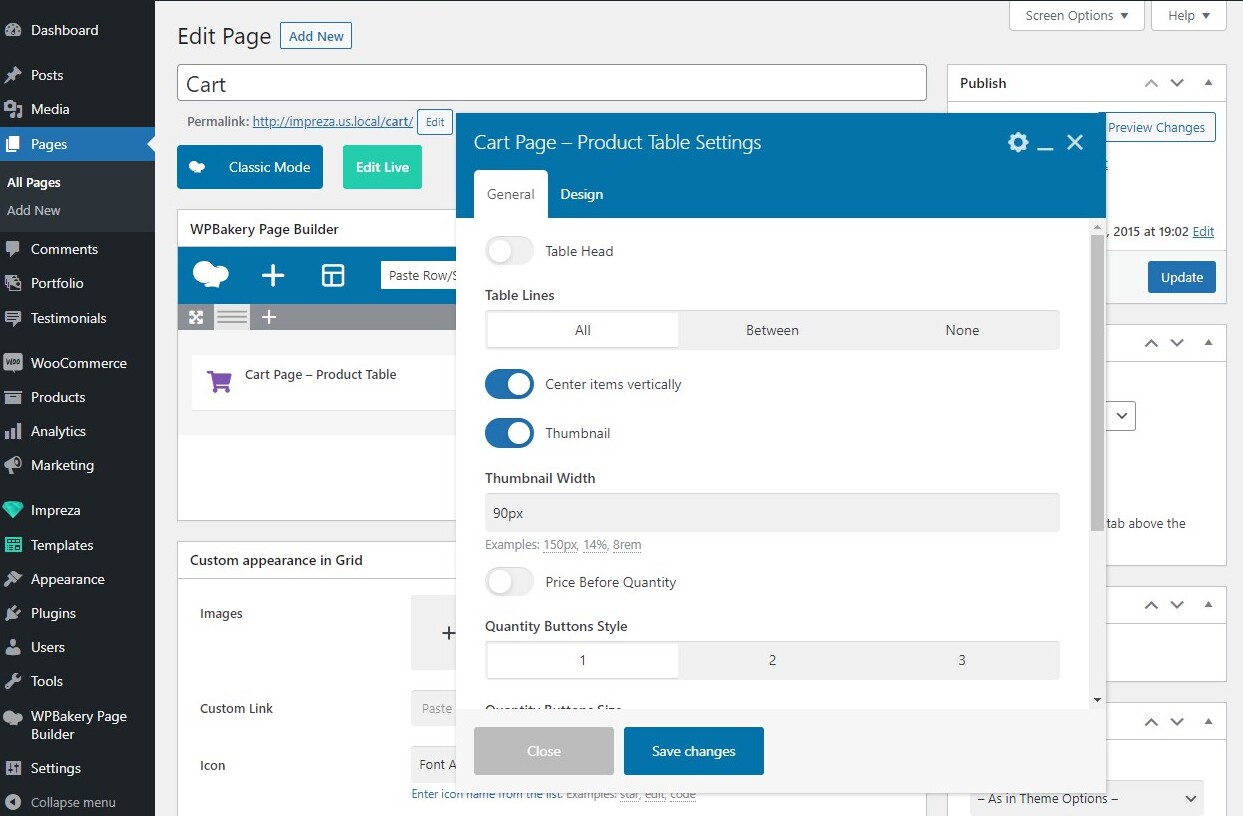
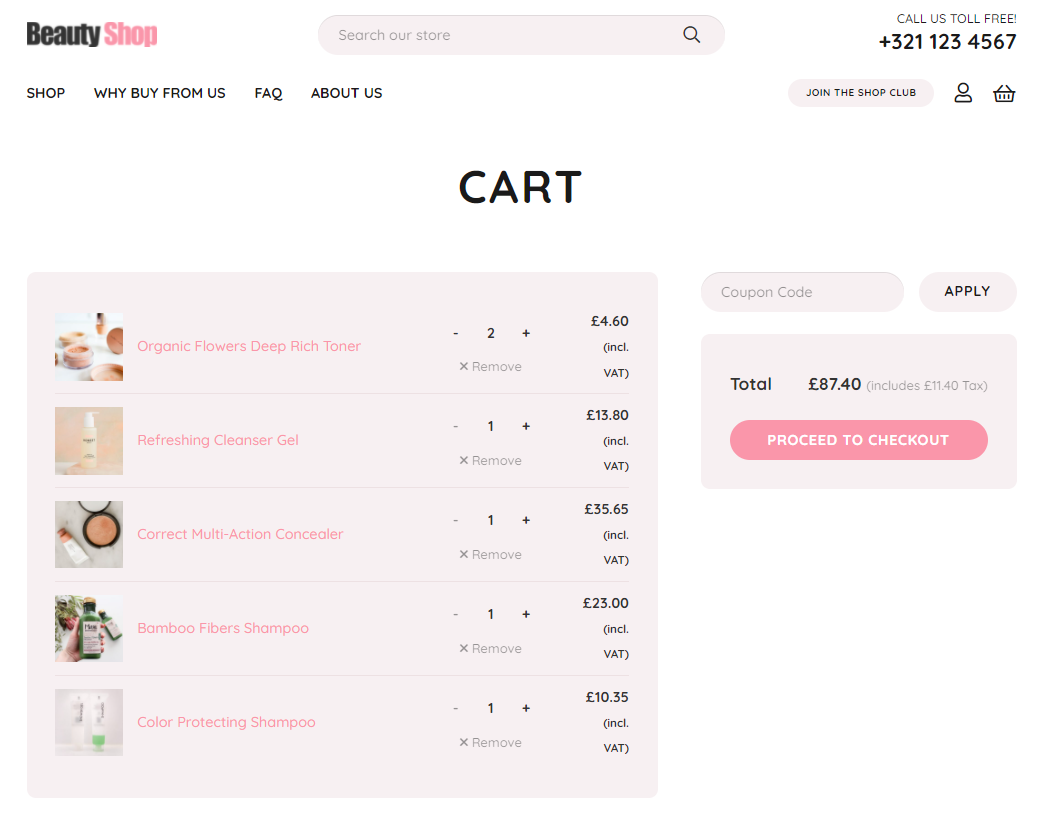
1. Cart Page - Product Table #
Shows the table with the list of cart items allowing you to adjust the table head, table styling, thumbnails, quantity buttons, and removal link. The "Design" tab allows you to apply any colors, background, padding, margins, animation, and other styling tools you like.
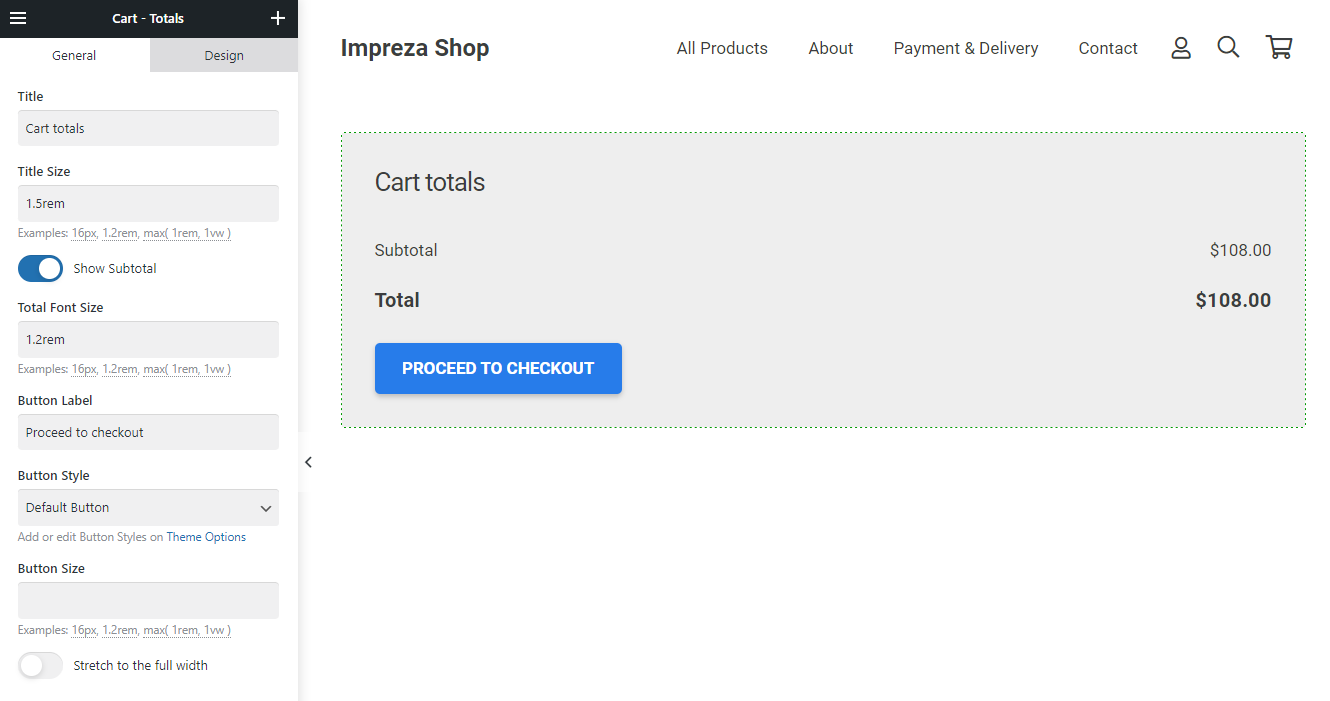
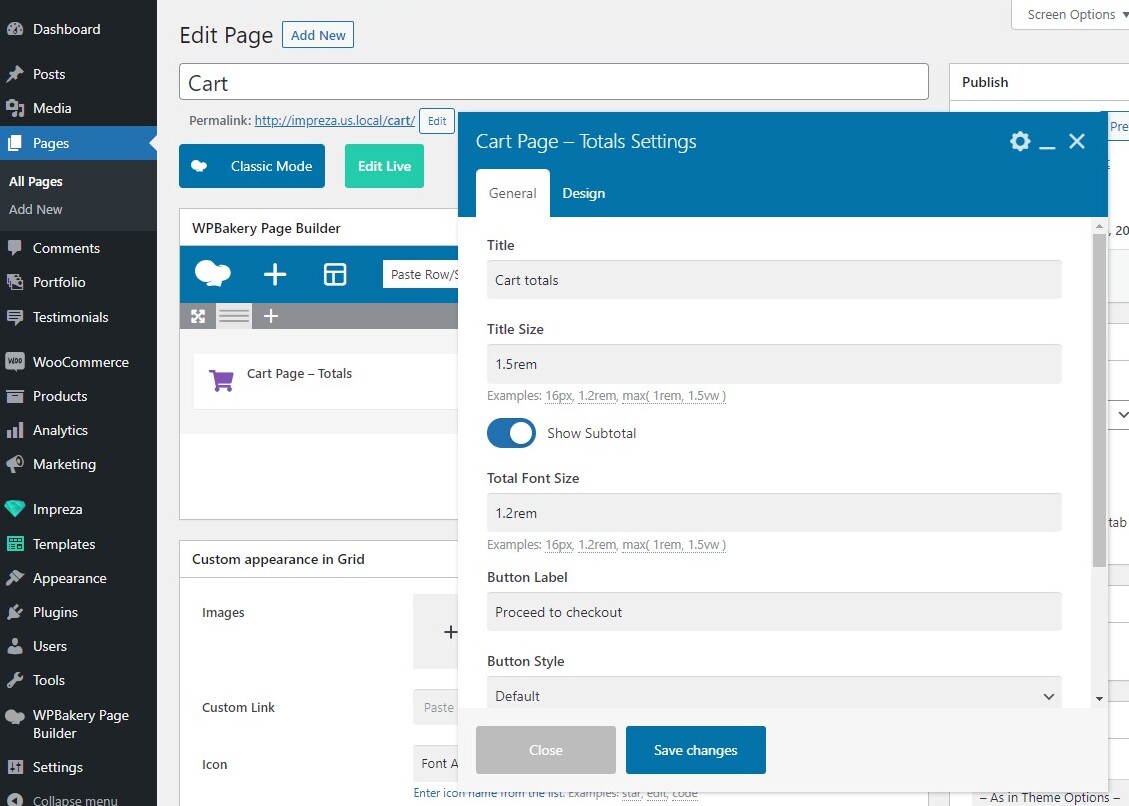
2. Cart Page - Totals (Required) #
Shows the total price for your cart items. While editing, you can decide if you want to show the sub-total price for it (before the discount) and adjust the wording and styles for the title and button. The "Design" tab allows you to apply any colors, background, padding, margins, animation, and other styling tools you like.
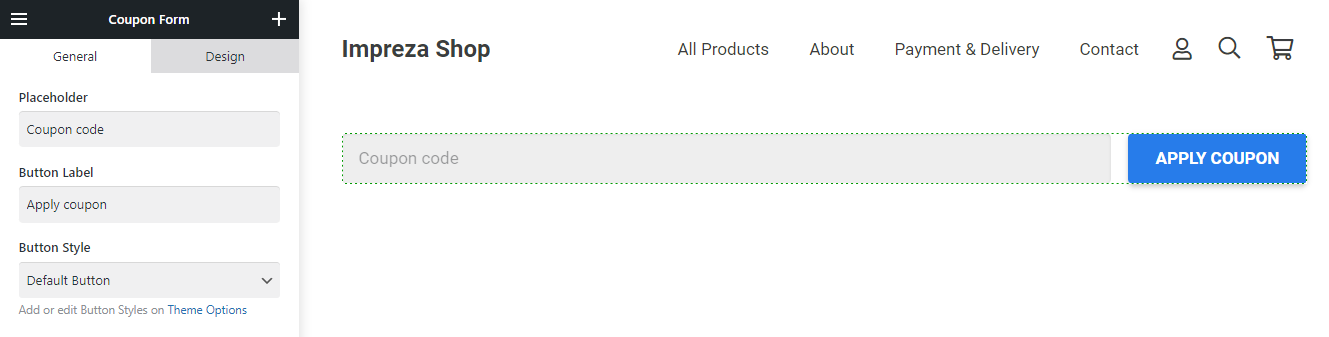
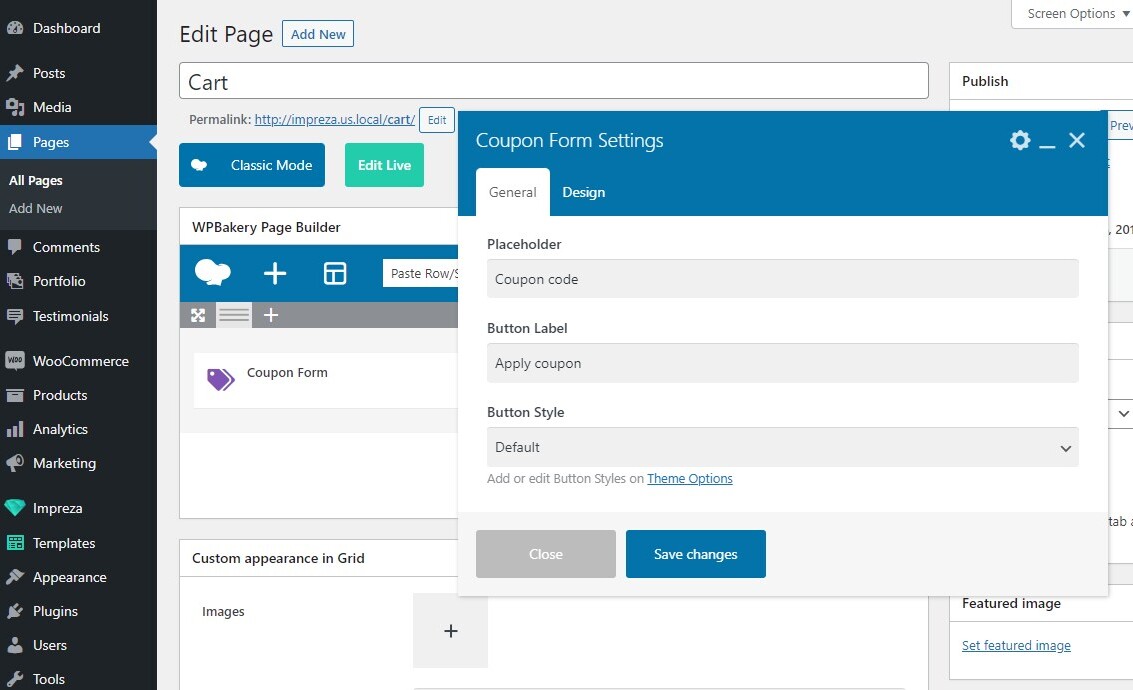
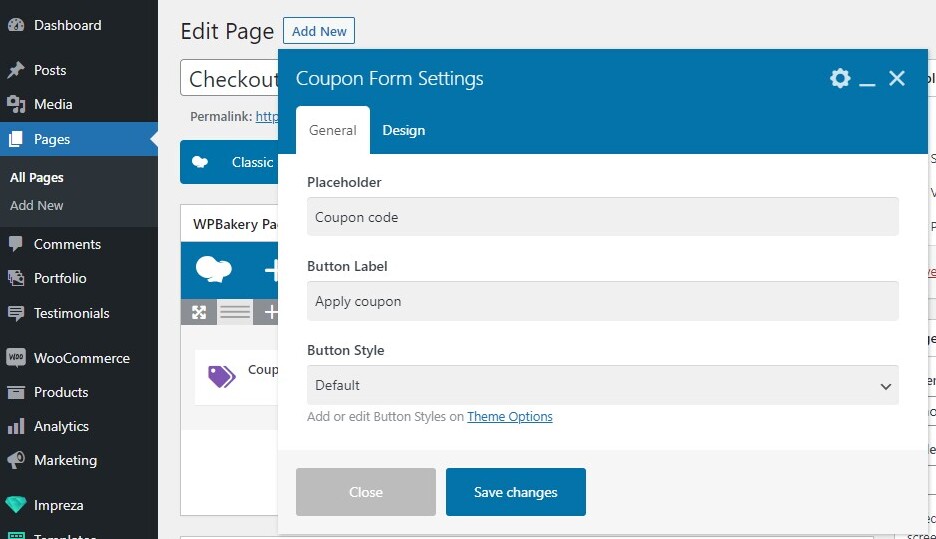
3. Coupon Form #
Shows the input for applying the coupon code. While editing, you can adjust its placeholder as well as styling and label for the submit button. The "Design" tab allows you to apply any colors, background, padding, margins, animation, and other styling tools as you like.
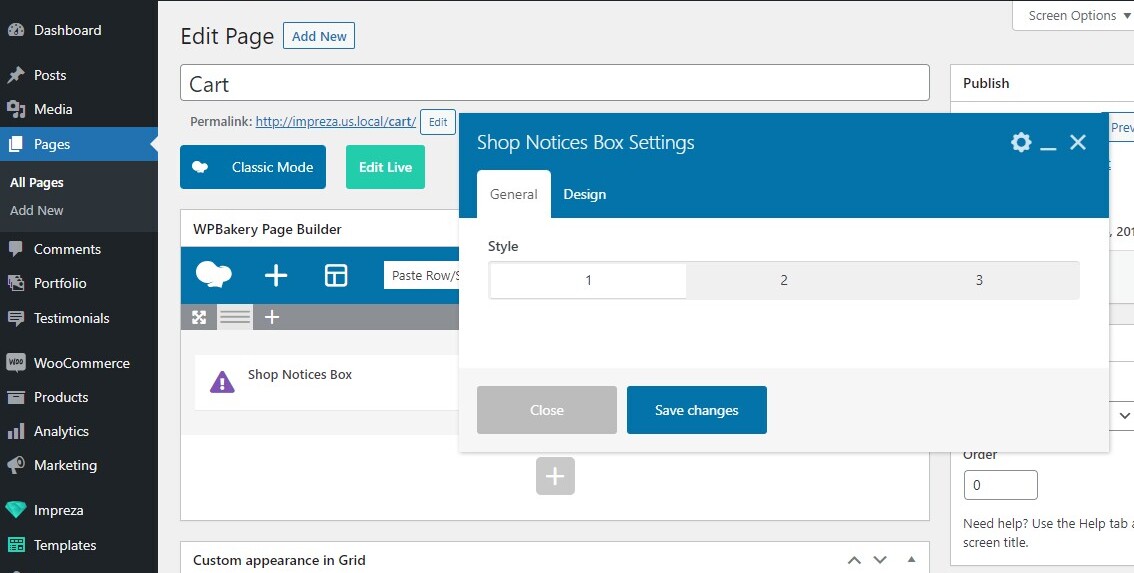
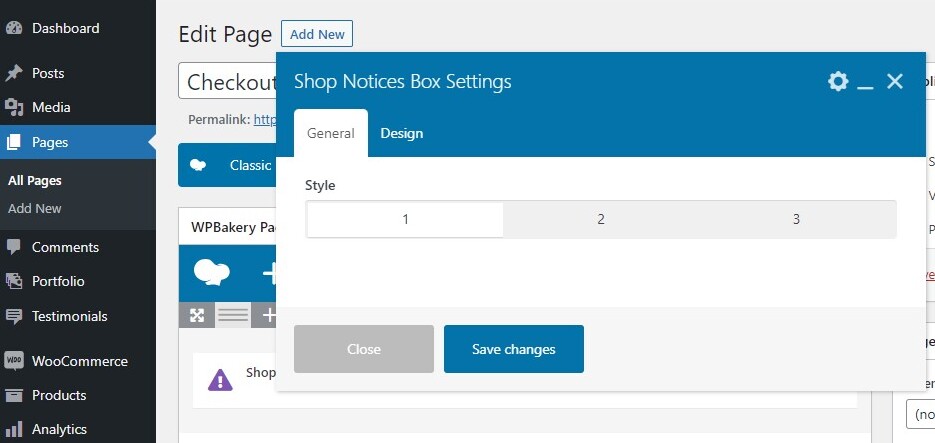
4. Shop Notices Box #
Shows the validation messages and notifications about the cart page adjustments (such as "coupon applied" and others). While editing, you can apply one of the pre-defined styles for the message box. The "Design" tab allows you to apply any colors, background, padding, margins, animation, and other styling tools you like.

You can combine and move these elements, use different column layouts for them, and apply styling via the "Design" tab to create your own unique Cart page appearance.
Custom Upsells and Cross-Sells #
You can show related products in your custom Cart page by adding a Grid element that is set up to show the Upsells or Cross-Sells products:

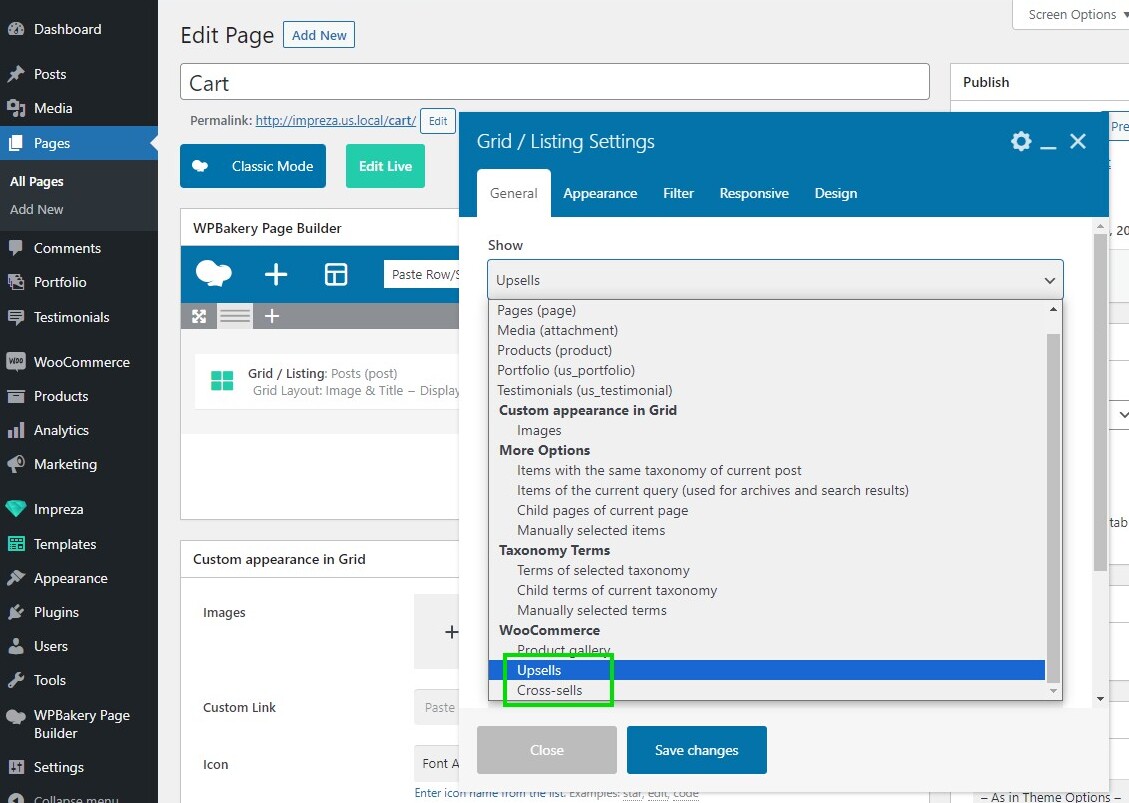
Upsells are products that you recommend instead of the currently viewed product, for example, products that are more profitable or better quality or more expensive.
Cross-sells are products that you promote in the cart, based on the current product.
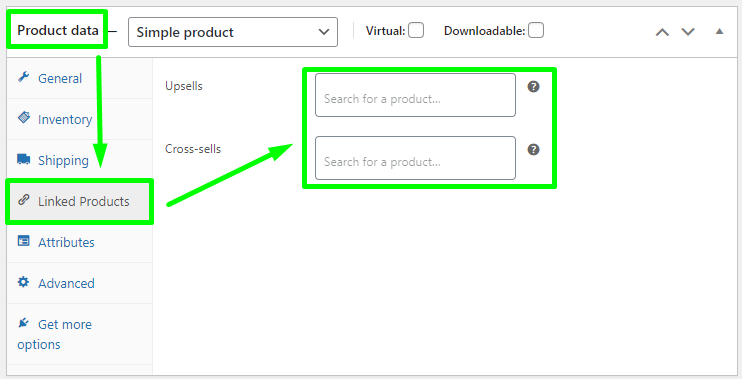
When editing the product, you can set up other products related to it as an Upsell or Cross-sell via the Product data > Linked Products.
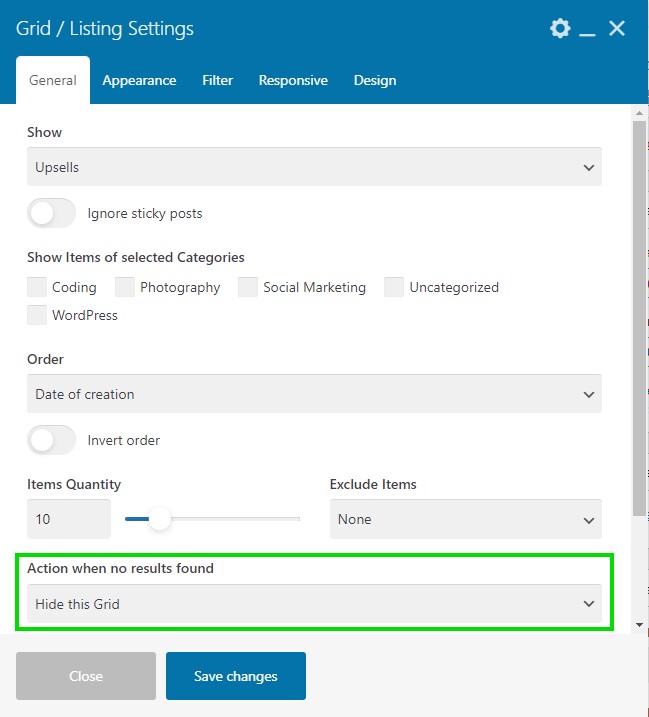
You might also want to hide Grid with Upsells/Cross-sells in case there are no relevant products specified. You can implement this behavior in the Grid element’s General tab > Action when no results found > Hide this Grid.

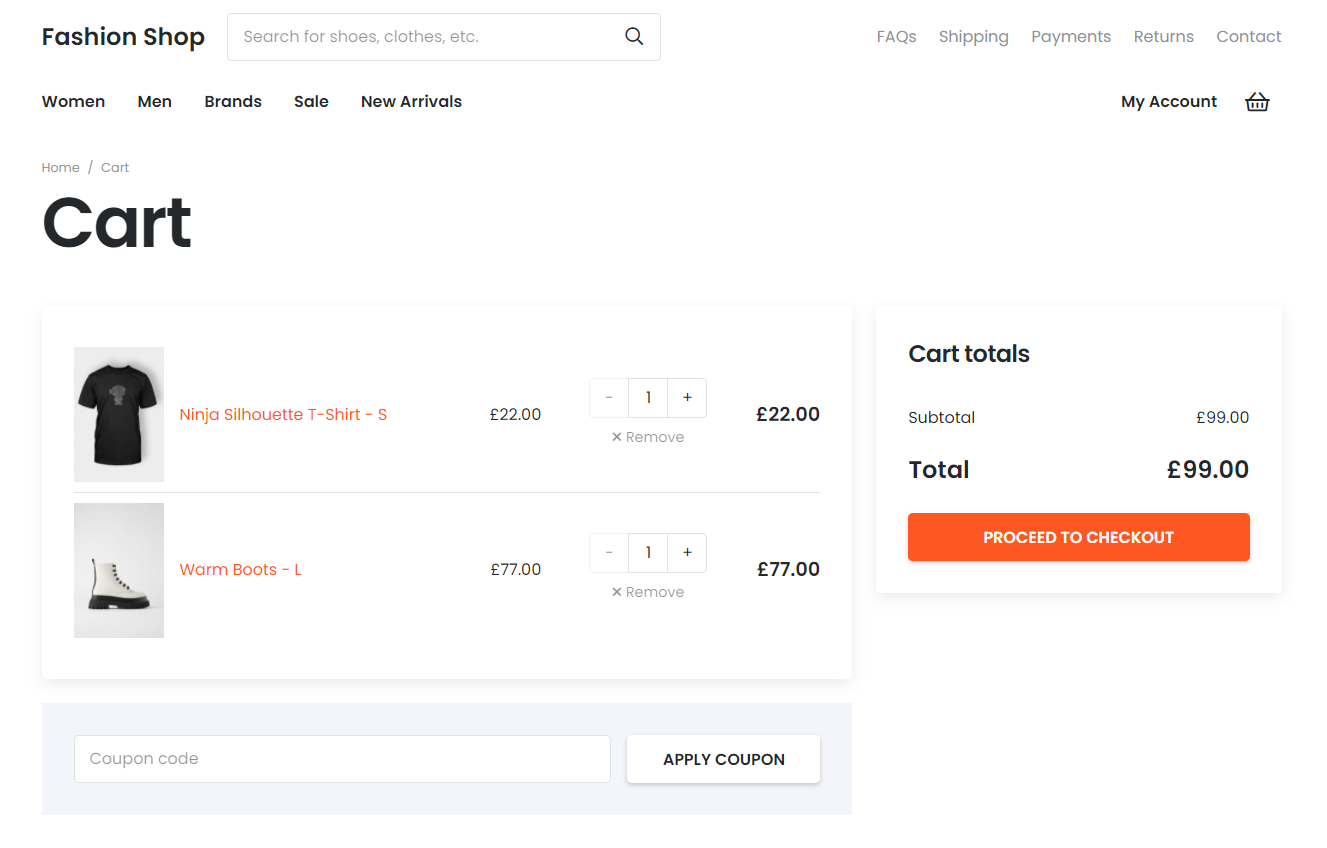
Cart Page Examples #
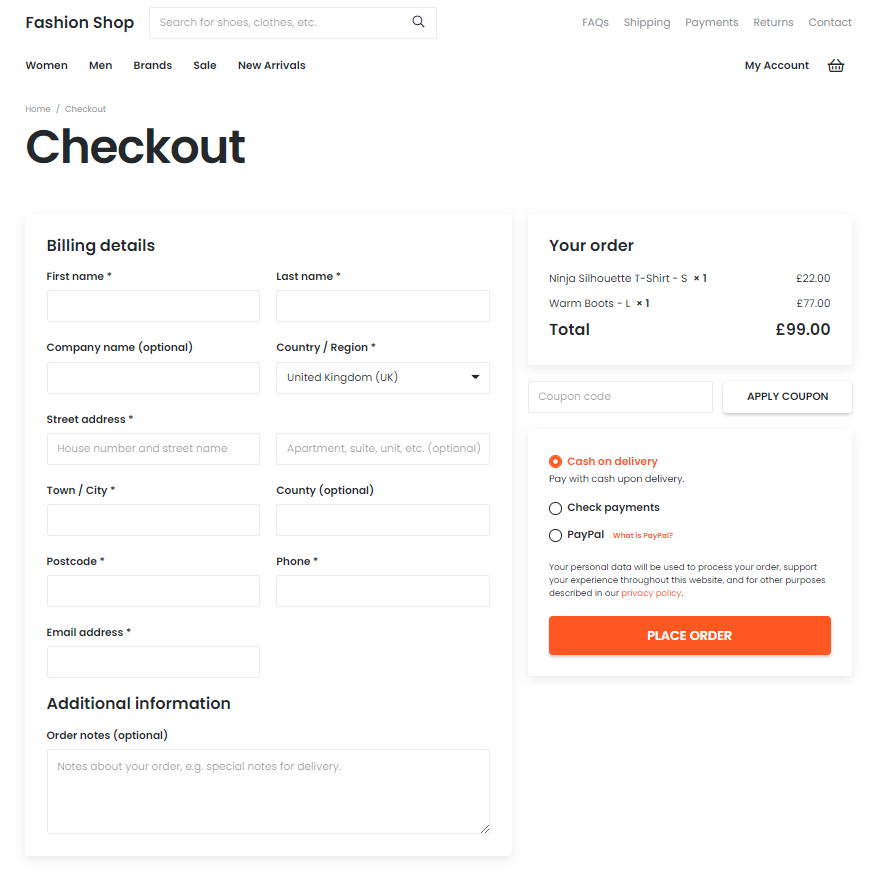
Checkout Page #
What is a Checkout page? #
Checkout is the required page of the site with WooCommerce if you want to sell online. It's created automatically after installation WooCommerce plugin, and you can easily find it in the list of pages.
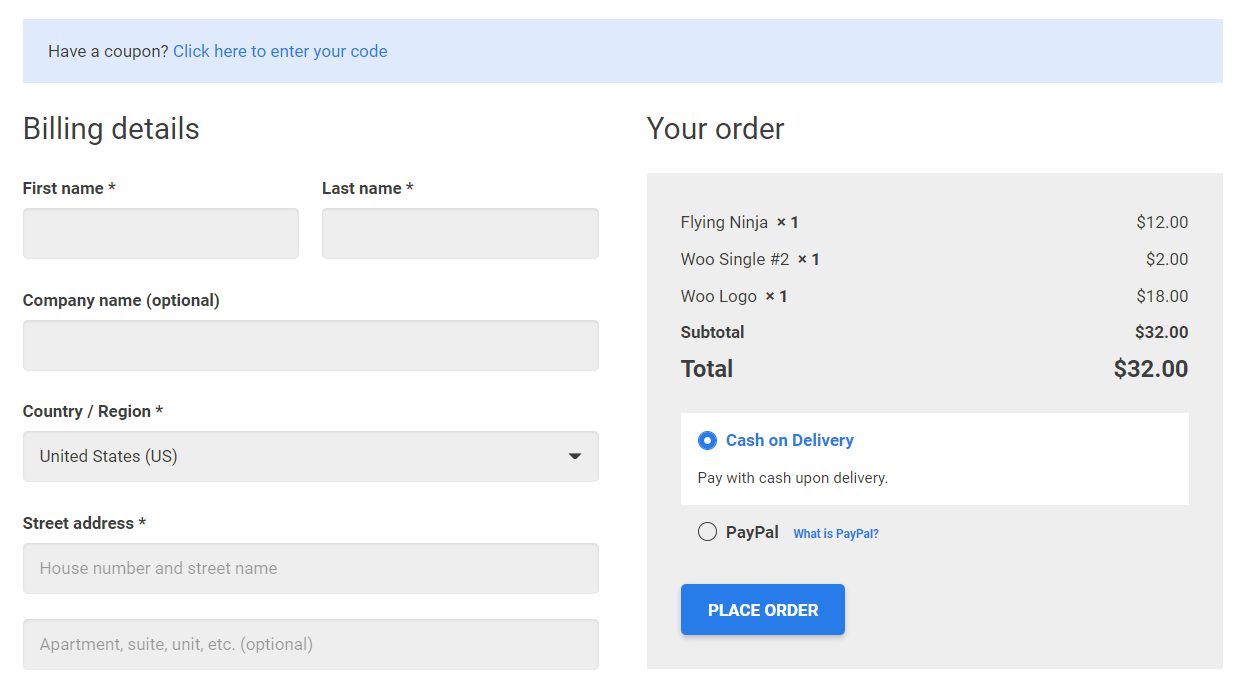
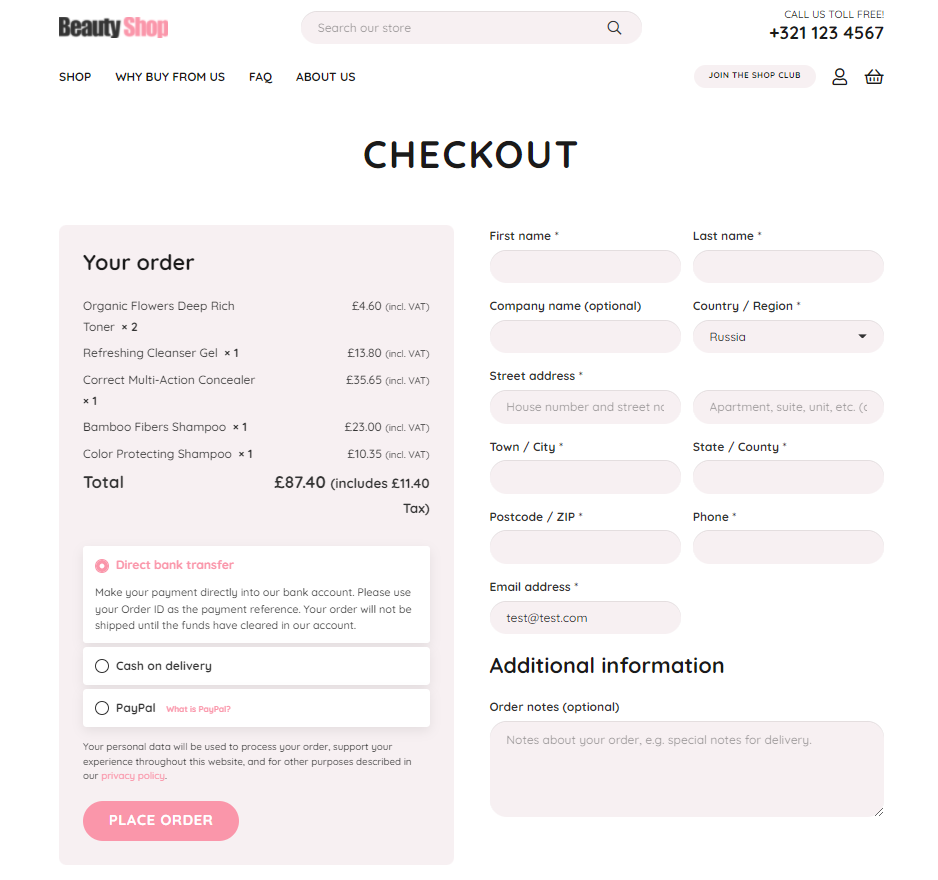
By default, the checkout page has the Checkout element ([woocommerce_checkout] shortcode), which shows the predefined WooCommerce template for the order and billing details:
How to Customize the Checkout Page #
You can customize the Checkout page like any other page with WPBakery Builder or Live Builder. You can add rows, columns, and other elements as you like.
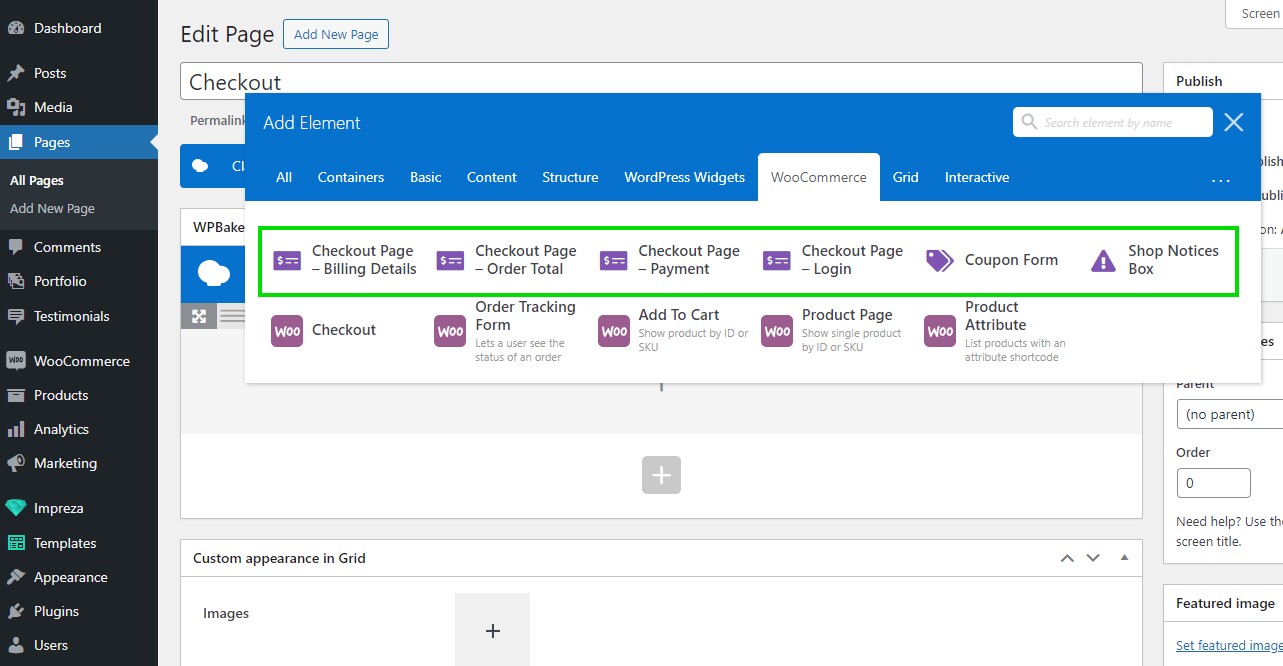
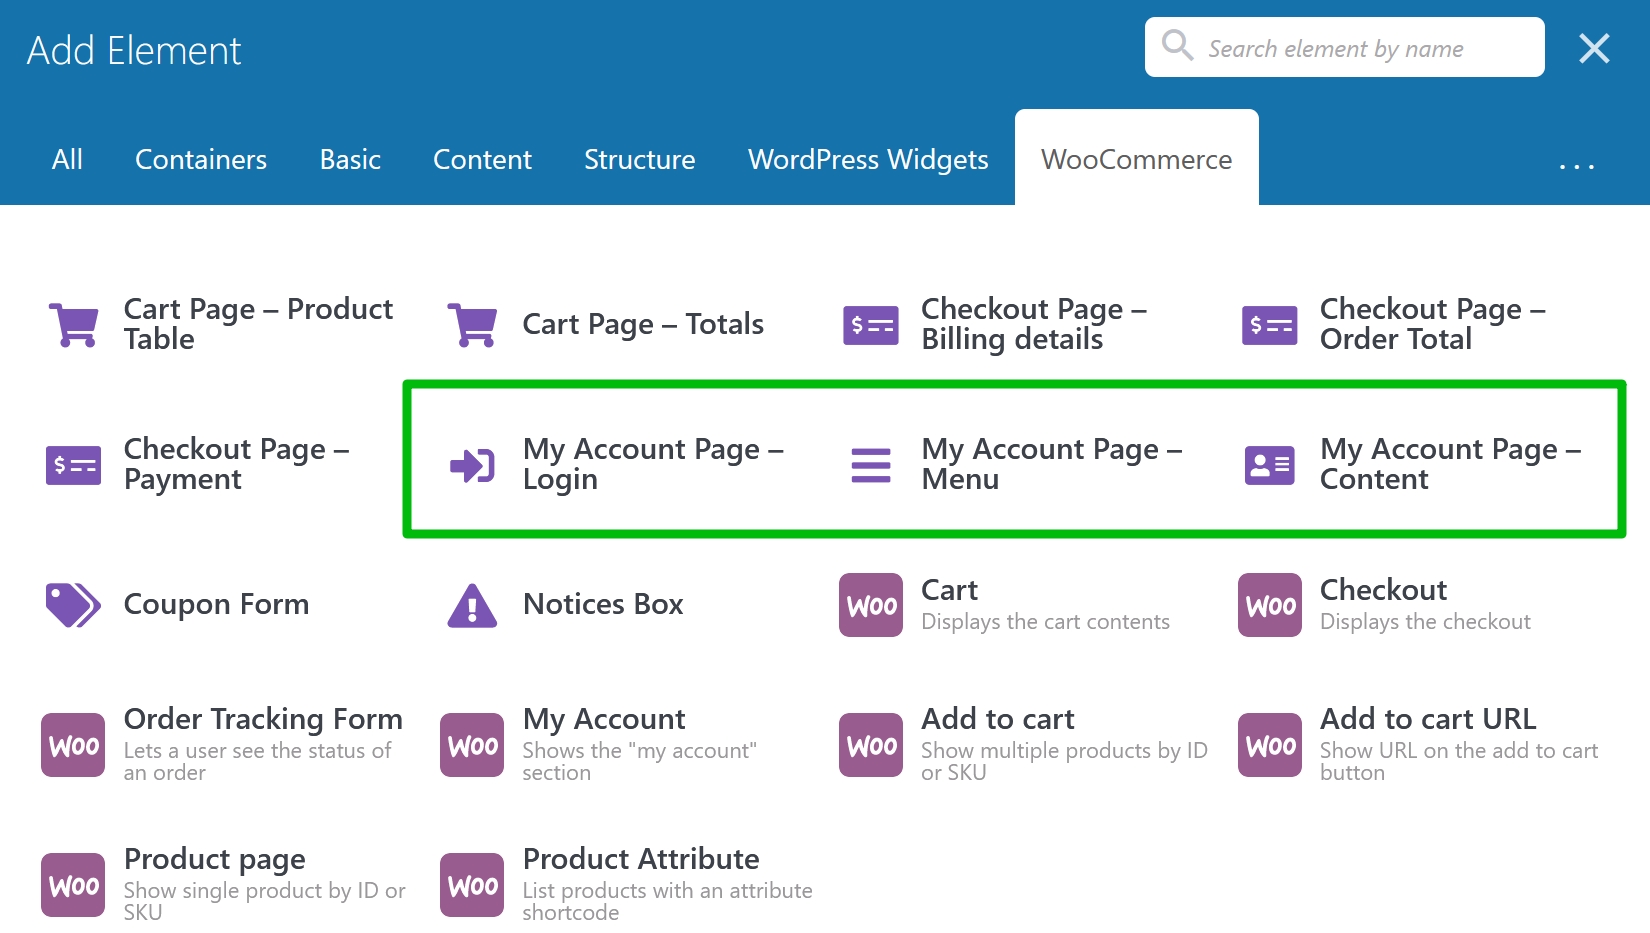
Start customizing by removing the default Checkout element ([woocommerce_checkout] shortcode) and using the following relevant elements from the Impreza library:
- Checkout Page - Billing Details
- Checkout Page - Order Total
- Checkout Page - Payment
- Checkout Page - Login
- Coupon Form
- Shop Notices Box

You can combine and move these elements, use different column layouts for them, and apply custom styling via the "Design" tab to create your own unique Checkout page appearance.
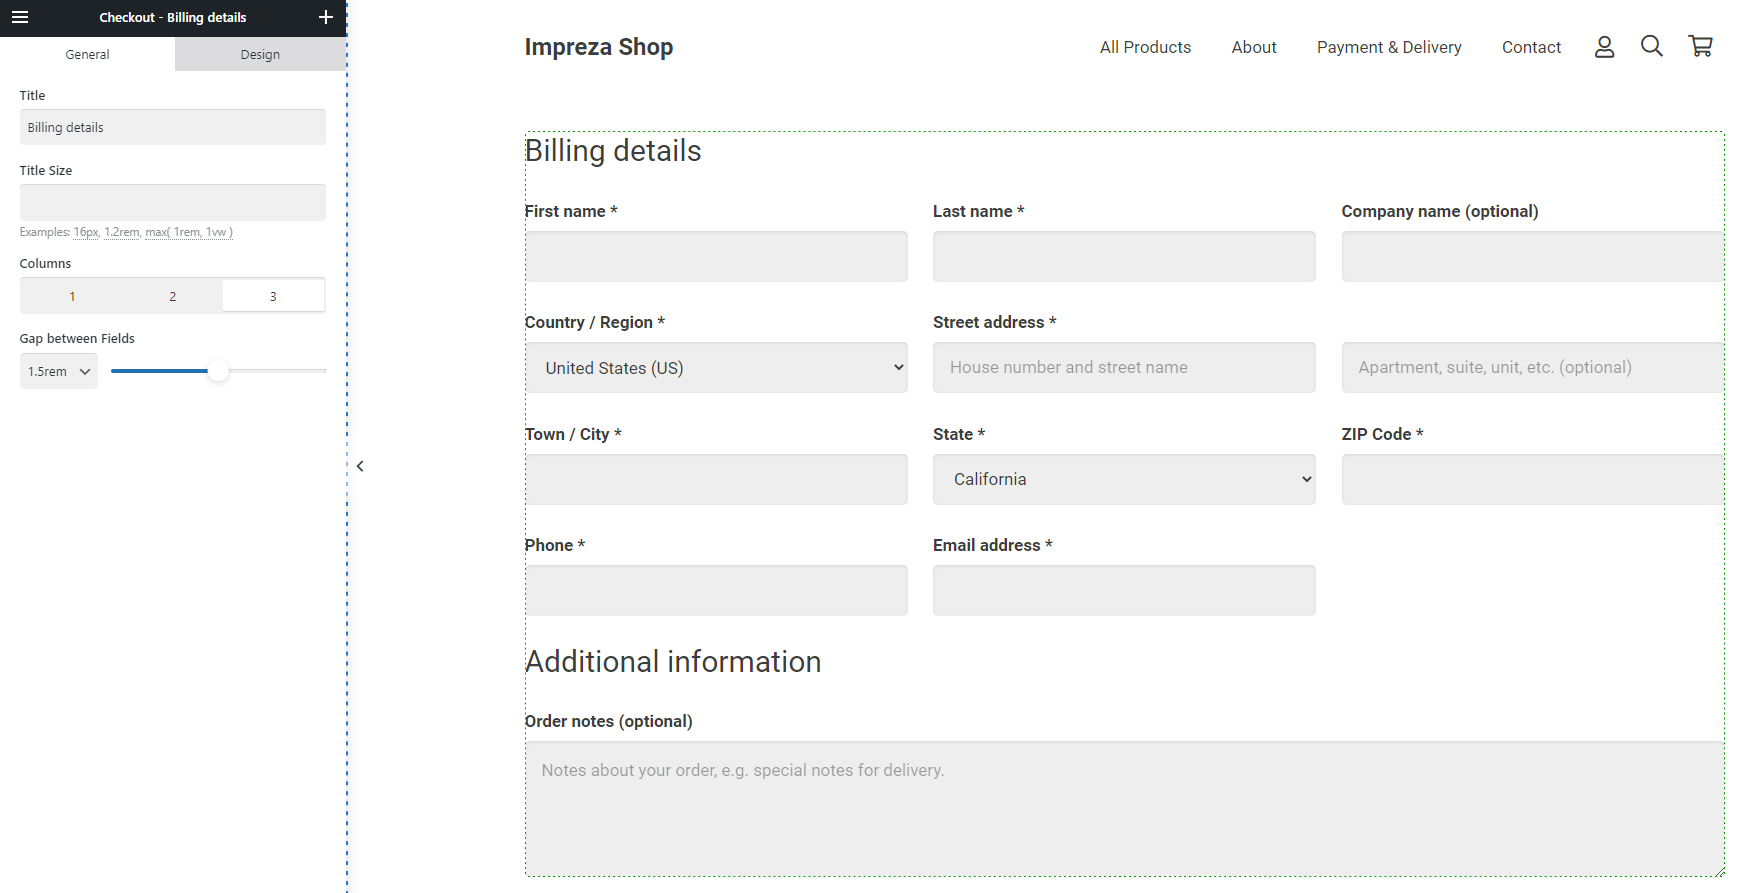
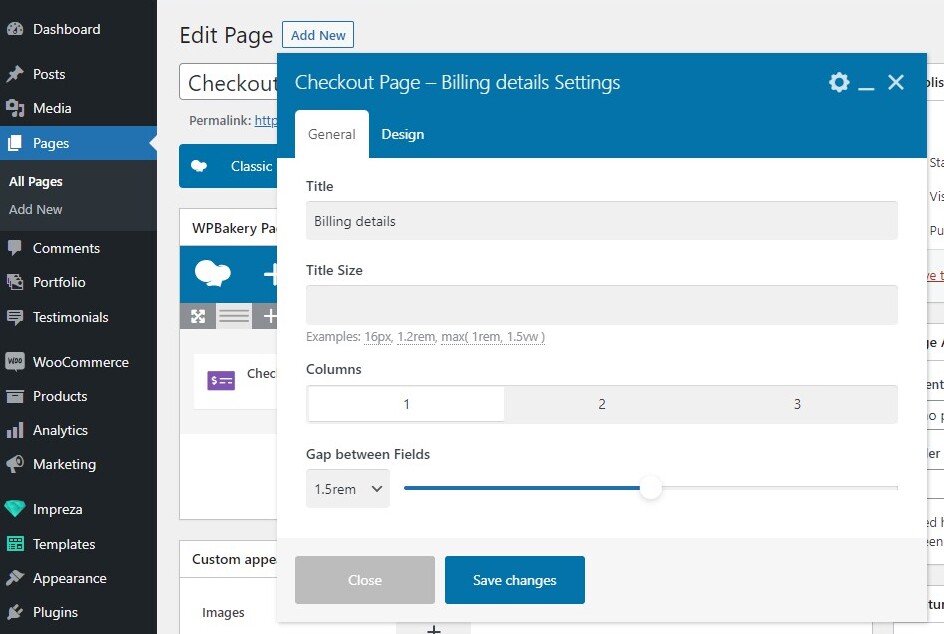
1. Checkout Page - Billing Details #
Shows input fields for the billing details. While editing, you can adjust the number of columns, gaps, size, and wording for its title. Also, you can use Design settings.
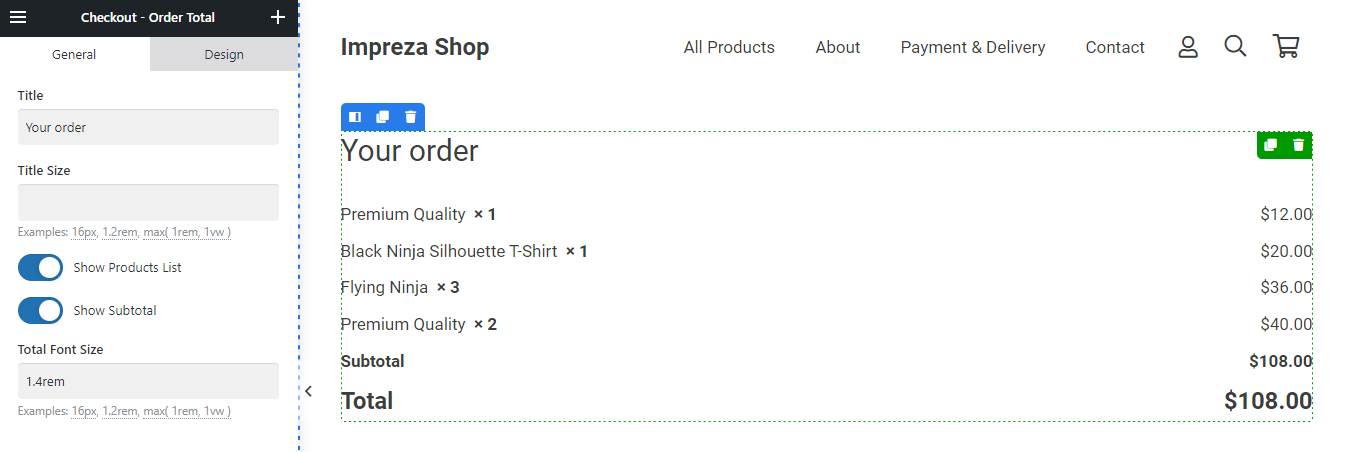
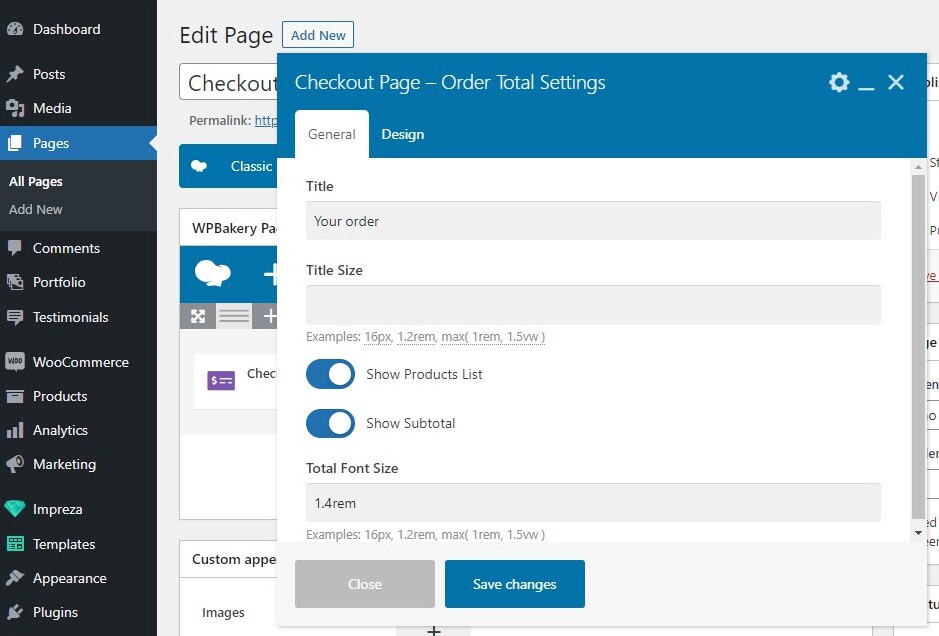
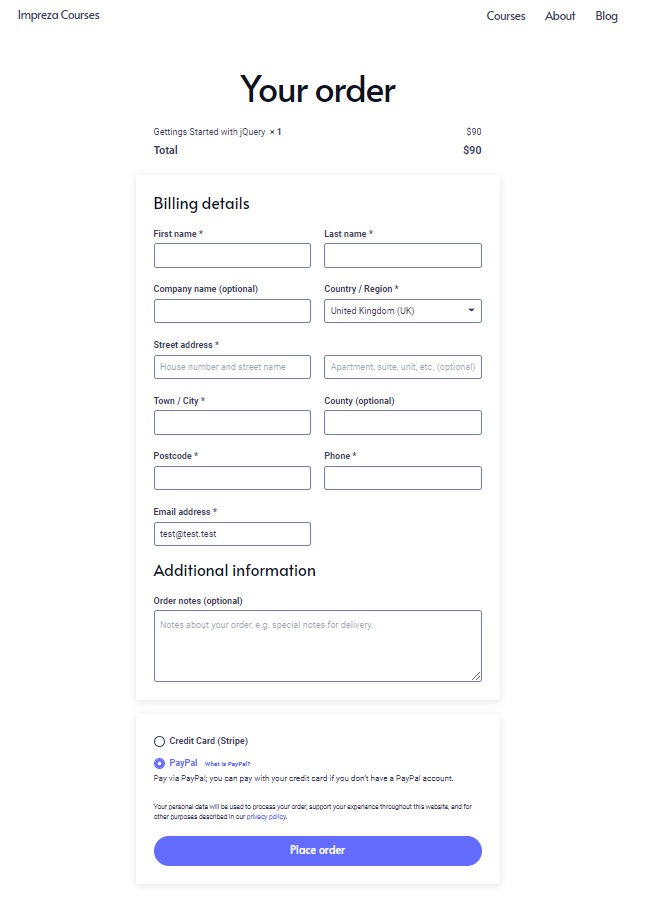
2. Checkout Page - Order Total #
Shows the total price of cart items. While editing, you can decide if you want to show the list of included products and the sub-total price in it (before the discount), as well as change the wording for the title and its size. Also, you can use Design settings.
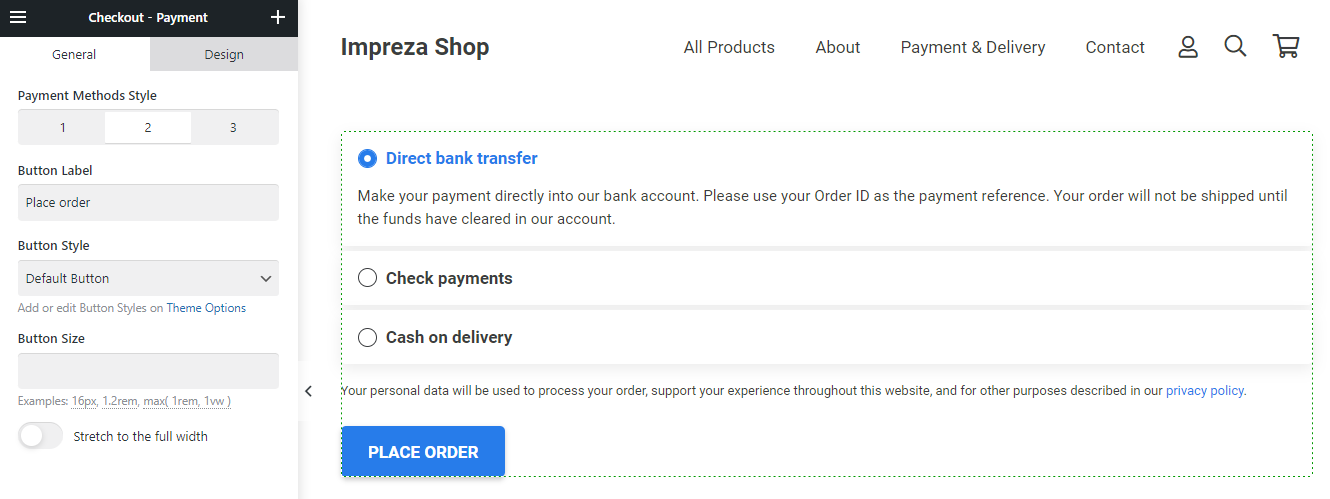
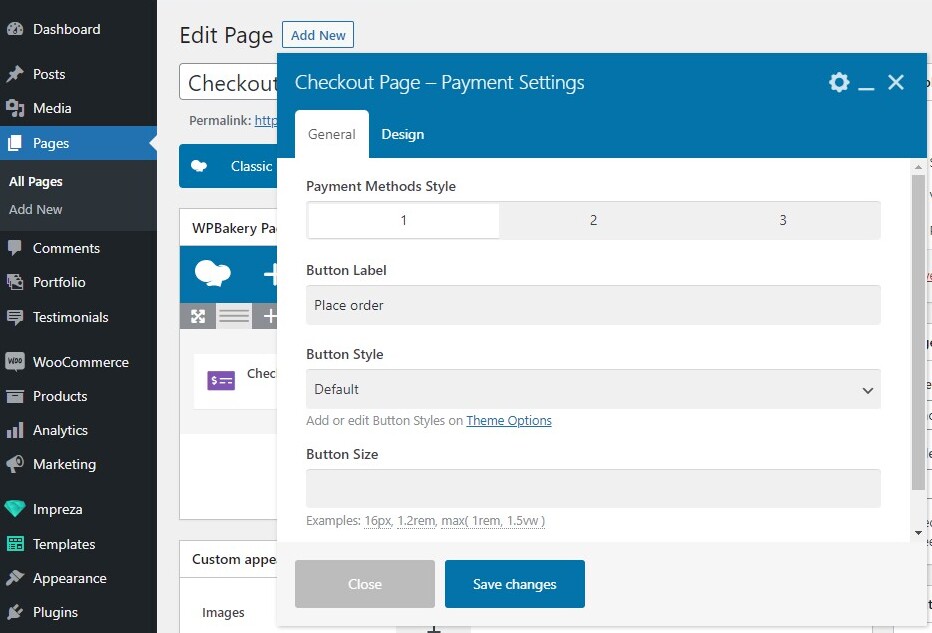
3. Checkout Page - Payment #
Shows the available payment options. While editing you can apply different styling adjustments to the options themselves and to the submit button. Also, you can use Design settings.
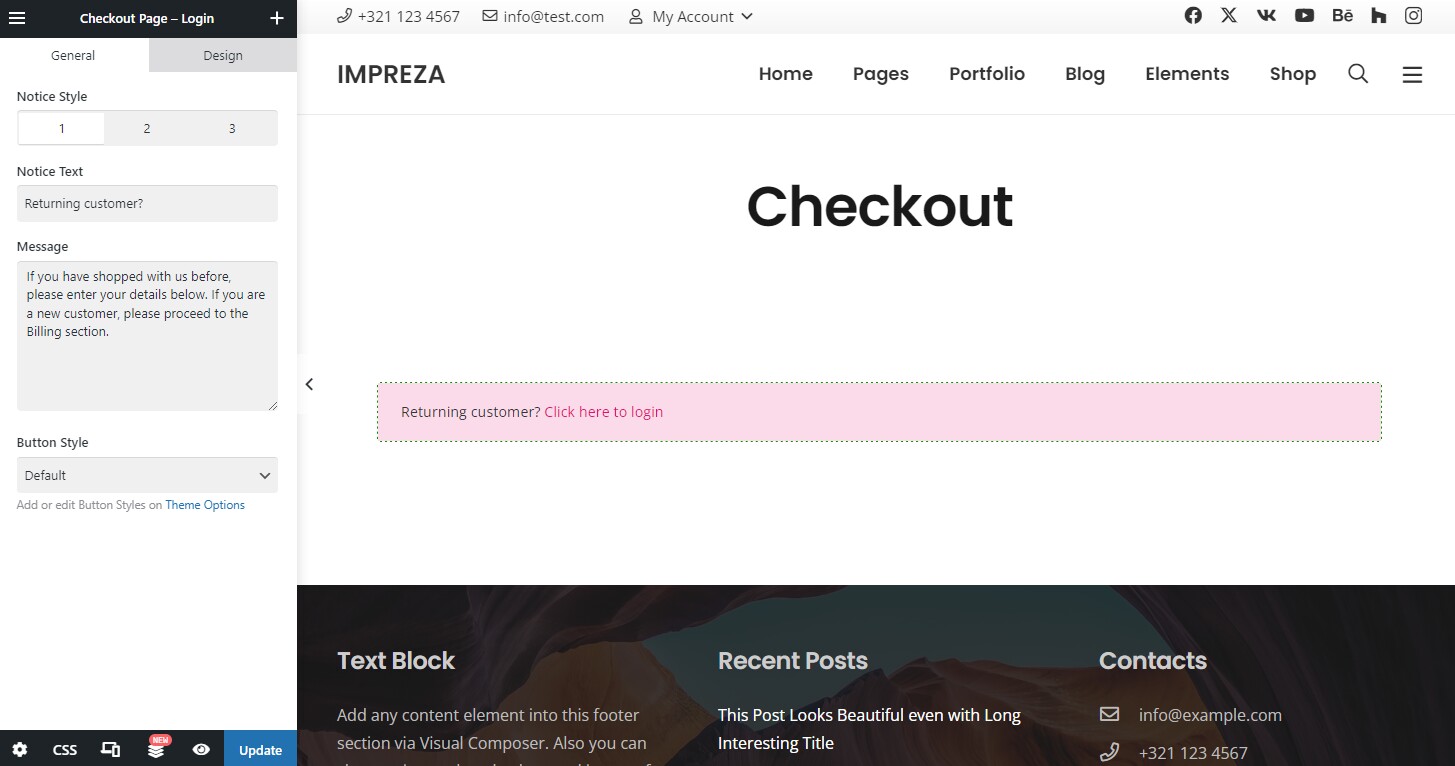
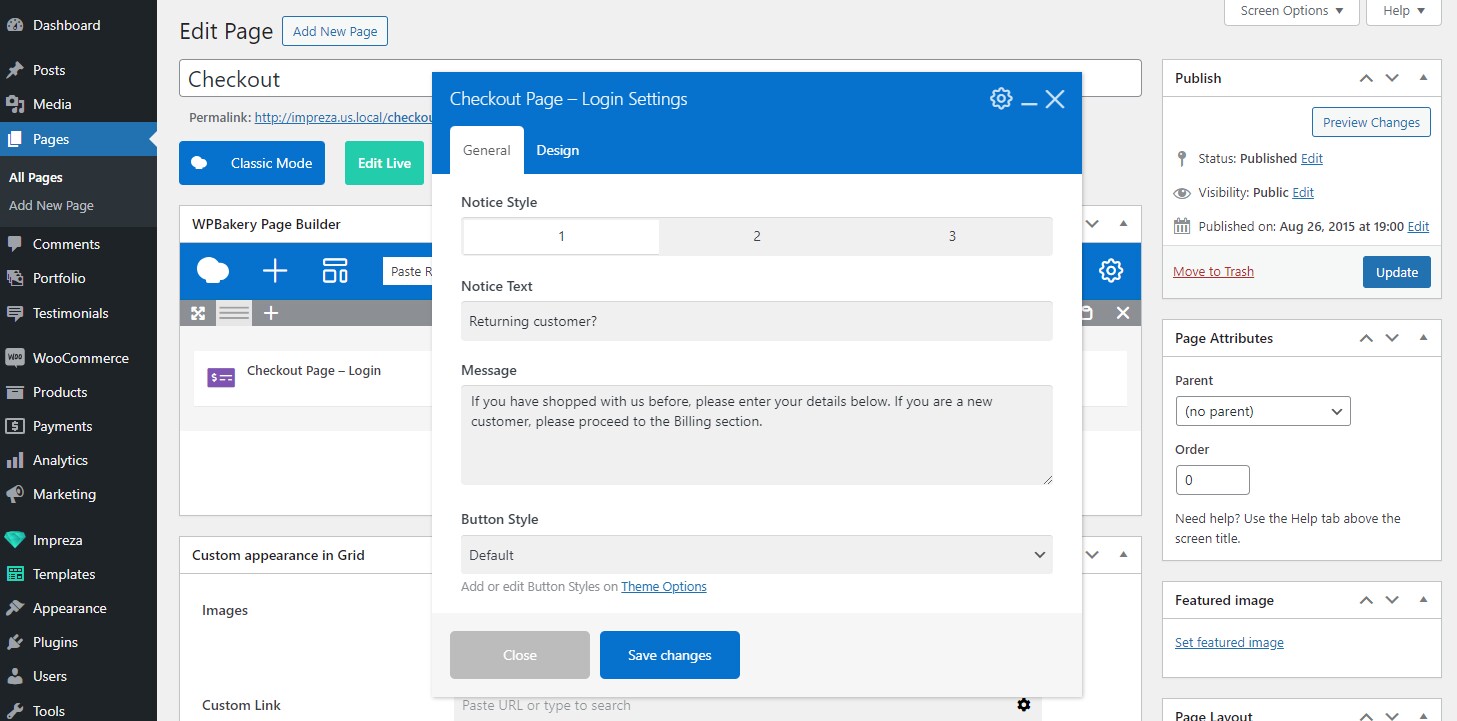
4. Checkout Page - Login #
Allows the visitor to log in during the checkout. This element adds a notification box with a link that opens a login form on click.

While editing, you can adjust its style, notice text, message, and button style. Also, you can use Design settings.
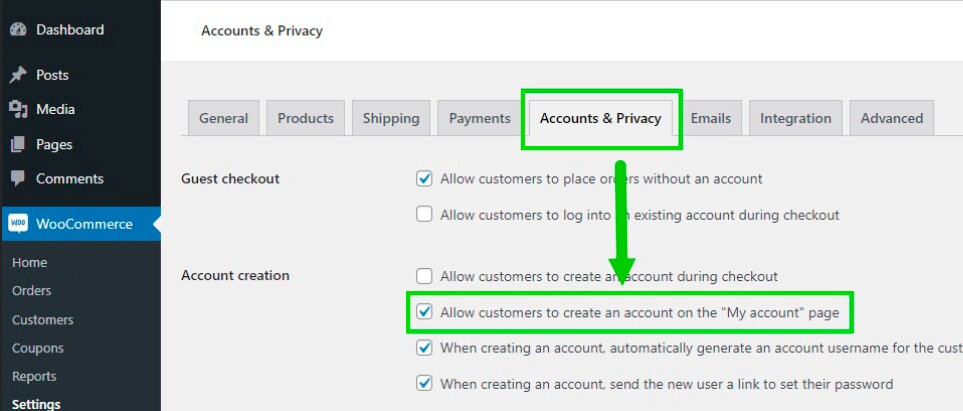
Note that the element is designed only to Log In to the existing account. To be able to Register a new account during checkout, activate the relevant checkbox at WooCommerce > Settings > Accounts & Privacy.
5. Coupon Form #
Shows the input for applying the coupon code. While editing, you can adjust its placeholder as well as style and label for the submit button. Also, you can use Design settings.

6. Shop Notices Box #
Shows the validation messages and notifications such as coupon applied, field errors, etc. While editing, you can apply one of the pre-defined styles for the message box. Also, you can use Design settings.

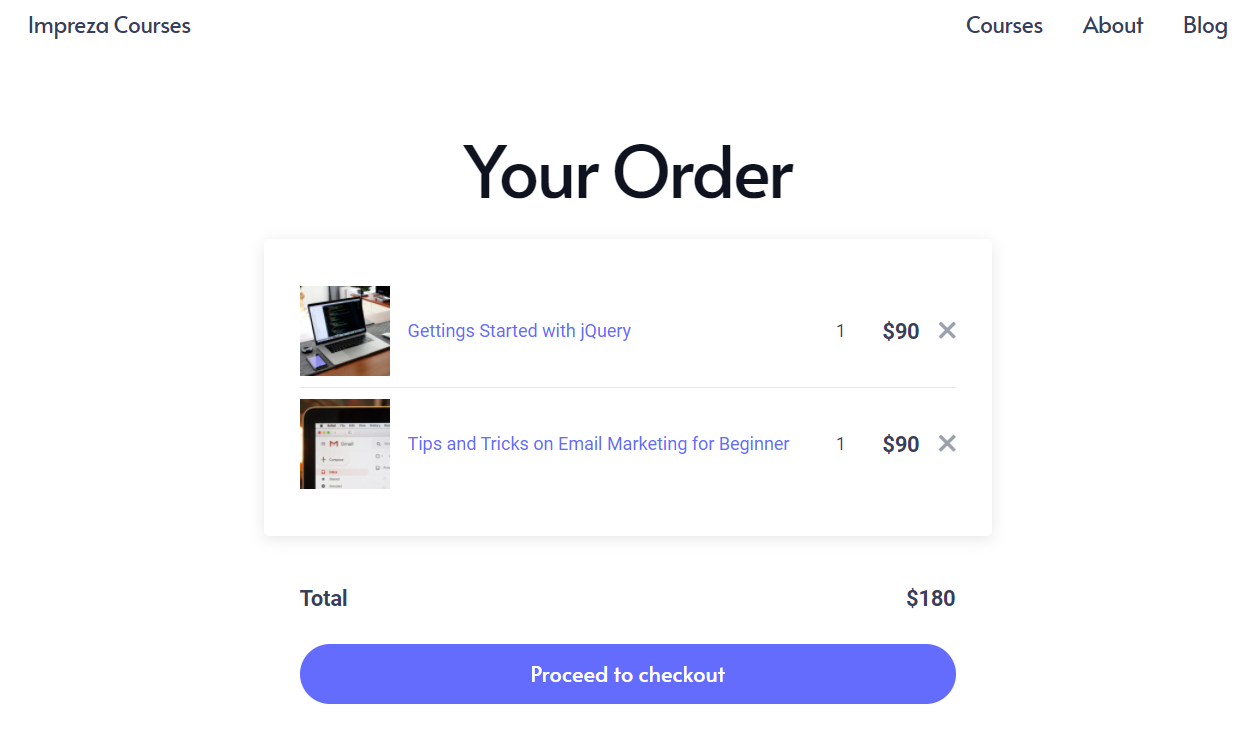
Checkout Page Examples #
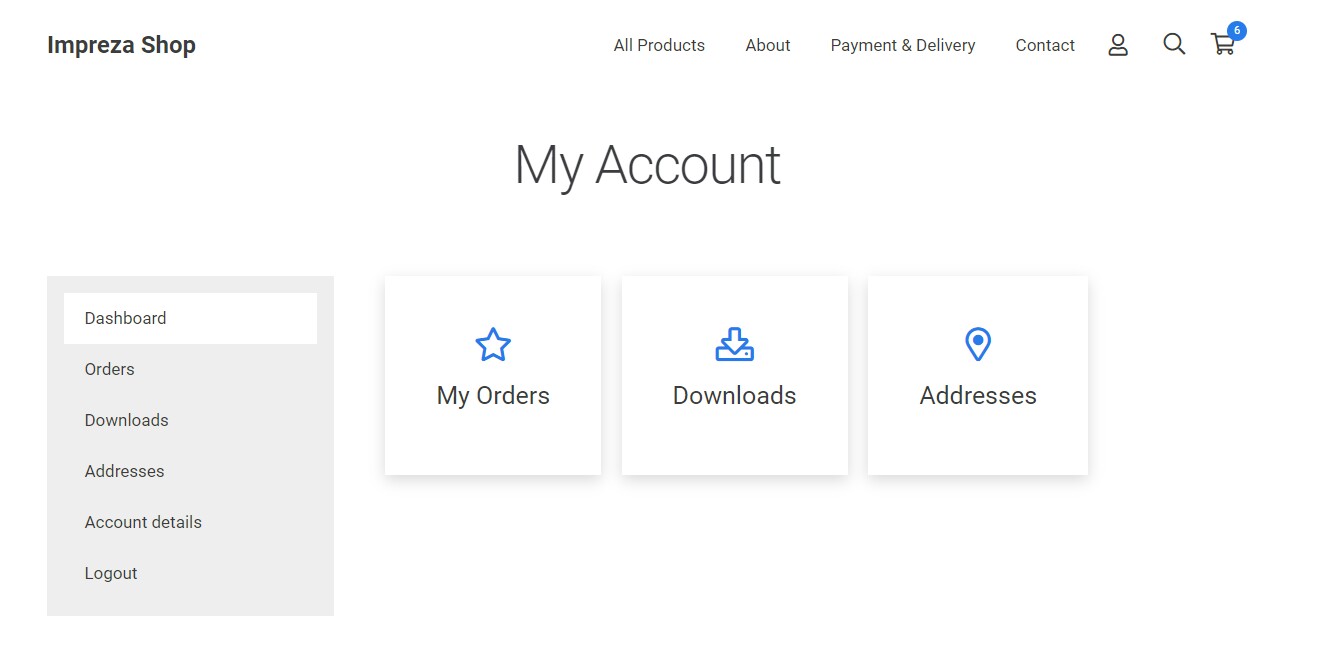
Customer Account Page #
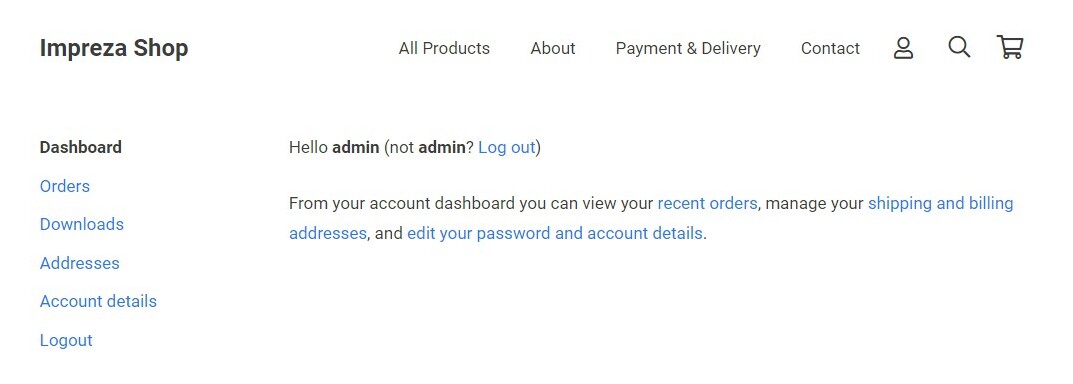
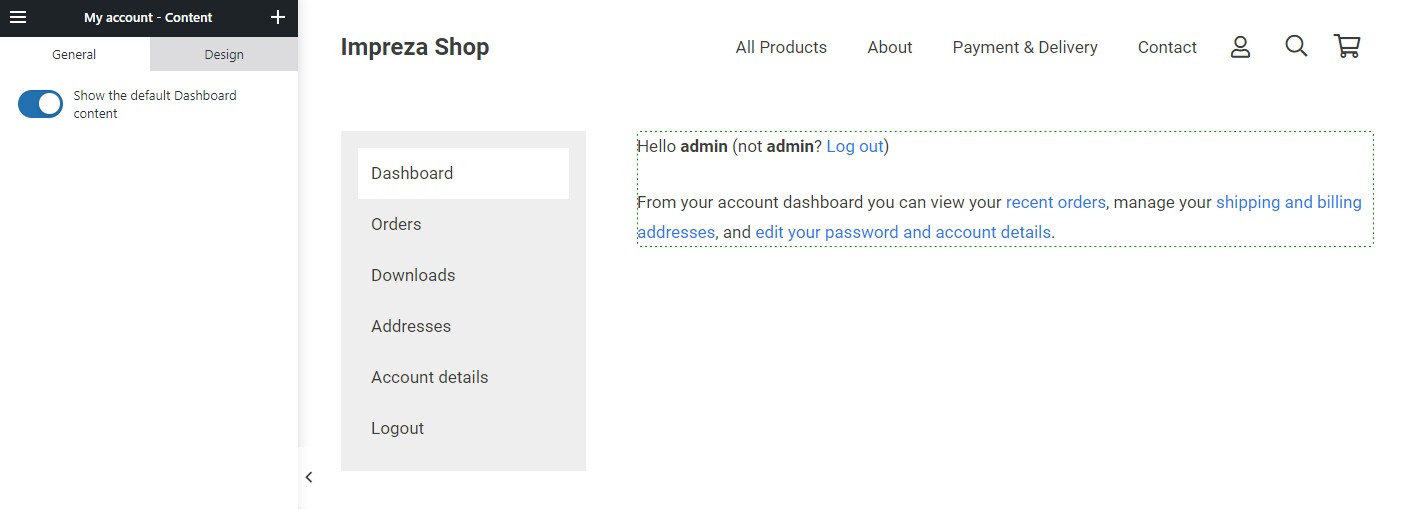
"My Account" is a page for your shop customers. It allows the customer to log in/register on your site and see their order information and personal data.
This page is created by WooCommerce automatically, and you can easily find it in the admin list of pages.

By default, the My Account page has the default "My Account" element in it (shortcode [woocommerce_my_account]). It shows the predefined WooCommerce template:
How to Customize the My Account Page #
You can customize the "My Account" page like any other page with WPBakery Builder or Live Builder.
To change the default WooCommerce appearance remove the default "My Account" element (shortcode [woocommerce_my_account]) and use the following Impreza elements:
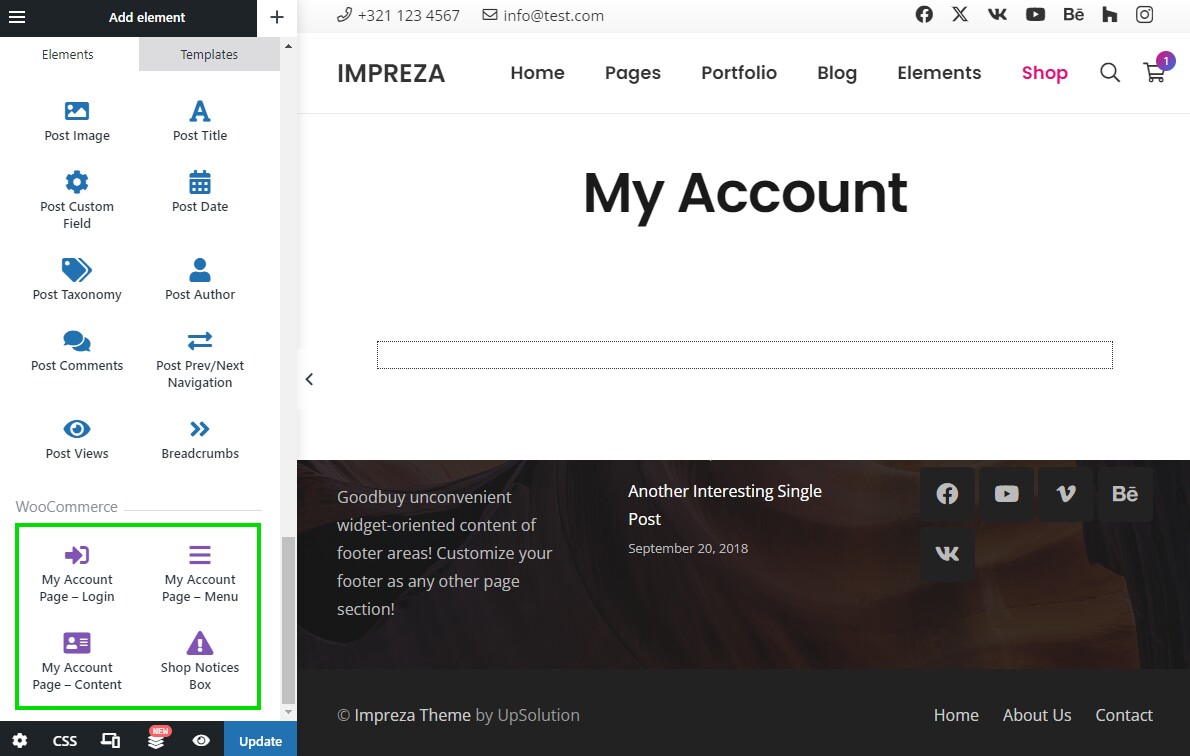
While creating a custom layout, you can move and/or re-order My Account elements as you like, but all three elements are required for the My Account page to work properly.
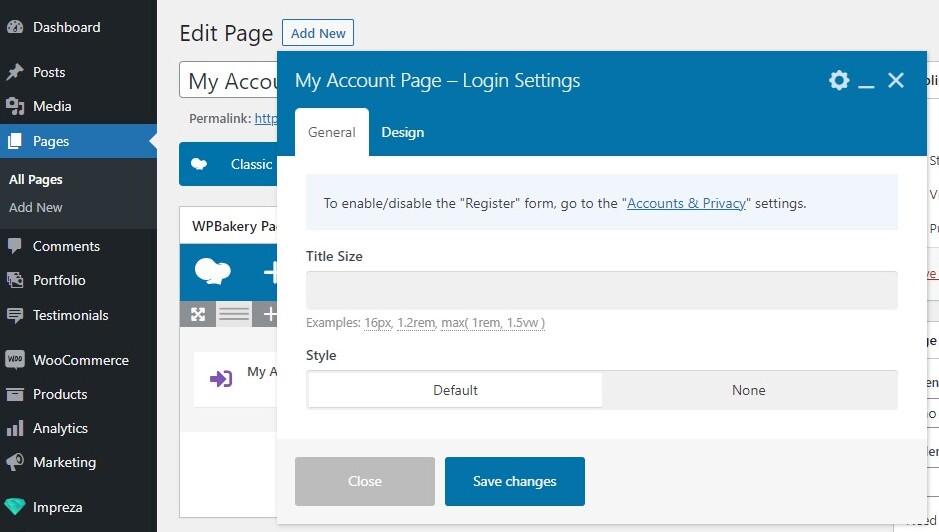
1. My Account Page – Login #
Shows the form for logging in to the existing account and the form for registering a new one, with relevant titles.
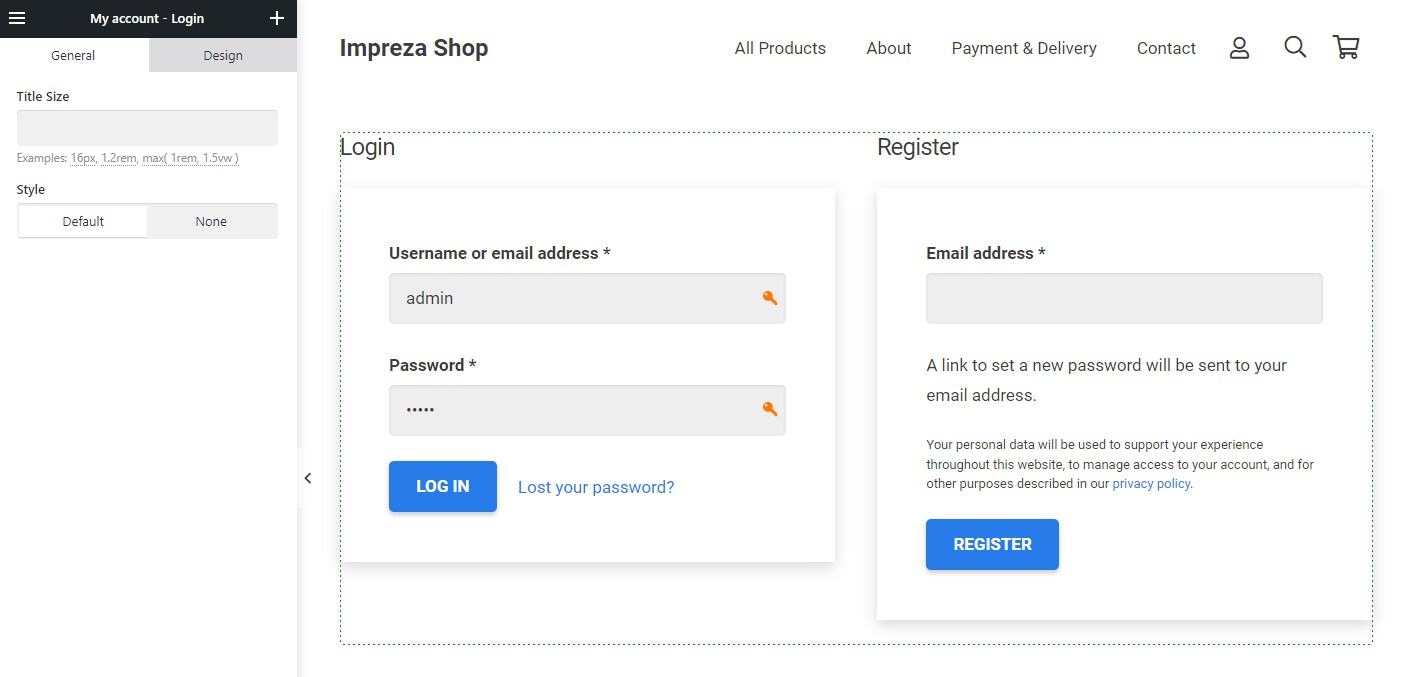
To show/hide the "Register" form go to the WooCommerce > Settings > Accounts & Privacy and use the "Allow customers to create an account on the My Account page" option
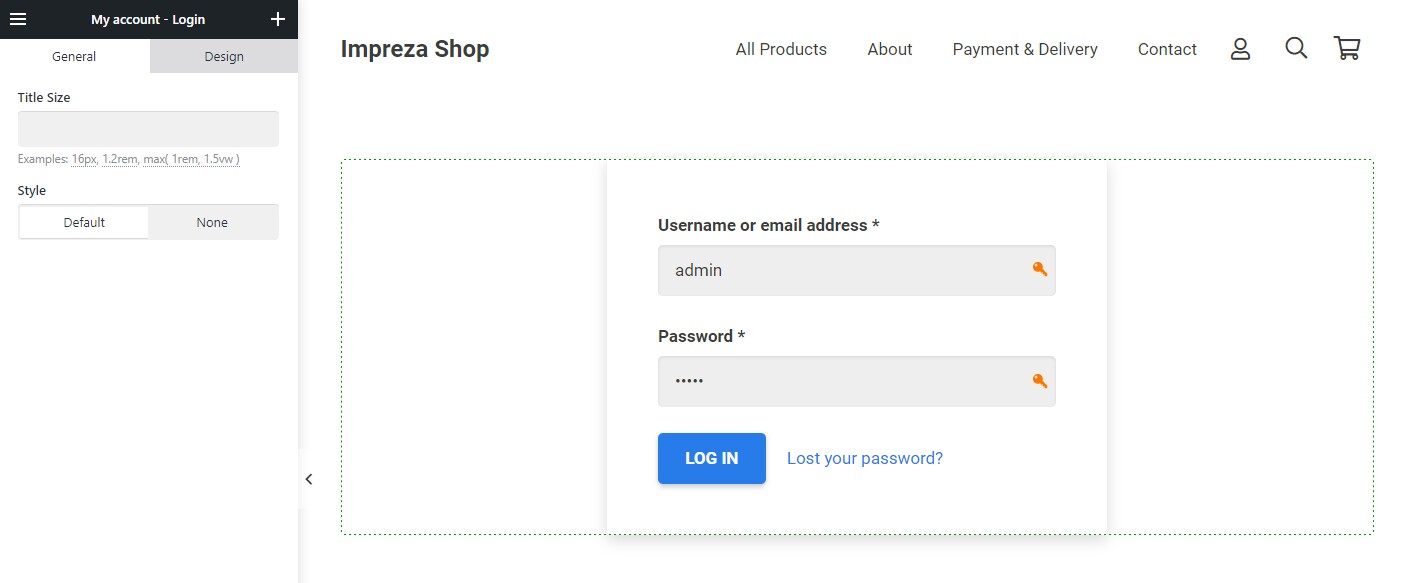
If this checkbox is not active, the My Account Page – Login element will only show the login form, without a title.
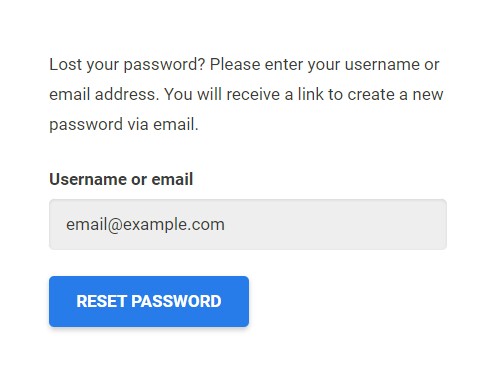
This element will also show a password recovery form if you click the relevant "Lost your password?" link.
You can customize the My Account Page – Login appearance by choosing the Title Size (only shows when both Login and Register forms are visible), choosing one of the Style options, and using the element's Design settings.
2. My Account Page – Menu #
Shows the navigation menu for switching the My Account subpages.
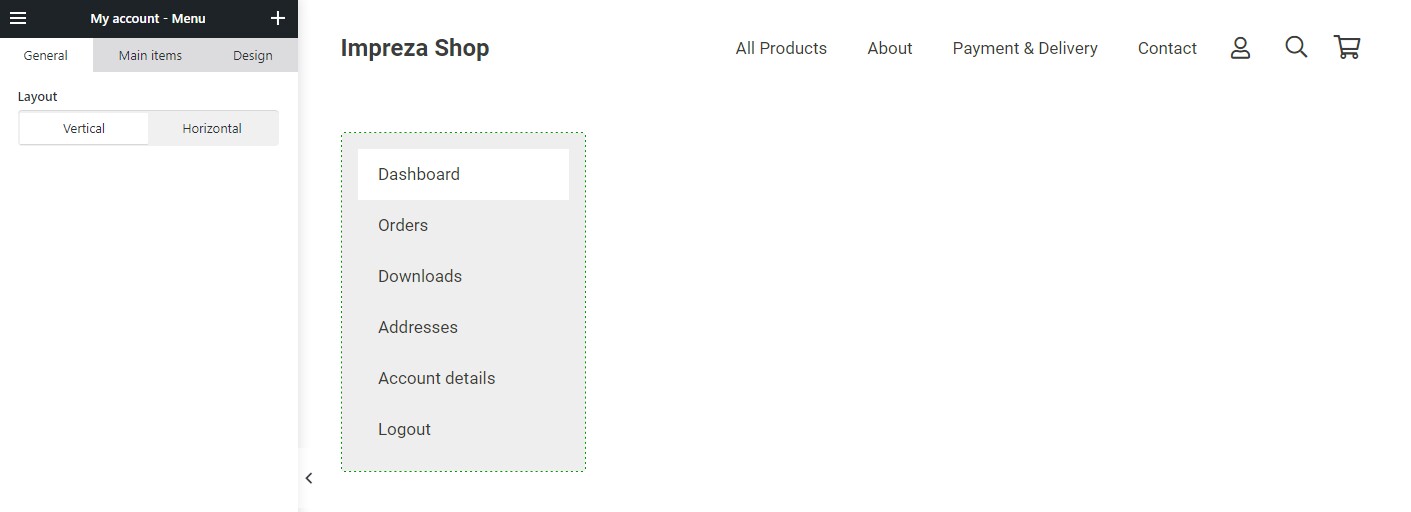
You can customize the appearance of the My Account Page – Menu element by using the:
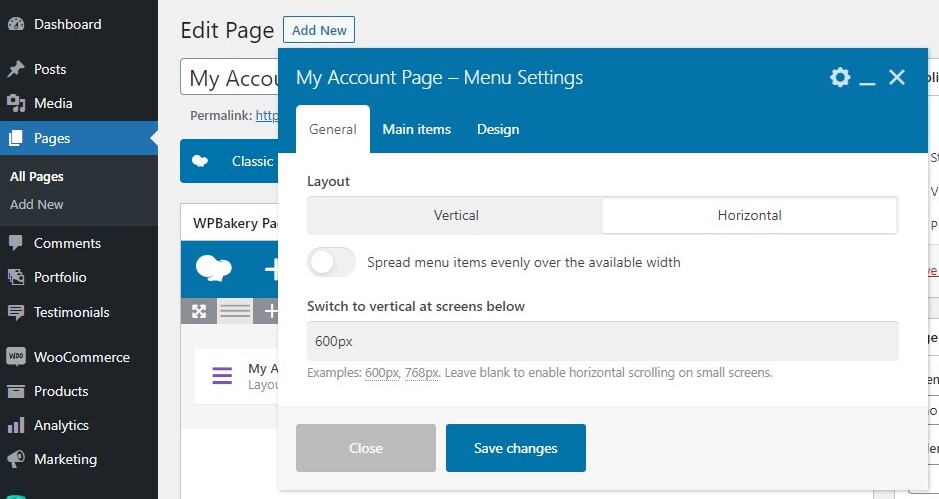
- General - You can choose the vertical or horizontal layout for the element, depending on the layout you create for the My Account page.
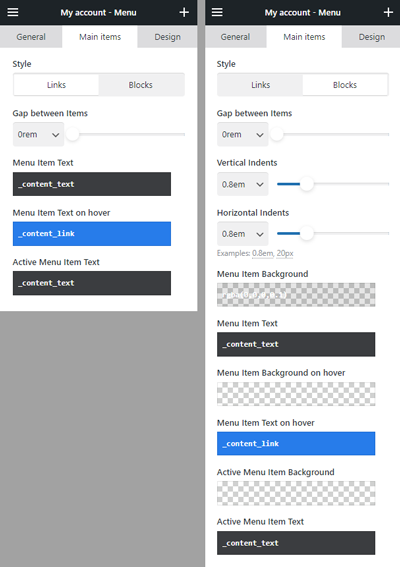
- Main Items - You can choose between the Links and Blocks style and specify the relevant spacing and colors for the items.
- Design - You can use Design settings to apply some extra styling.
3. My Account Page – Content #
Shows the main content of the current My Account sub-page.
My Account Page – Menu element (described above) allows switching between its sections, and the My Account Page – Content element displays the relevant content for each menu item.
For different menu sections My Account Page – Content displays the content listed below:
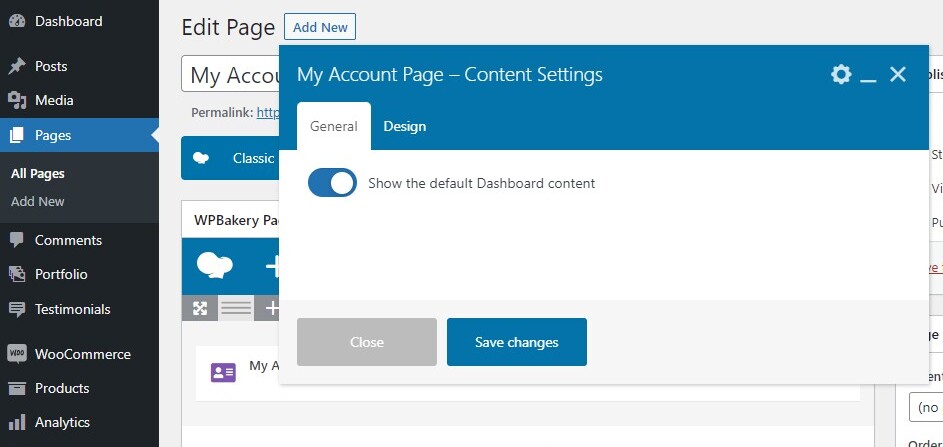
Dashboard - by default shows the WooCommerce content generated for the dashboard. You can choose to hide it by deactivating the "Show the default Dashboard content" switch and you can replace it with the custom content instead. Details on adding the custom content to different My Account sections are described below.
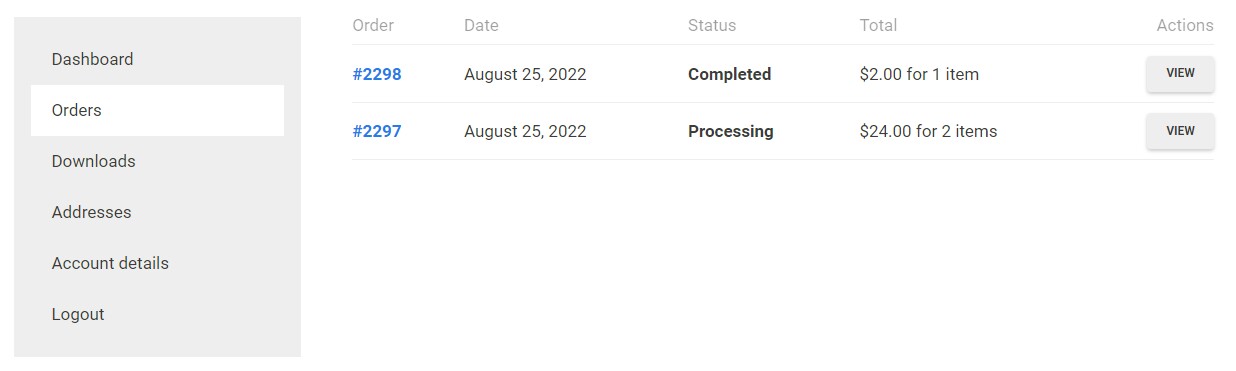
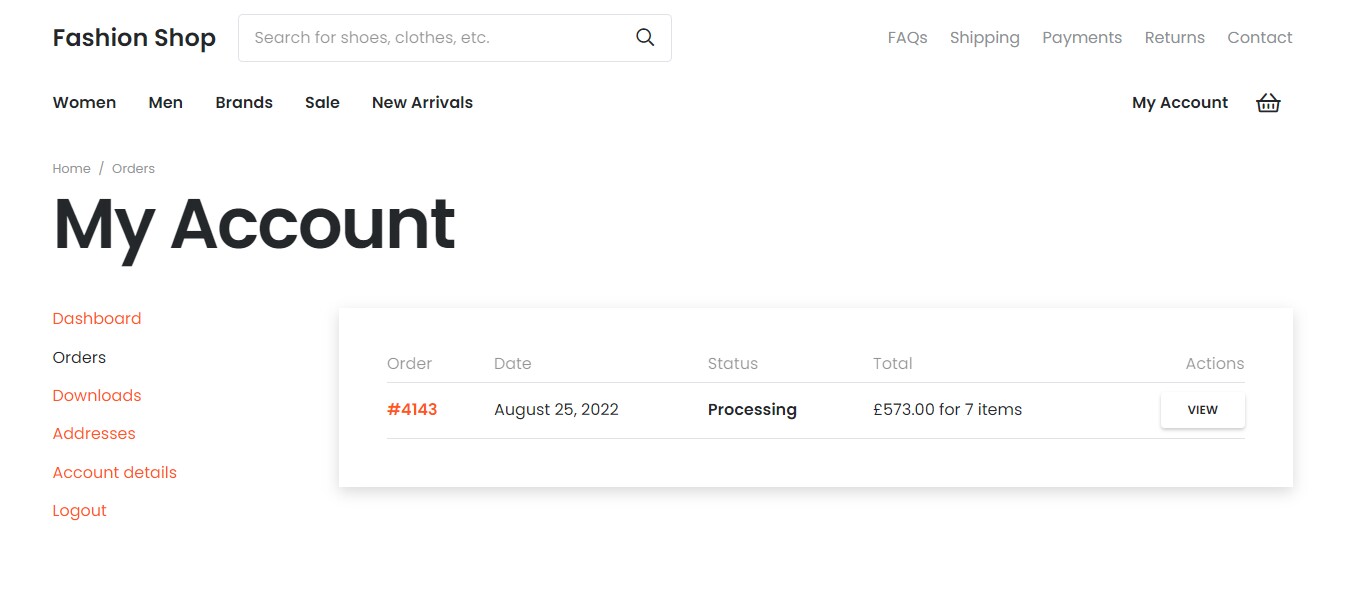
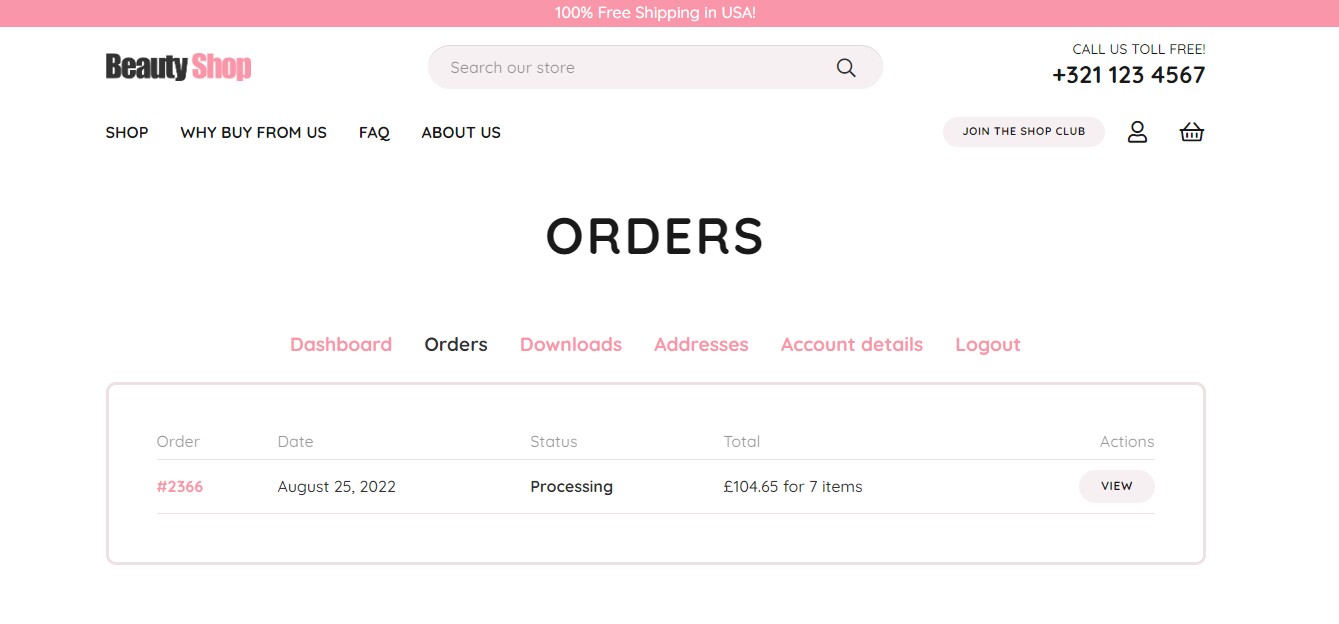
Orders - shows the general information about the orders.
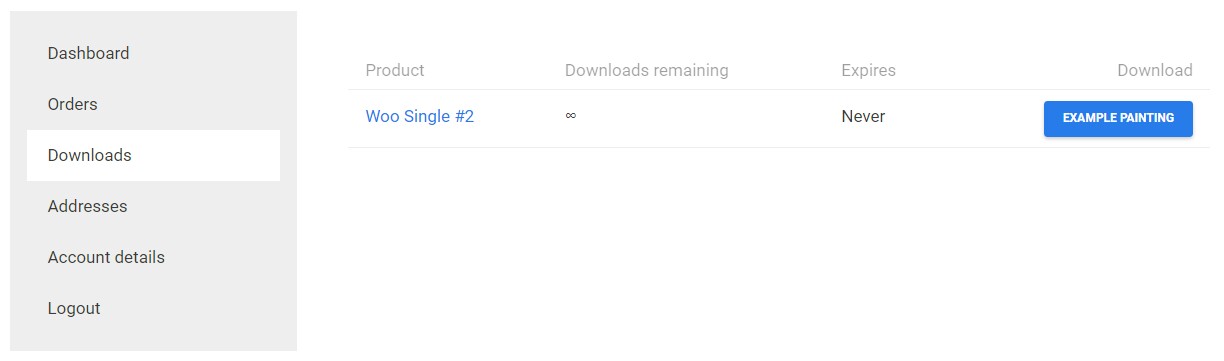
Downloads - shows the available downloadables from the purchased products.
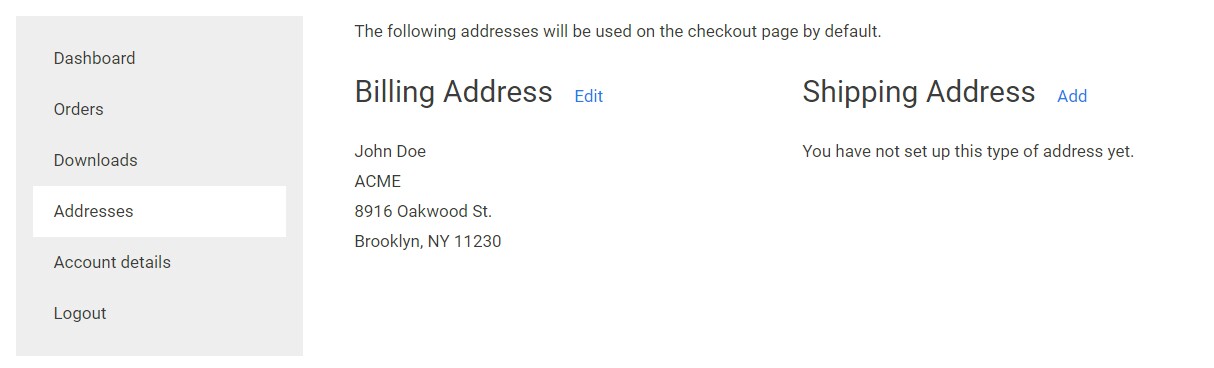
Addresses - shows the billing and shipping addresses, with the ability to add or edit this information.
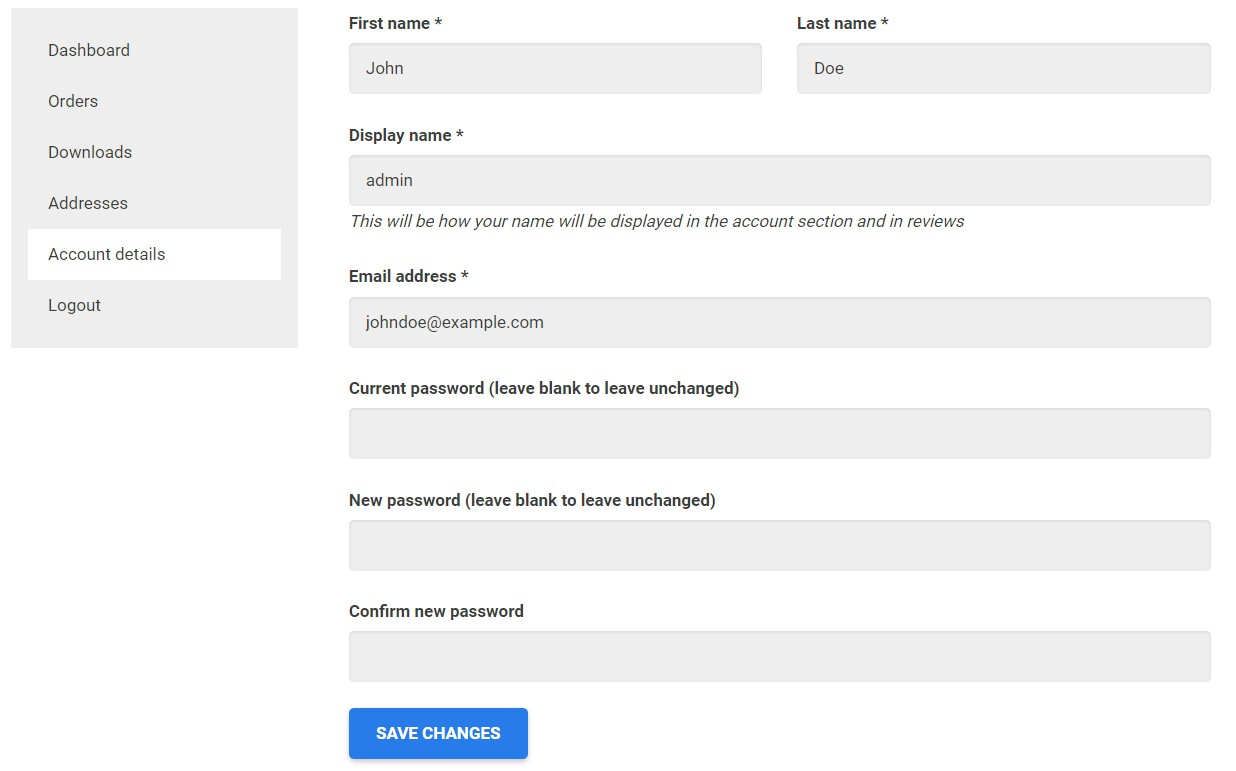
Account details - profile information, allowing the customer to edit personal data and password.
You can use Design settings to apply extra styling to the My Account – Content element.
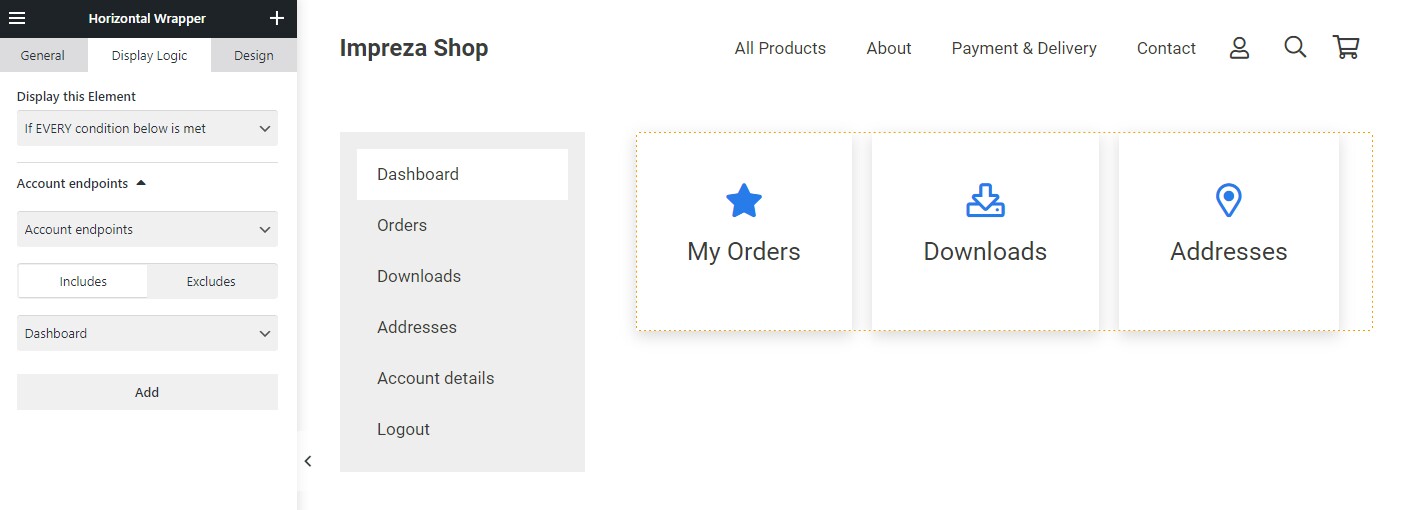
Adding Custom Content via the Display Logic #
You can add extra content to the relevant sub-page of the My Account page, by specifying the Display Logic for this content.
The Display Logic settings should be targeting the needed option inside the "Account endpoints" parameter. You can use this Display Logic condition multiple times if you want to show custom content for several sections of the My Account page.
My Account Page Examples #
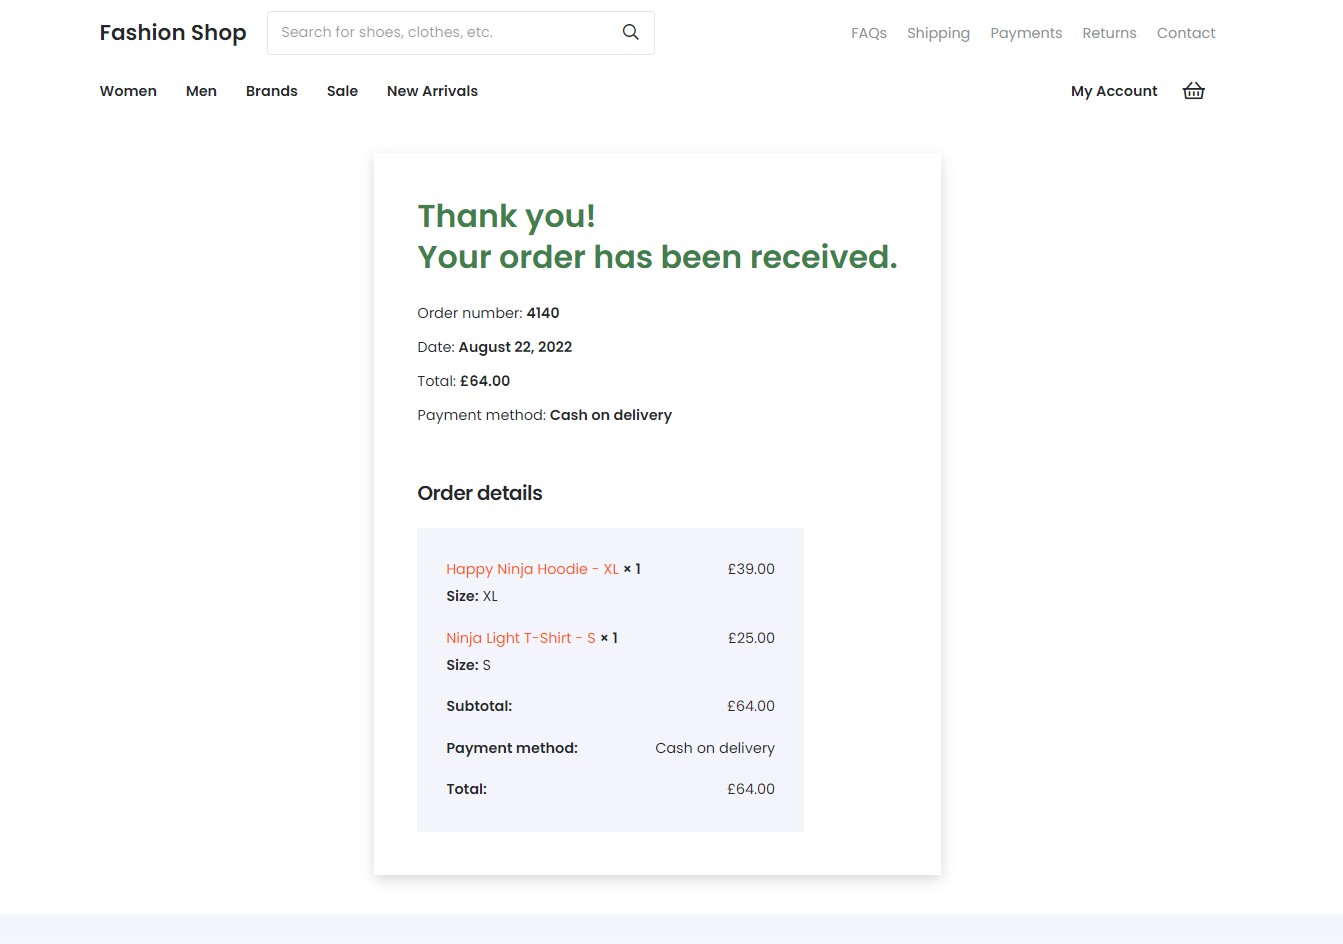
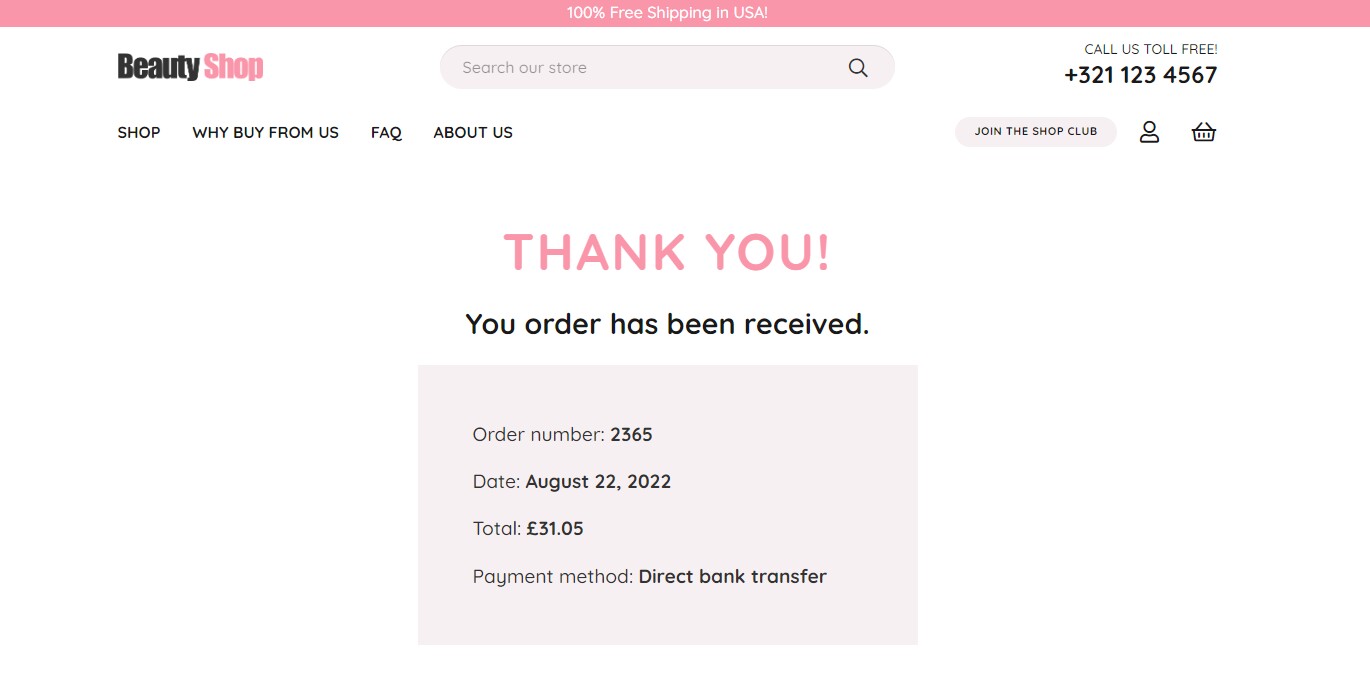
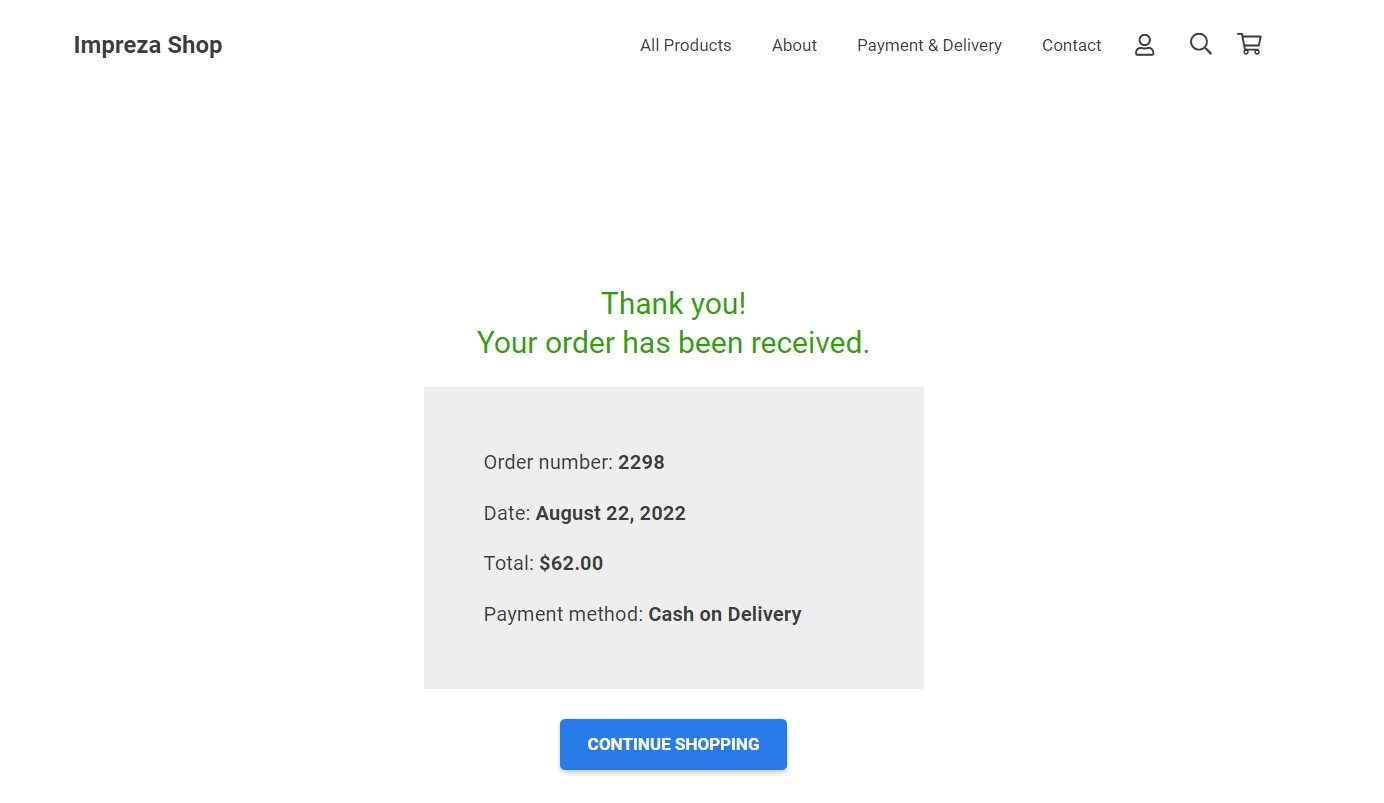
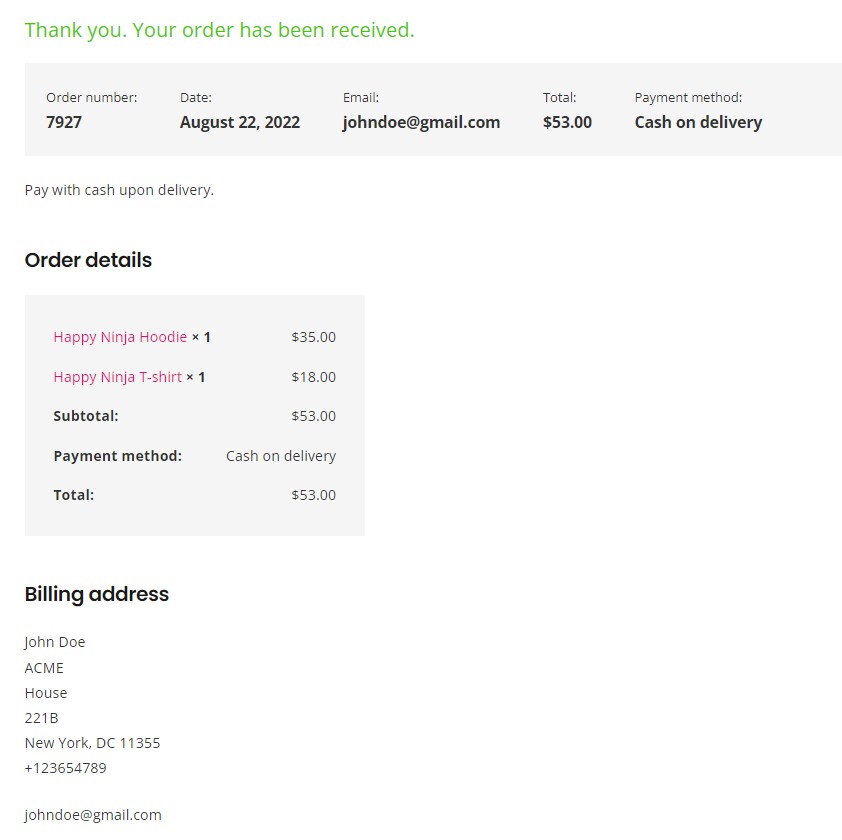
Thank You Page #
The page shows when a customer successfully finished the checkout process. WooCommerce has the default built-in template for it.
You can customize the Thank You page by creating a Content Template and assigning it at Impreza > Theme Options > Shop > Orders.

You can add any elements to that Content template. To show the order-related data use the Order Details element.
Order Details #
This element shows the order-related data and is available in both WPBakery and Live Builder when you edit the Content template.
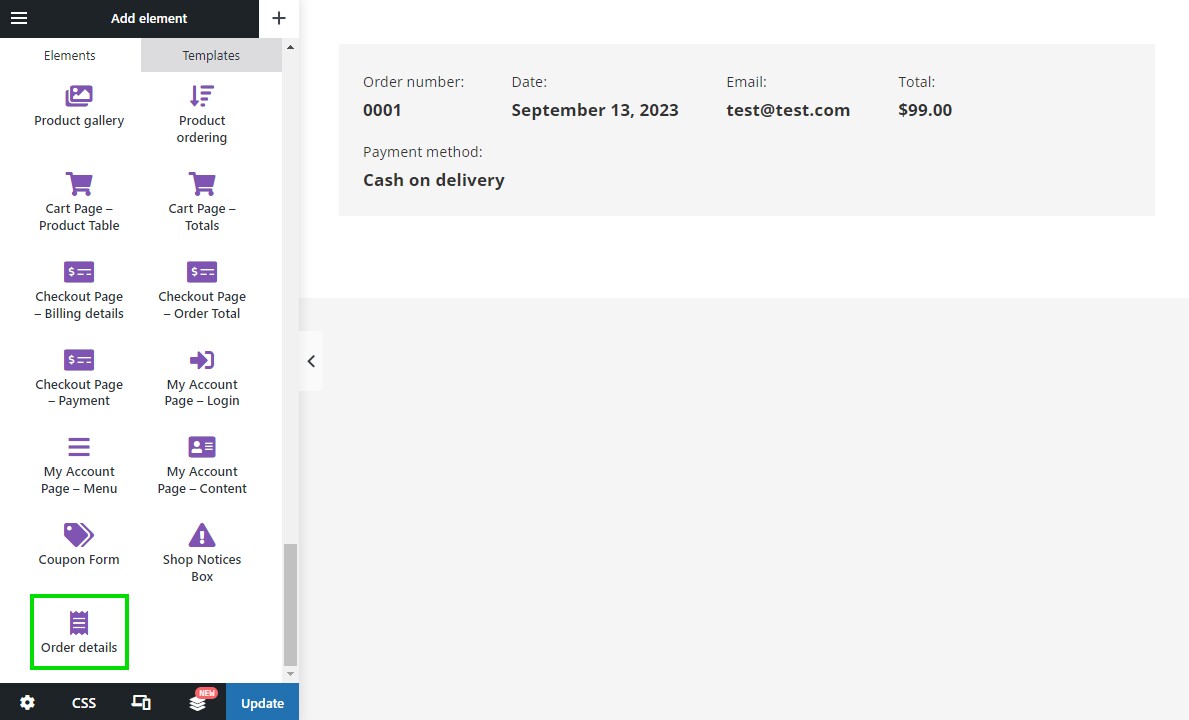
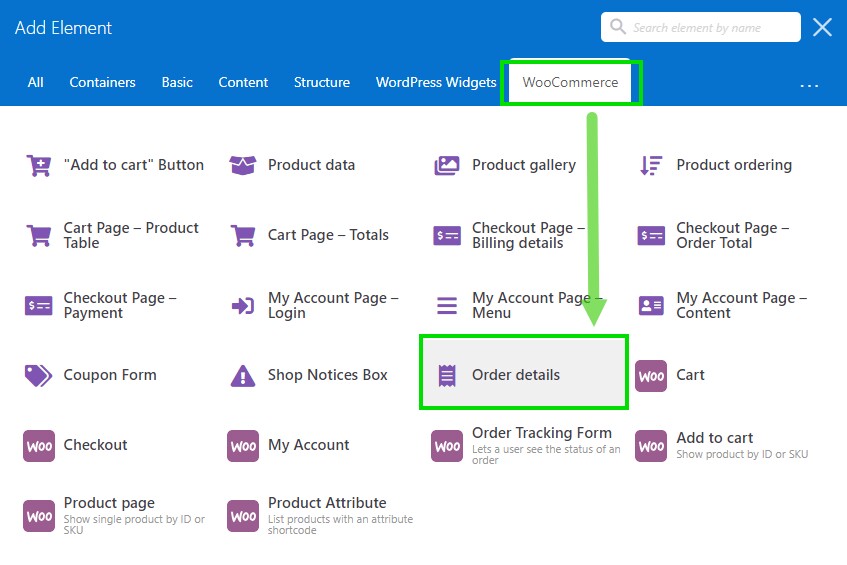
This element can show one of the following data:
- Order Number - shows the basic information about the order, including the number, date, customer email, total price, and selected payment method. You can customize its appearance by choosing one of the predefined Style options.
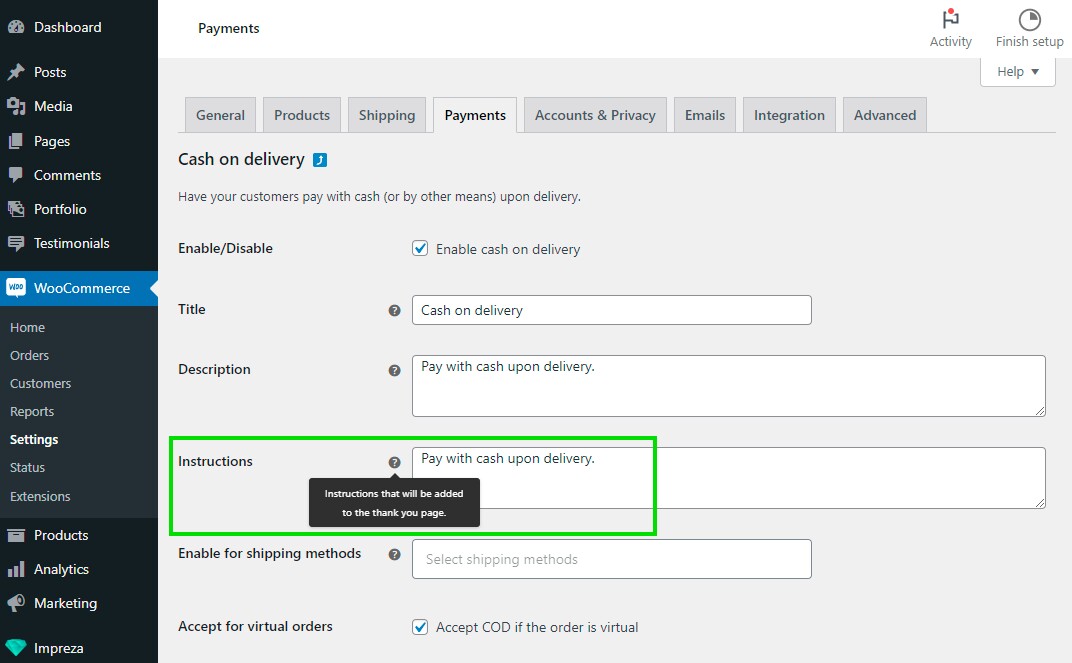
- Payment method: Instructions - shows the text of instructions for the chosen payment method. Read below how to edit that text.
- Order details - shows the:
- Order details table - ordered products, the subtotal, the shipping cost, the payment method, and the total price
- Billing address - customer data (name, address, phone number, email)
- Shipping address - is showing when it differs from the billing address
You can add the Order details element multiple times to show several blocks at a time. Also, you can apply Design settings for every other element.
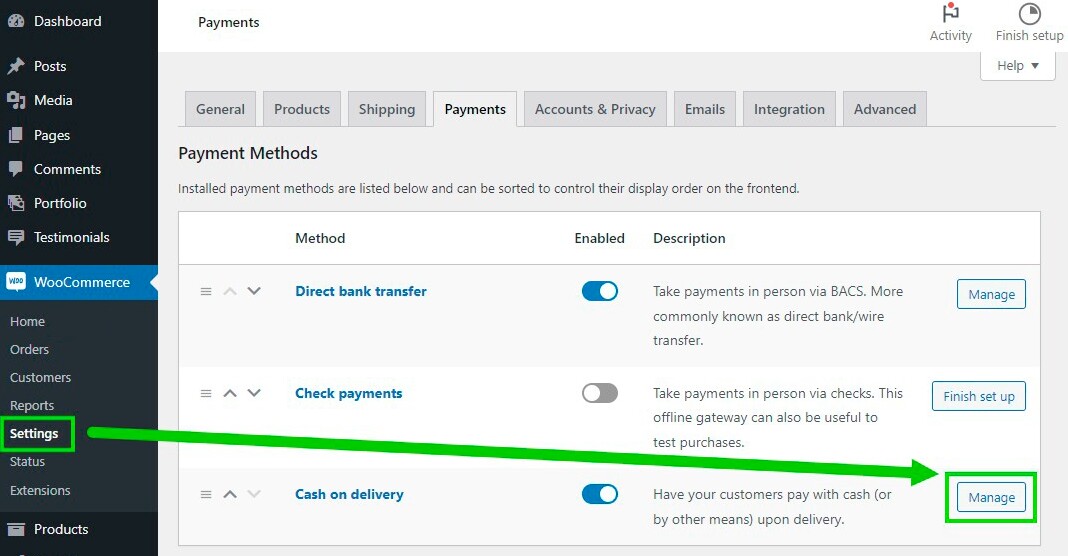
How to Edit Payment Instructions #
You can edit payment instructions for every payment method separately. Go to WooCommerce > Settings > Payments.
Thank You Page Examples #