Display Logic
Updated 9 months ago
Display Logic settings allow to define conditions for displaying content on your website. Those settings are available for all theme elements in Live Builder, WPBakery Builder, Header Builder, Grid Layout builder.
Conditions Matching Logic #
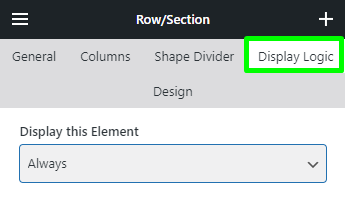
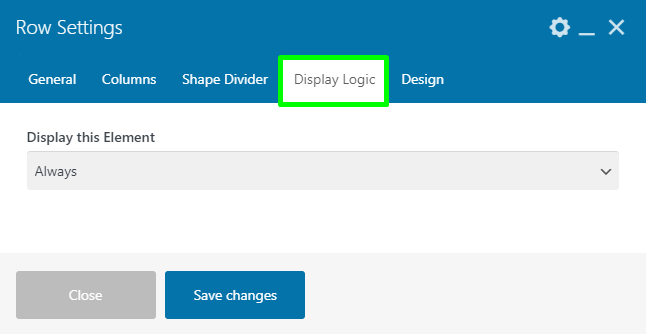
You can use one or multiple conditions to define if the element should be visible or not. To set up a matching condition, pick the relevant option in the Display this Element dropdown:
- Always - default option, the element is always visible.
- If EVERY condition below is met - the element will be visible if all conditions you specify are met at the same time.
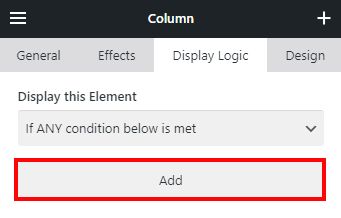
- If ANY condition below is met - the element will be visible if at least one condition you specify is met.
Once you pick the condition matching logic, you can start adding conditions by clicking the Add button:
Conditions #
- Date / Time
- Custom Field
- Page URL
- Post Type
- Post ID
- Taxonomy Term
- User Role
- User State
- User Custom Field
- Inner Grid/List Has Items
- Cart State
- Cart Total
- Account Endpoints
Date / Time #
This condition allows setting up a time when the element should start or stop showing.
The Date/Time condition uses the local time, which takes into account the Timezone value specified on the Settings > General admin page.
Use one of the matching conditions:
- Since
- Until
- Matches
Use the following controls to specify the needed date/time:
- Month
- Day
- Year
- Hour
- Minute
- Day of the week
Specify the exact value for each control or use the default position (dashed line), which means any value of this control matches the condition.
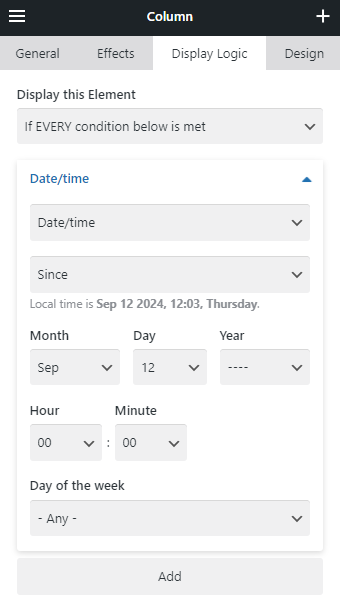
You can use the Date/time condition several times to implement complex logic.
Custom Field #
This condition allows showing the element based on the custom field value specified for:
- the current website page (works for any post type and any taxonomy term archive page)
- the relevant list item of Grid, Product List, Term List elements (works in their Grid Layout elements)
For a "Field Name" field use the slug, not the title. Multiple values are not supported, but you can add several "Custom Field" conditions if needed.
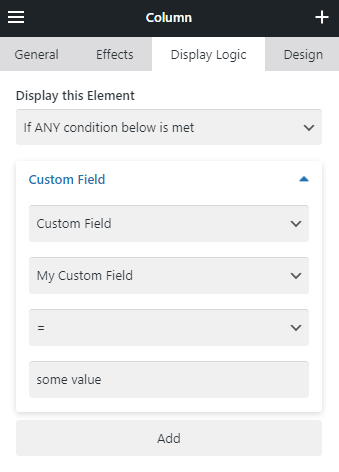
The "value" field supports dynamic values via {{custom_field_name}} shorthand.
Page URL #
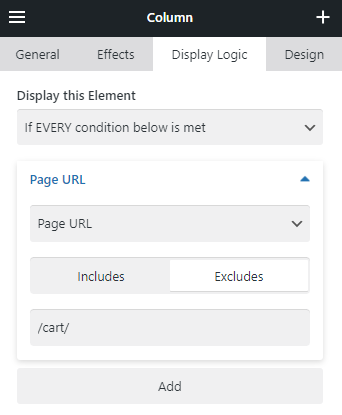
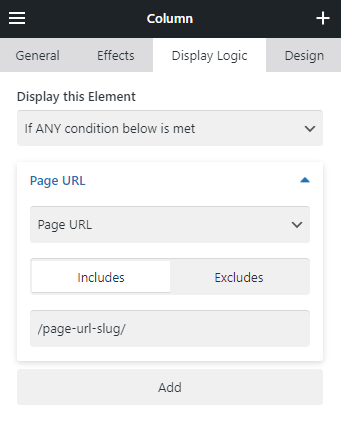
This condition allows showing the element based on the page URL address. You can Include or Exclude a part of the URL or the absolute one.
Post Type #
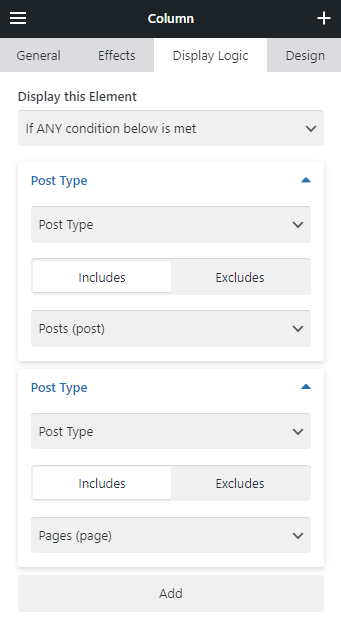
This condition allows showing the element based on the WordPress post type. You can Include or Exclude a certain post type by using the relevant switch and dropdown list:
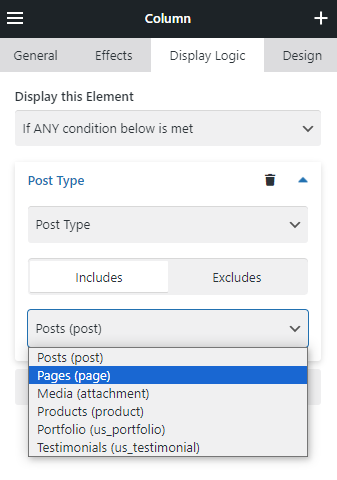
To include or exclude multiple post types, you can use this condition multiple times with the relevant "Display this Element" matching logic.
Post ID #
This condition allows showing the element based on the current WordPress post ID. You can specify a single value or multiple comma-separated values to Include or Exclude multiple IDs:
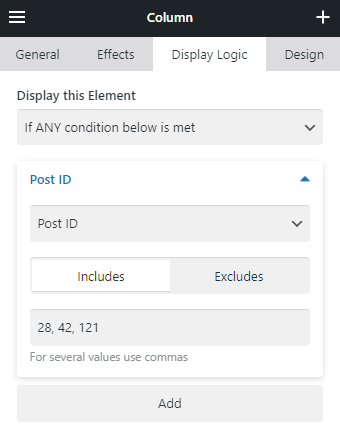
You can find the post ID in the URL while editing the relevant post, in the `?post=<number>` URL parameter.
Taxonomy Term #
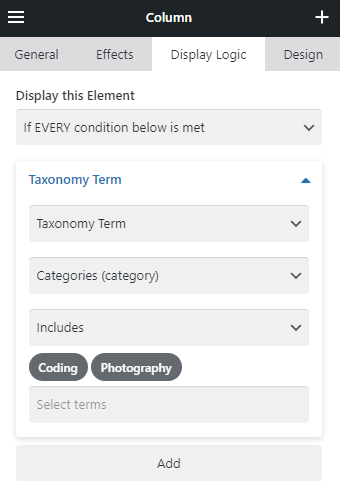
This condition allows showing the element based on the specified taxonomy terms. It works for both post and term pages.
Matching conditions:
- Includes
- Excludes
- Has any term
- Doesn't have terms
Include or exclude needed terms from the dropdown list.
User Role #
This condition allows showing the element based on the WordPress user role.
Choose the user to check:
- Current user
- Author of the current post
Pick the matching condition (includes/excludes) and specify the relevant role(s) from the list.
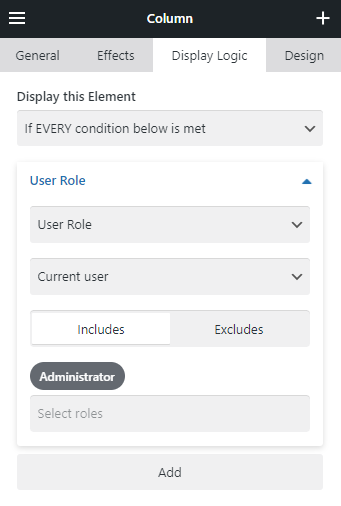
To include or exclude several roles, you can add this condition several times with the relevant "Display this Element" matching logic.
User State #
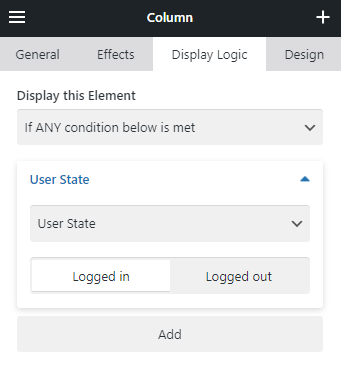
This condition allows showing the element based on whether the visitor is logged in or not. Just pick the relevant switch position.
User Custom Field #
This condition allows showing the element based on the user's custom field value.
Choose the user to check:
- Current user
- Author of the current post
Pick the user's custom field name and relevant value.
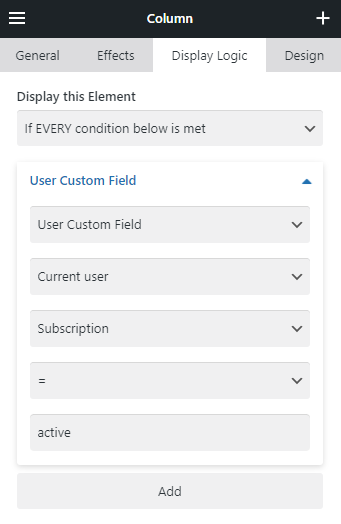
Multiple values are not supported, but you can add several "User Custom Field" conditions if needed.
The "value" field supports dynamic values via {{custom_field_name}} shorthand.
Inner Grid/List Has Items #
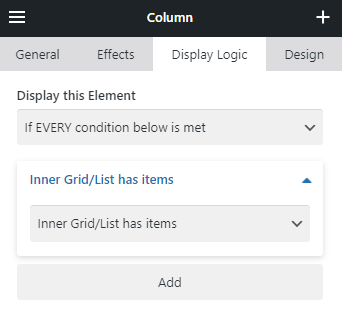
This condition allows showing the element only if it contains a Grid, Carousel, Post List, Product List, or Term List that has at least one item.
The element might contain several Grids or Lists. In this case, if at least one of them has no items, the element won't appear.
Cart State #
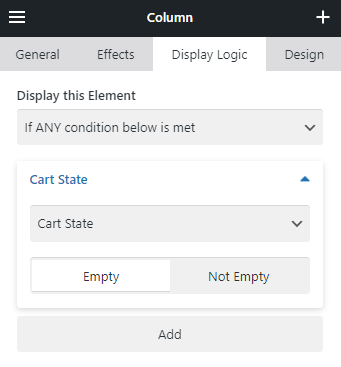
This condition is WooCommerce-related, it allows showing the element based on the Cart state for the current visitor. Pick the relevant switch to define if the cart should be empty or not.
Cart Total #
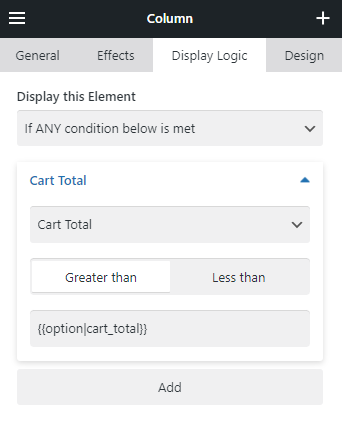
This condition is WooCommerce-related, it allows showing the element based on the total cost of products inside the Cart for the current visitor. Pick the relevant switch to define if the cost should be less or greater than your custom value.
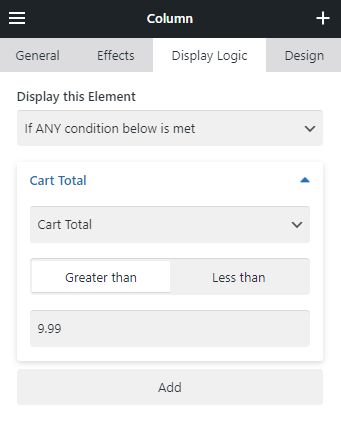
Also, this condition supports dynamic values via {{custom_field_name}} shorthand:
Account Endpoints #
This condition is WooCommerce-related, it allows showing the element based on the My Account subpage/endpoint. The URL for each endpoint can be customized in WooCommerce > Settings > Advanced. Learn more about WooCommerce endpoints.

Usage Examples #
- Showing an element for posts and pages
- Showing an element if the custom field has ANY value
- Showing an element on a specific page
- Showing an element based on the ACF Date / Time field
- Showing an element based on the product stock quantity
- Showing an element based on the product stock status
- Showing an element on December 25, 2024
- Showing an element on specific date range
- Showing an element from 00:00 to 11:59 every day
- Showing an element from the 1st to the 3rd of each month
Showing an element for posts and pages #
- Display this Element: if ANY condition below is met
- Post type includes posts
- Post type includes pages
Showing an element if the custom field has ANY value #
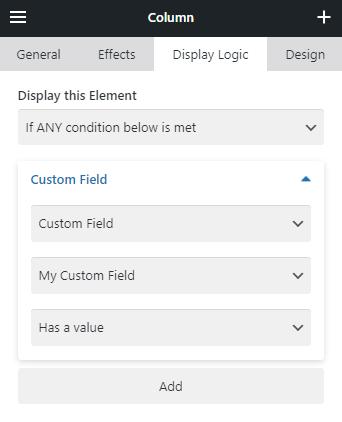
- Display this Element: if EVERY condition below is met.
- Custom field "Has a value".
Showing an element on a specific page #
- Display this Element: if EVERY condition below is met.
- Page URL includes <page URL slug>
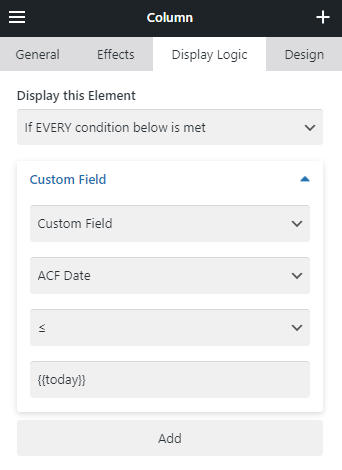
Showing an element based on the ACF Date / Time field #
Date only:
- Create the ACF Date field and set its "Return Format" as
Ymd - Use the {{today}} shorthand for comparison
Time only:
- Create the ACF Time field and set its "Return Format" as
His - Use the {{now}} shorthand for comparison
Date and Time:
- Create the ACF Date and Time field and set its "Return Format" as
YmdHis - Use the {{today_now}} shorthand for comparison
The example in the screenshot will show the element if its date is today or earlier:
Showing an element based on the product stock quantity #
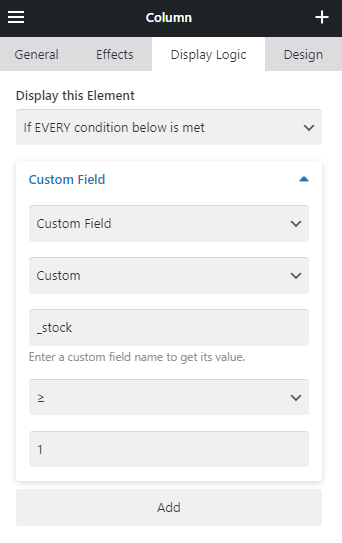
- Display this Element: if EVERY condition below is met.
- Custom Field > Custom:
- _stock
- ≥
- 1
Showing an element based on the product stock status #
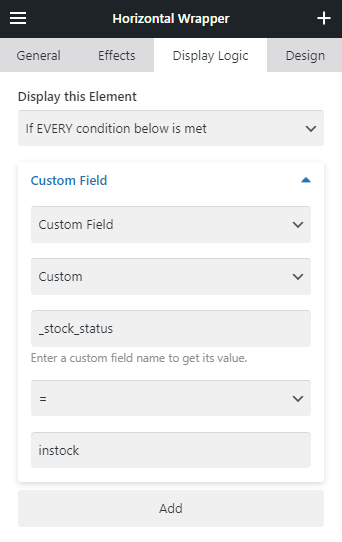
- Display this Element: if EVERY condition below is met
- Custom Field > Custom:
- _stock_status
- =
- instock
The WooCommerce custom field "_stock_status" could have one of 3 values:
- instock
- outofstock
- onbackorder
Showing an element on December 25, 2024 #
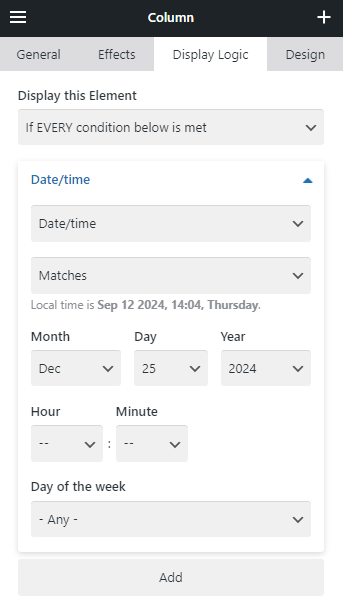
- Display this Element: if EVERY condition below is met
- Date/Time: Matches
- Month: Dec
- Day: 25
- Year: 2024
- Hour: ---
- Minute: ---
- Day of the week: - Any -
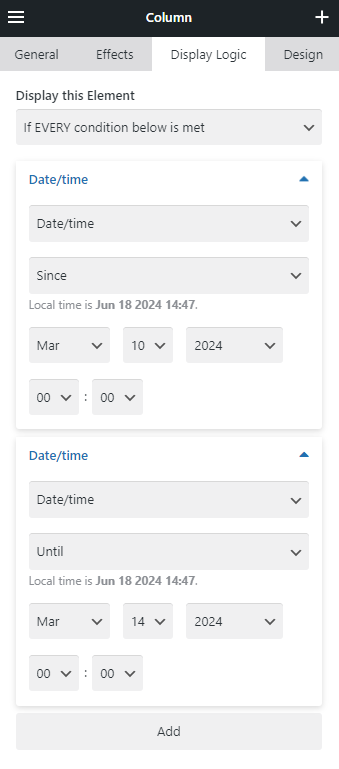
Showing an element on specific date range #
- Display this Element: if EVERY condition below is met
- Date/Time > Since > Mar 10
- Date/Time > Until > Mar 14
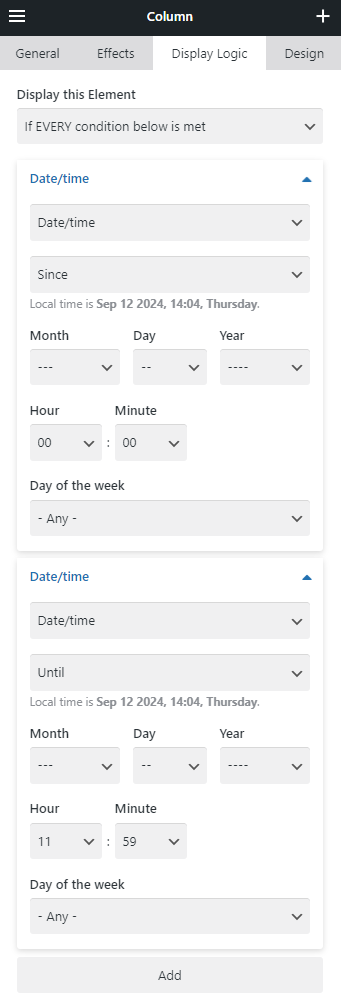
Showing an element from 00:00 to 11:59 every day #
- Display this Element: if EVERY condition below is met
- Date/Time: Since
- Month: ---
- Day: ---
- Year: ---
- Hour: 00
- Minute: 00
- Day of the week: - Any -
- Date/Time: Until
- Month: ---
- Day: ---
- Year: ---
- Hour: 11
- Minute: 59
- Day of the week: - Any -
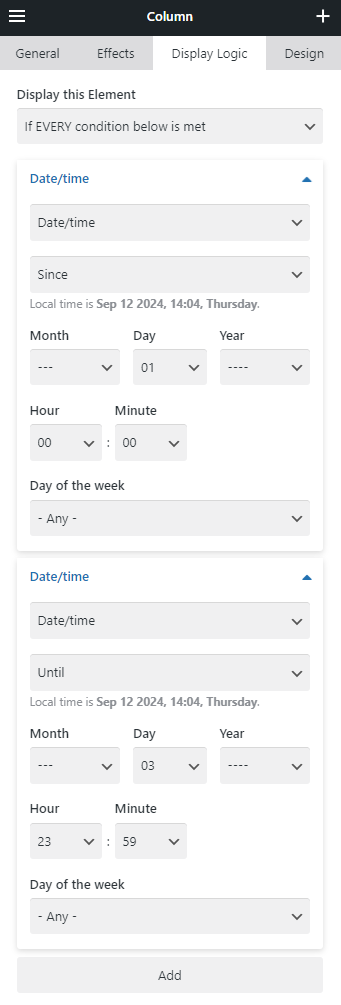
Showing an element from the 1st to the 3rd of each month #
- Display this Element: if EVERY condition below is met
- Date/Time: Since
- Month: ---
- Day: 01
- Year: ---
- Hour: 00
- Minute: 00
- Day of the week: - Any -
- Date/Time: Until
- Month: ---
- Day: 03
- Year: ---
- Hour: 23
- Minute: 59
- Day of the week: - Any -
PHP Customizations #
Display Logic conditions has the following PHP hooks (filters):
us_conditional_param_optionsus_conditional_param_result
To apply your custom conditions append the specific code (check examples below) to the functions.php file of a child theme.
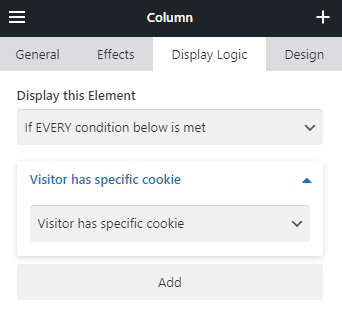
Visitor Has Specific Cookie #
This condition shows the element if the visitor has submitted the cookie notification bar set up at Theme Options > General > Cookie Notice.
PHP code:
add_filter( 'us_conditional_param_options', function( $options ) {
	$options['has_specific_cookie'] = 'Visitor has specific cookie';
	return $options;
} );
add_filter( 'us_conditional_param_result', function( $result, $param ) {
	if ( $param == 'has_specific_cookie' ) {
		$result = ! empty( $_COOKIE['us_cookie_notice_accepted'] );
	}
	return $result;
}, 10, 2 );
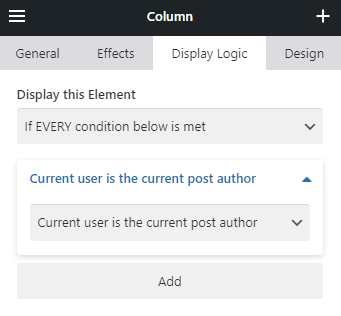
Current User is the Current Post Author #
This condition shows the element if the visitor is the author of the currently viewed post.
PHP code:
add_filter( 'us_conditional_param_options', function( $options ) {
	$options['is_post_author'] = 'Current user is the current post author';
	return $options;
} );
add_filter( 'us_conditional_param_result', function( $result, $param ) {
	if ( $param == 'is_post_author' ) {
		global $authordata;
		$result = ( is_object( $authordata ) AND $authordata->ID == get_current_user_id() );
	}
	return $result;
}, 10, 2 );
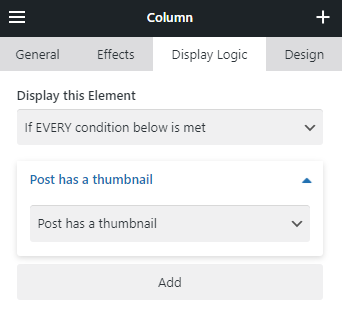
Post Has a Thumbnail #
This condition shows the element only if the current post (any post type) has a featured image specified.
PHP code:
add_filter( 'us_conditional_param_options', function( $options ) {
	$options['post_has_thumbnail'] = 'Post has a thumbnail';
	return $options;
} );
add_filter( 'us_conditional_param_result', function( $result, $param ) {
	if ( $param == 'post_has_thumbnail' ) {
		$result = get_post_thumbnail_id();
	}
	return $result;
}, 10, 2 );
