Menus
Updated 3 weeks ago
How to Create Menus #
Impreza uses the default WordPress menu functionality.
The menu is created at Appearance > Menus. For more information on this WordPress module, read the relevant article.

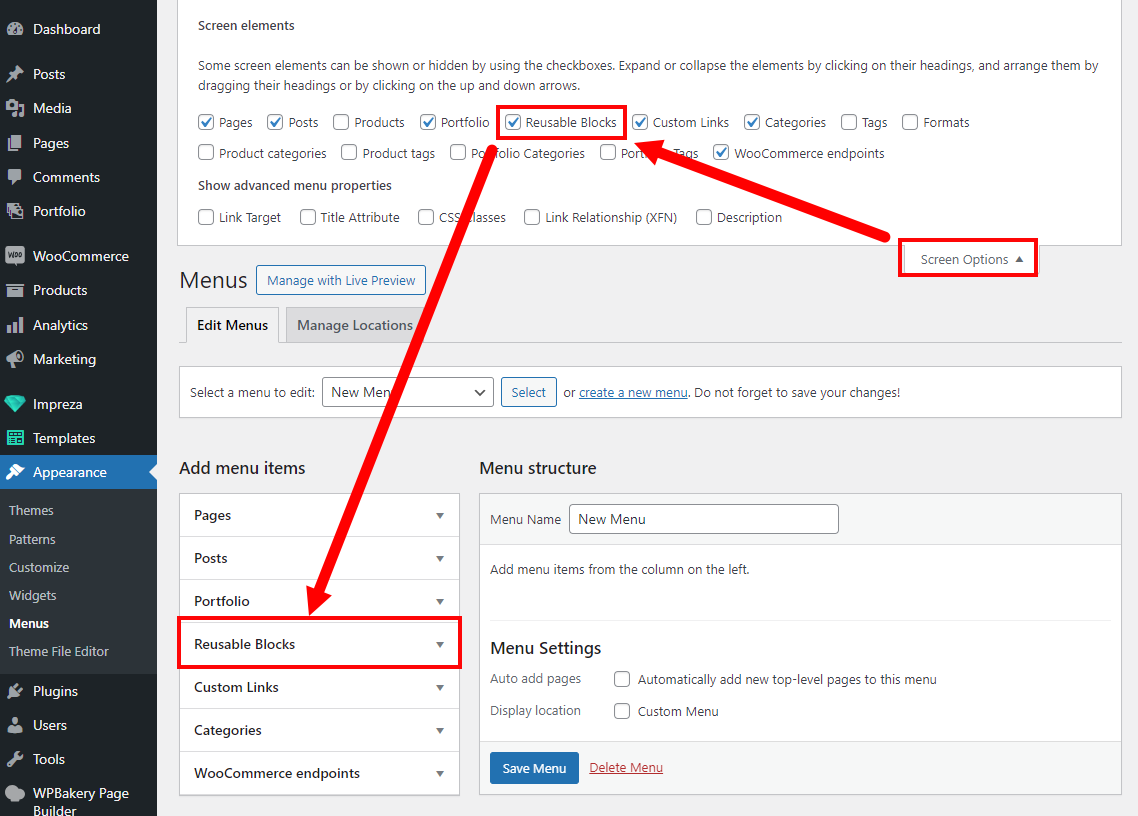
If the post type you wish to use is not in the list of available menu items, activate its checkbox at Screen Options.
Adding Reusable Blocks to Menus #
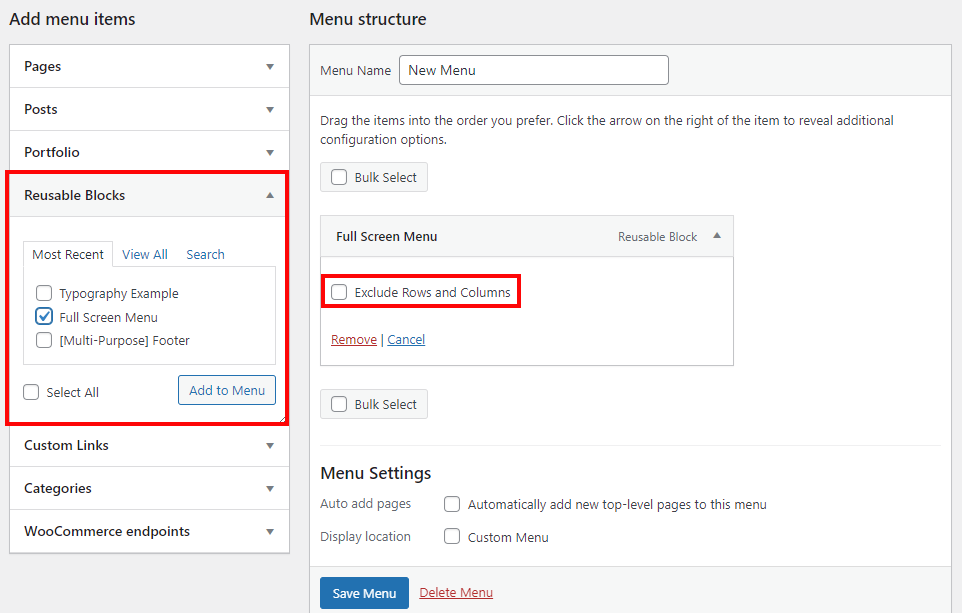
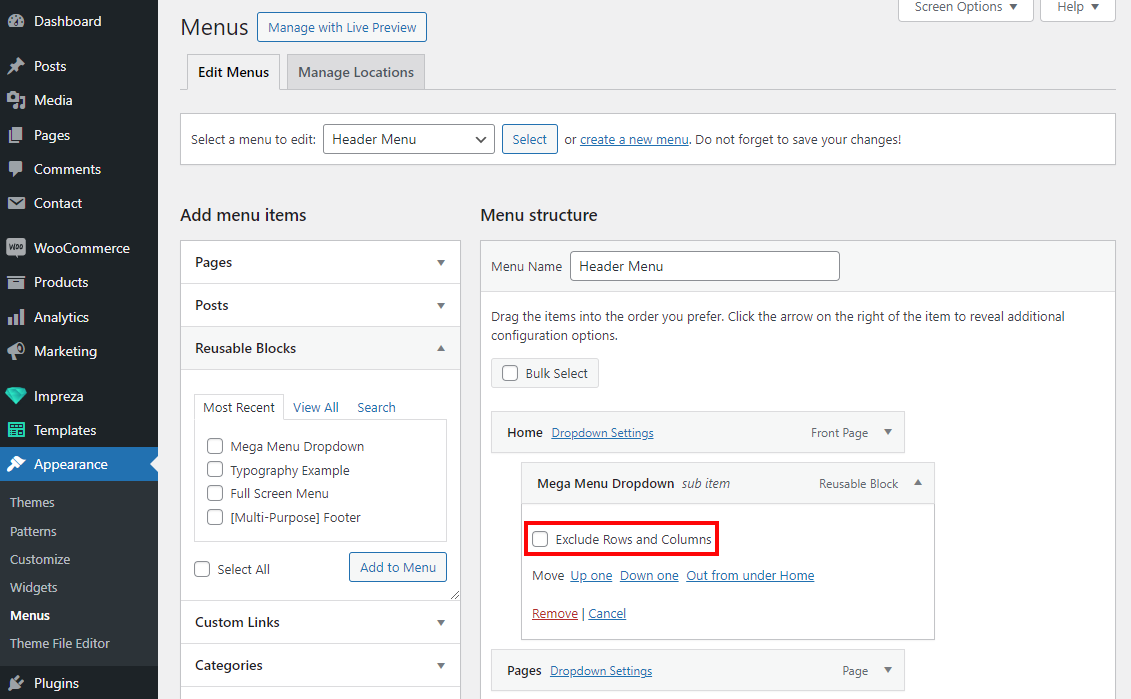
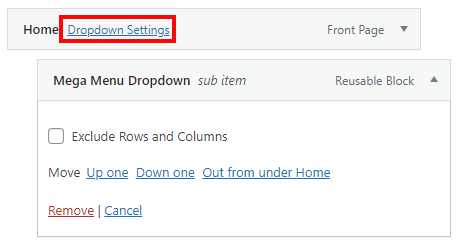
Select the Reusable Block, add it as a new menu item, and uncheck the "Exclude Rows and Columns" checkbox to keep its rows and columns layout.
Adding Menu to Headers #
Open the relevant header or create a new one at Template > Headers and add a Menu or Simple Menu element.
Both elements are designed to show the menu but have some differences:
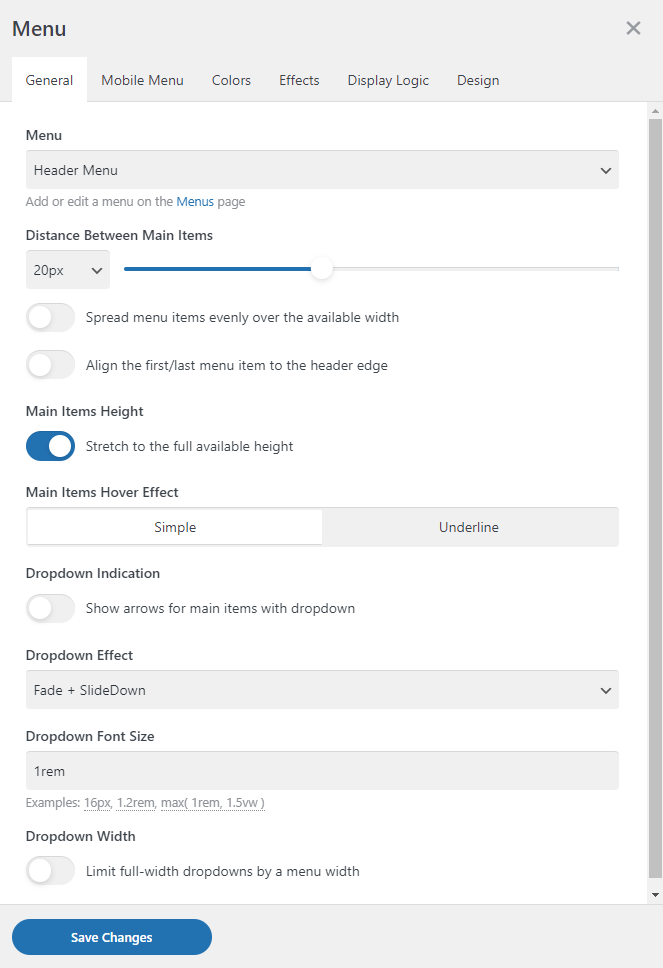
- The Menu element has tools for detailed customization of complex multi-level menu appearance, including responsive behavior.
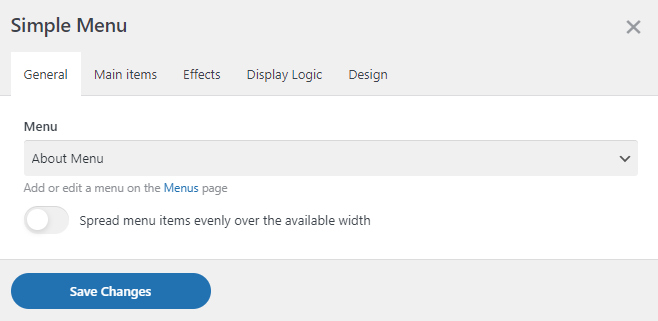
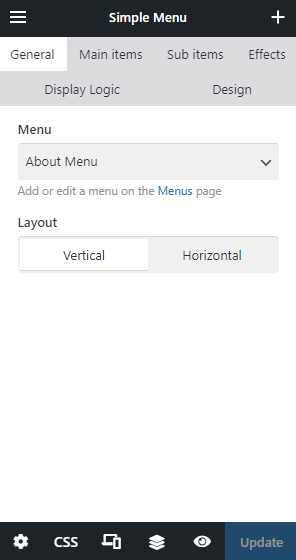
- The Simple Menu element has simplified settings and a layout for adding menus.
Customizing Header Menu Dropdown #
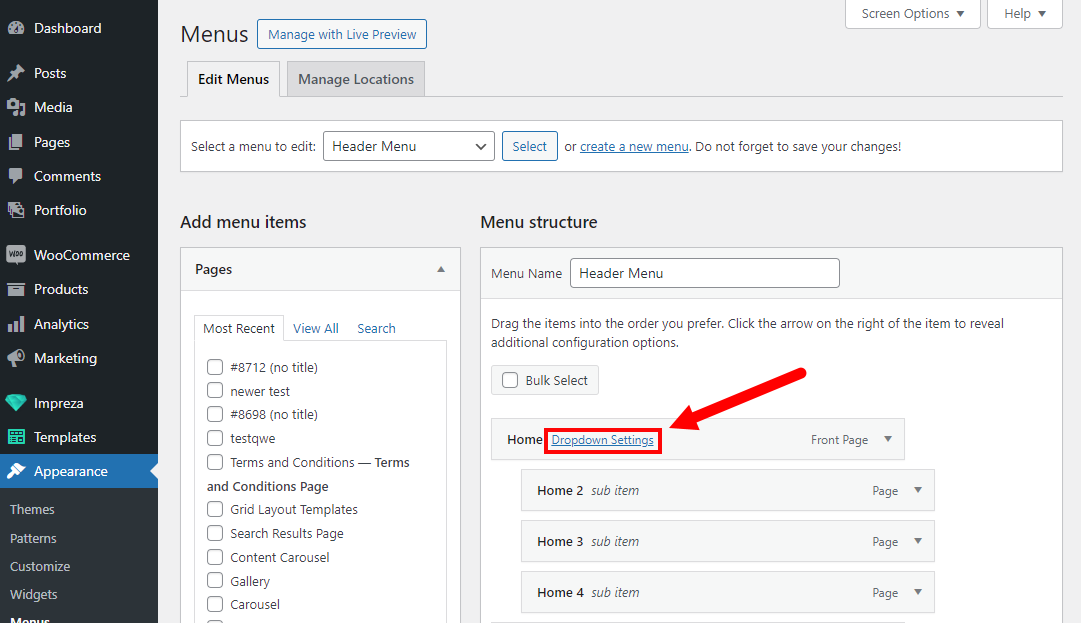
Dropdown Settings are only available for the 1st-level items with sub-items. Go to Appearance > Menus and click on the "Dropdown Settings" link:
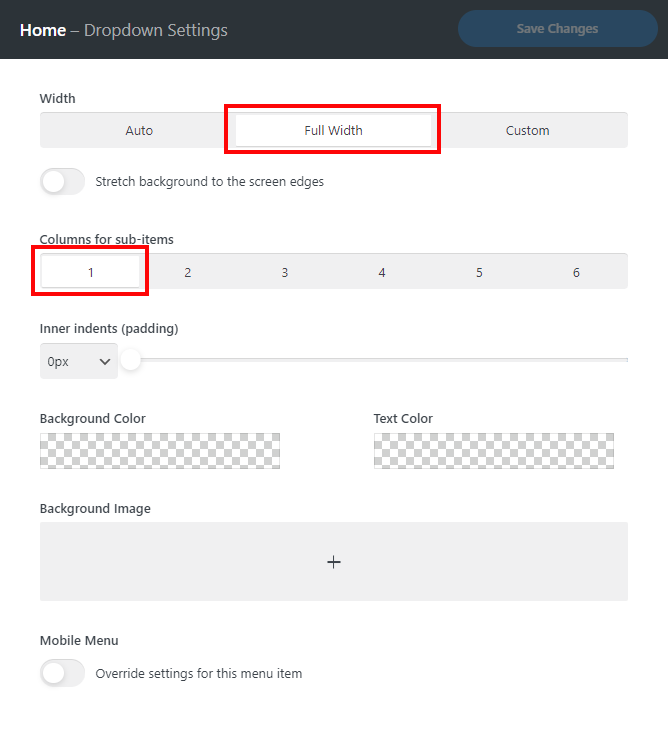
Adjust the Dropdown Settings in a relevant popup:
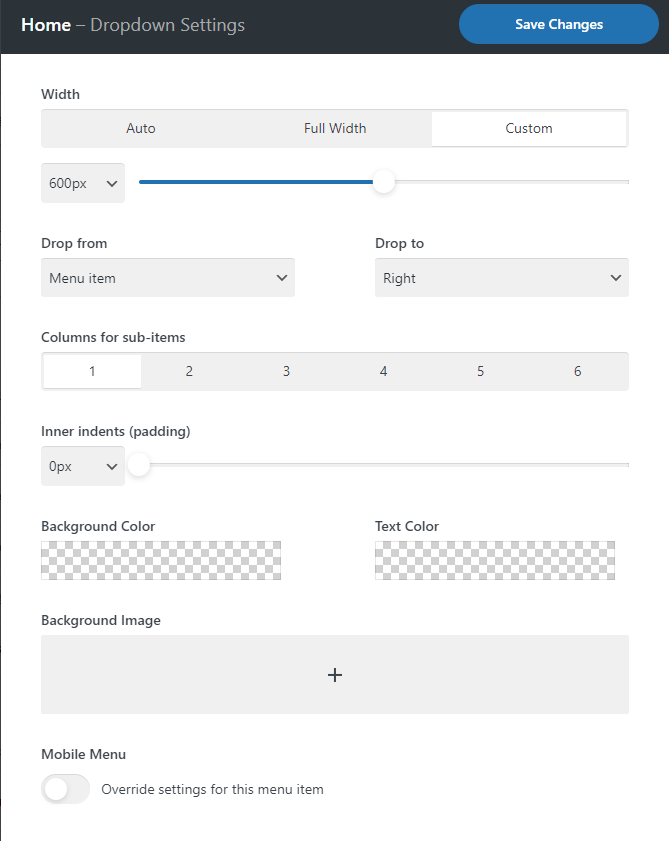
- Width - set it to Auto, Full Width, or Custom Width (by default Full Width equals the Site Content Width from Theme Options > Site Layout)
- Drop from - select the anchor for the dropdown to appear. It could be a header or the parent menu element.
- Drop to - select the direction for the dropdown position (right / center / left).
- Columns for sub-items - set a number of columns to be shown from 1 to 6
- Inner indents (padding) - set custom padding around a dropdown content
- Background Color - assign a custom Background Color
- Text Color - assign a custom Text Color
- Background Image - assign a custom background image and adjust its settings
- Mobile Menu - allows to override the "Show dropdown by click on" for a separate menu item
Hamburger Menu for Desktops #
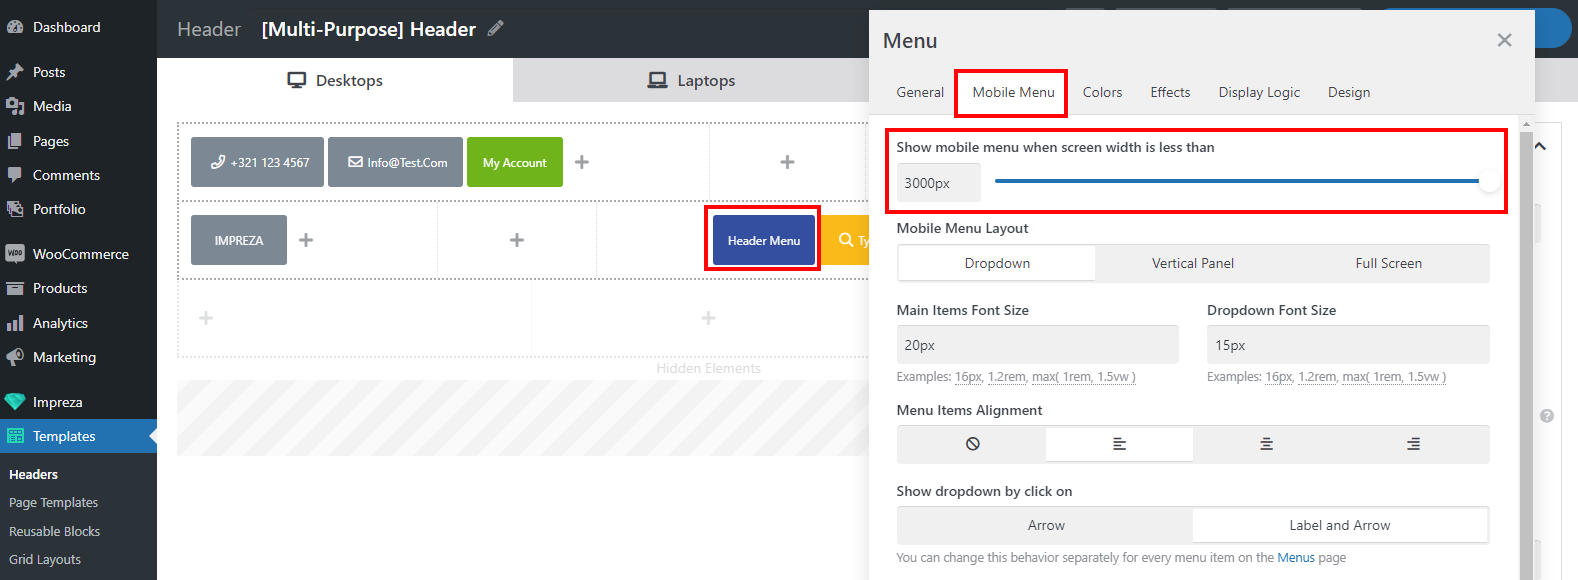
When editing your site's header, open the Menu element settings and pick its Mobile Menu tab. Move the "Show mobile menu when the screen width is less than" control to the extreme right position or specify the needed pixel value manually.
Adding Menu to Content #
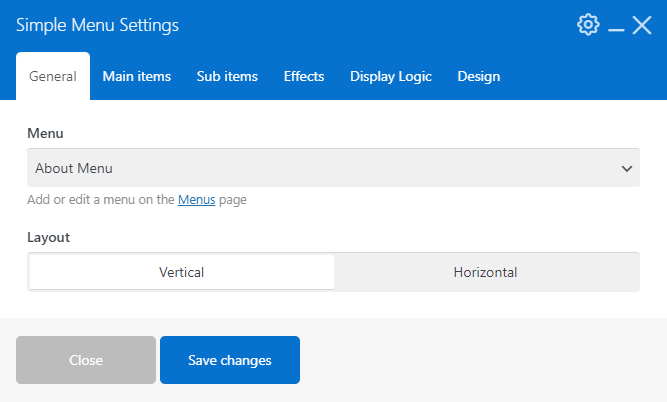
When editing the content of the post, page, Reusable Block, or Page Template, you can add a menu via the Simple Menu element.
How to Customize the Mobile Menu #
When editing the Menu element, you can set up its layout and behavior for mobile devices at the Mobile Menu tab.

Show mobile menu when screen width is less than — defines the screen width at which the Menu should switch to its mobile layout. If you wish to use a mobile layout for all devices, specify the maximum value, or enter a large enough value manually.
Mobile Menu Icon — a group of settings that allows specifying the style, thickness, and size of the mobile menu icon. You can also add a Text near icon if you need an additional text label for the Menu element's mobile layout.
Mobile Menu — a group of settings that defines the appearance of the open mobile menu elements. You can set it up to open as a Dropdown, Vertical Panel, or a Full Screen menu, and adjust the font sizes, menu item alignment, and a trigger to open sub-menu items.
How to Create Mega Menus #
You can use any custom content with a custom layout in a menu dropdown via Reusable Blocks.
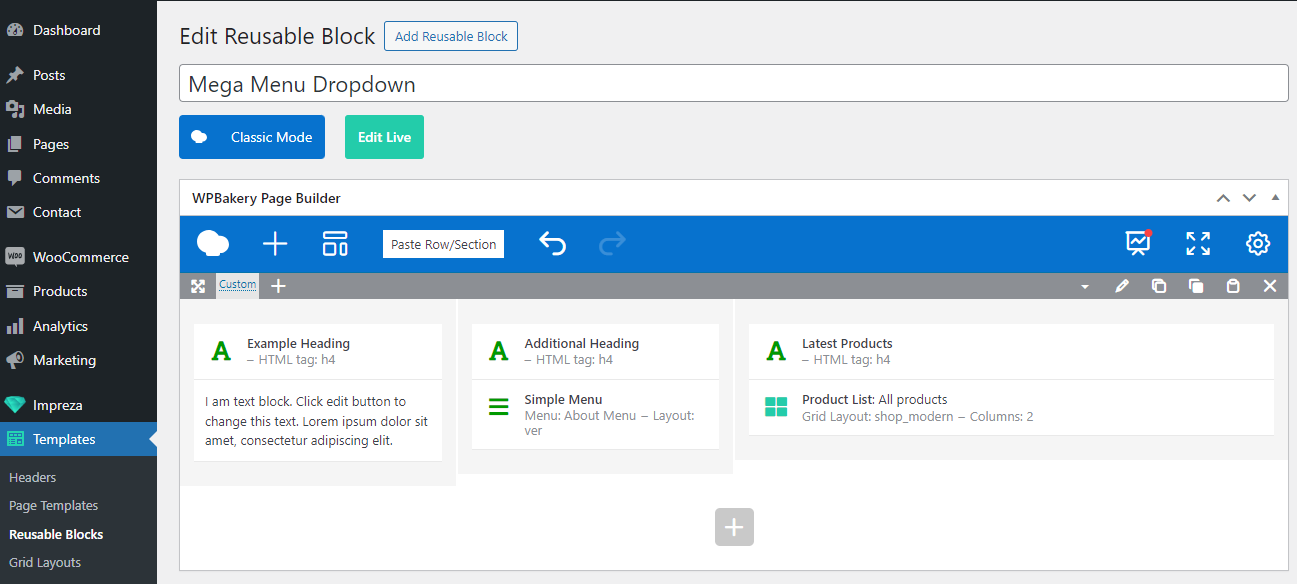
Create custom content for the mega menu dropdown at Templates > Reusable Blocks. Similar to regular pages, you can use any elements and include additional sub-menus with the Simple Menu element.
Afterward, go to Appearance > Menus and pick the menu for which you created a dropdown.
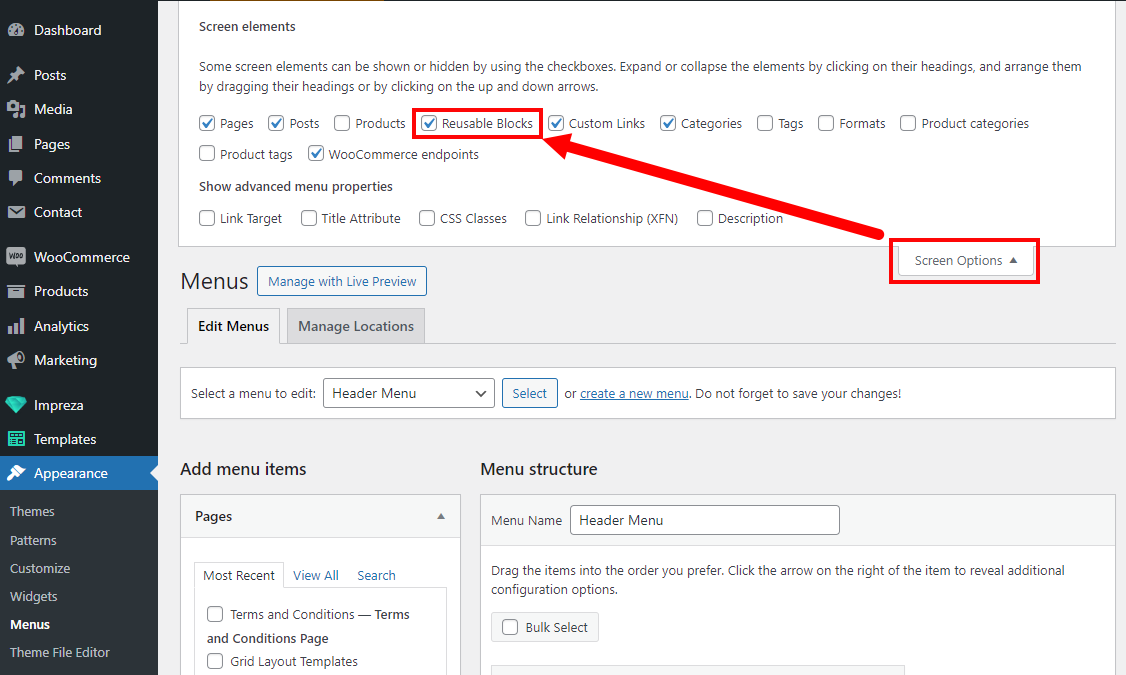
Ensure that the "Reusable Blocks" checkbox is active in the "Screen options" at the top—it allows you to add Reusable Blocks as menu items.
Add your custom Reusable Block to the menu (second level). Deactivate the "Exclude Rows and Columns" to keep the columns' layout.
Open the Dropdown Settings of the parent menu element and set it up to use Full Width and 1-column layout.
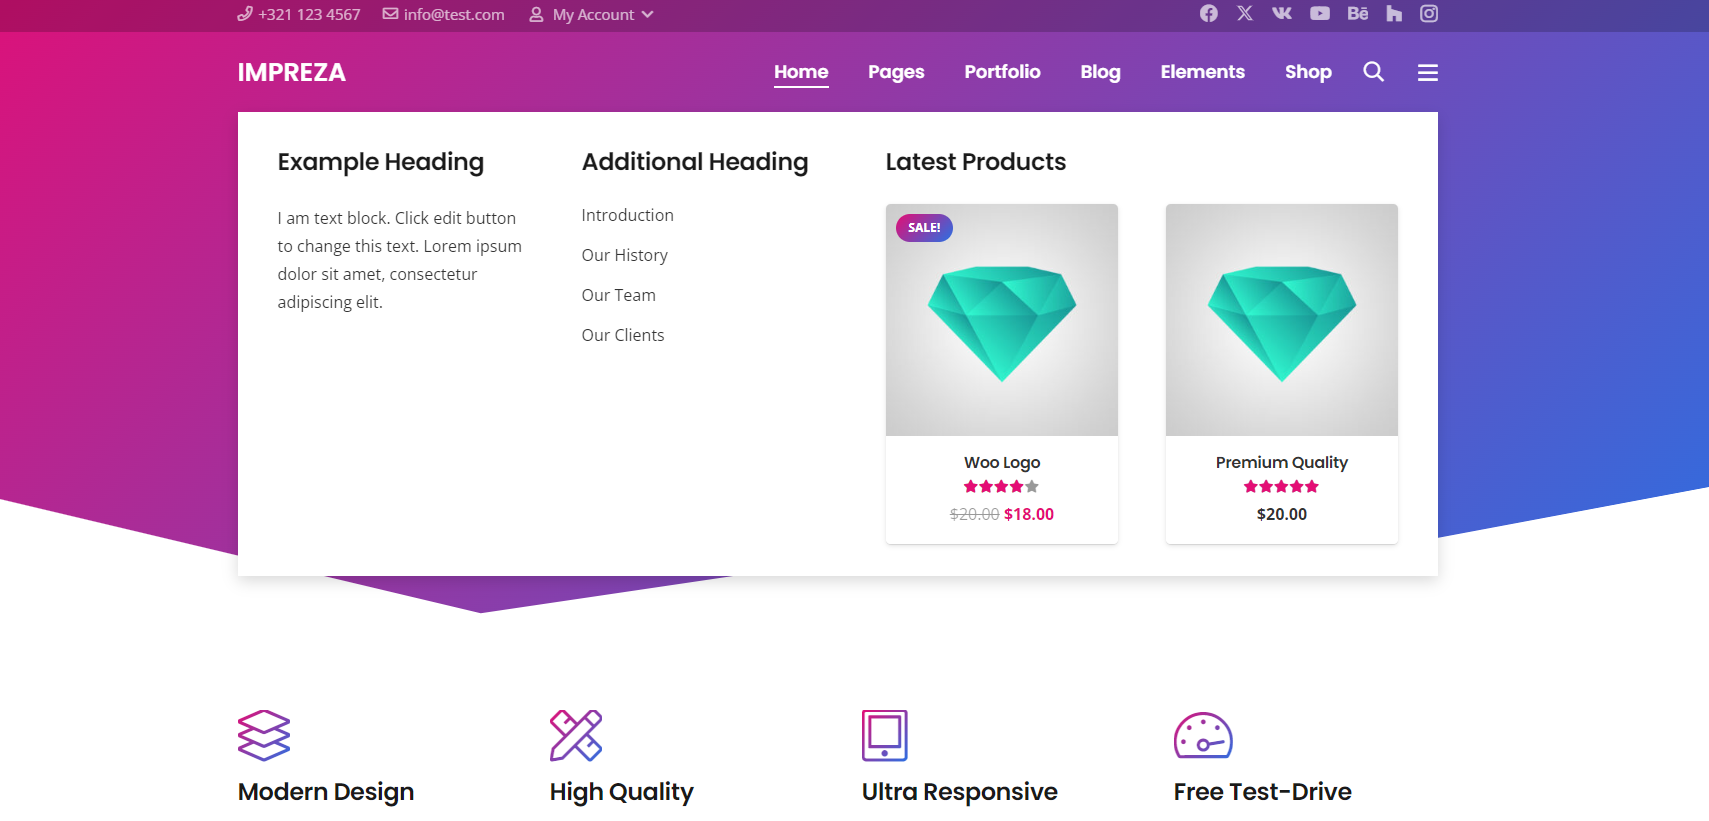
Save changes and check your custom mega menu.
How to Style Menu Item as a Button #
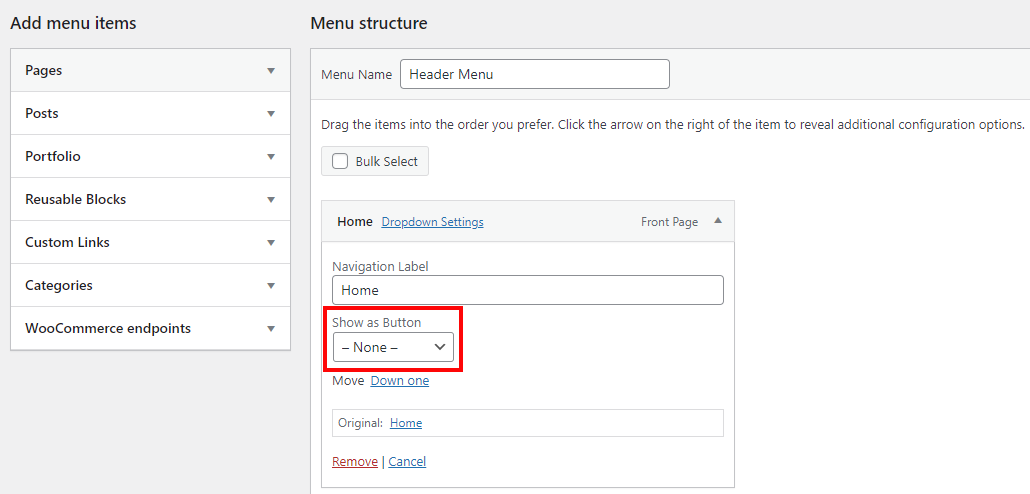
When editing the menu element at Appearance > Menus, you can use its "Show as button" setting to display it using the specified button style. This option applies only to the 1st-level menu items.
How to Add an Icon to the Menu Item #
You can add an icon to your menu by adding its code to the Navigation Label.
For example:
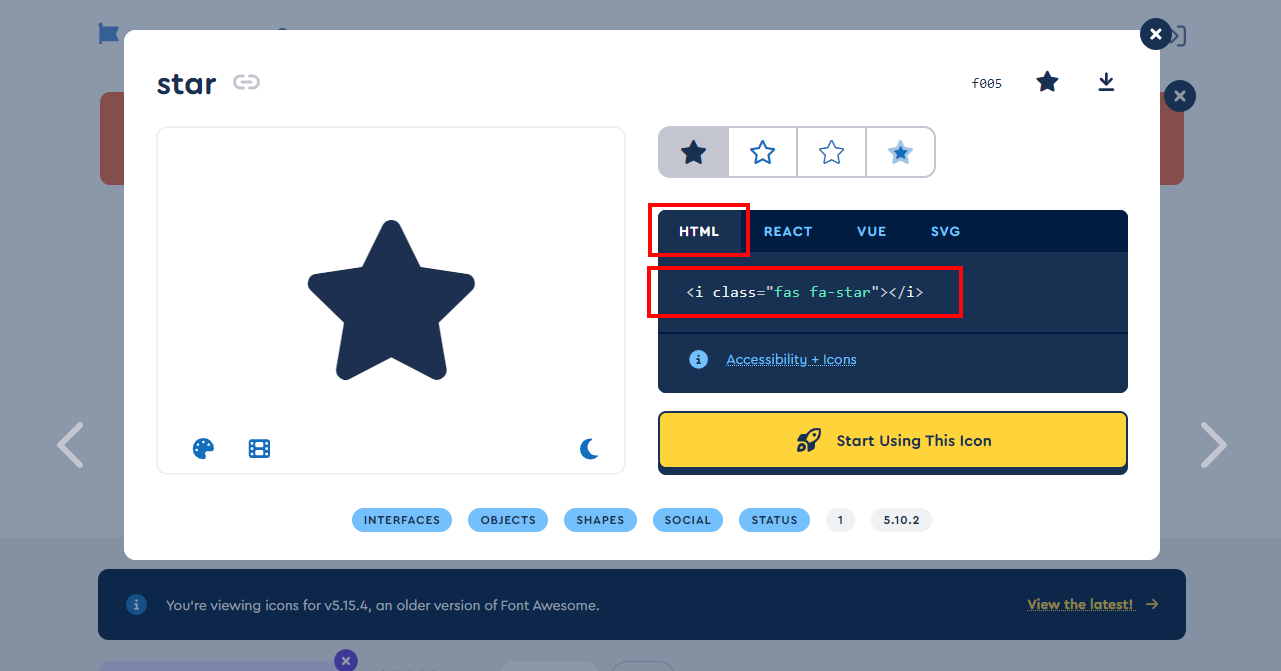
<i class="fas fa-star"></i>
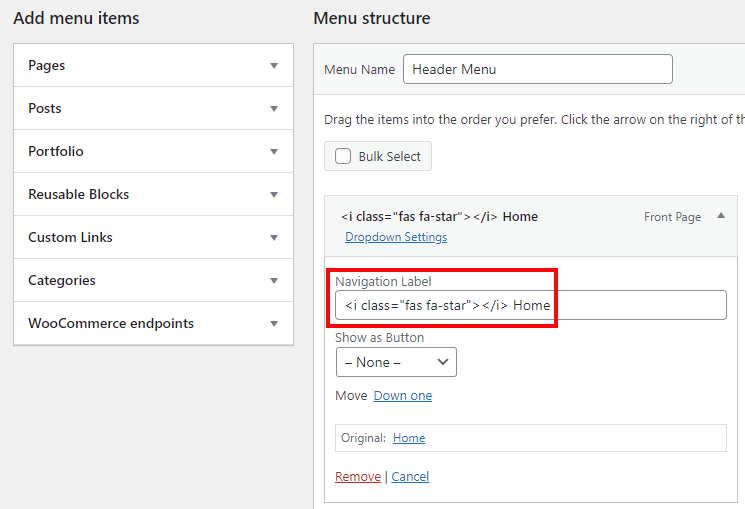
You can browse and use icons from the Font Awesome v5 PRO library.
Ensure you're using the HTML version of the icon's code:
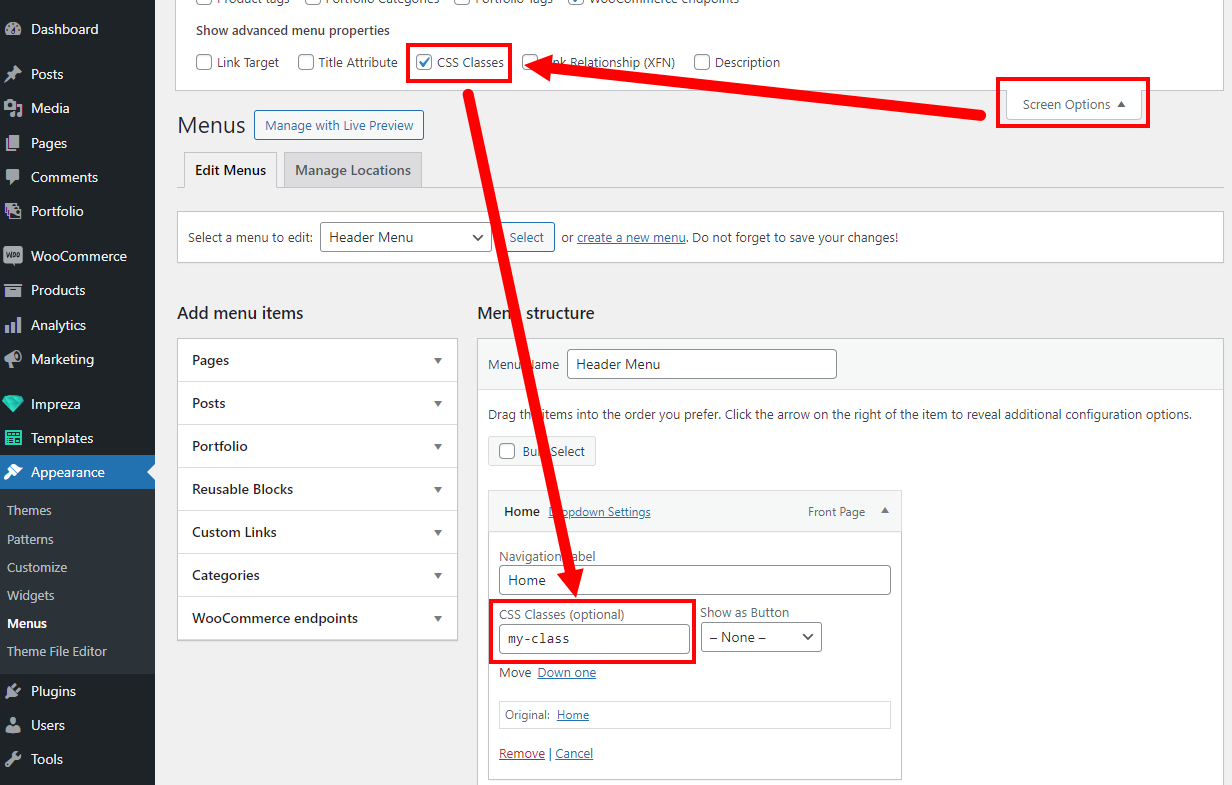
How to Add a Custom CSS Class to the Menu Item #
When editing the menu item at Appearance > Menus, open the Screen Options and activate the "CSS Classes" checkbox. Then, you can add a custom class to the menu item.
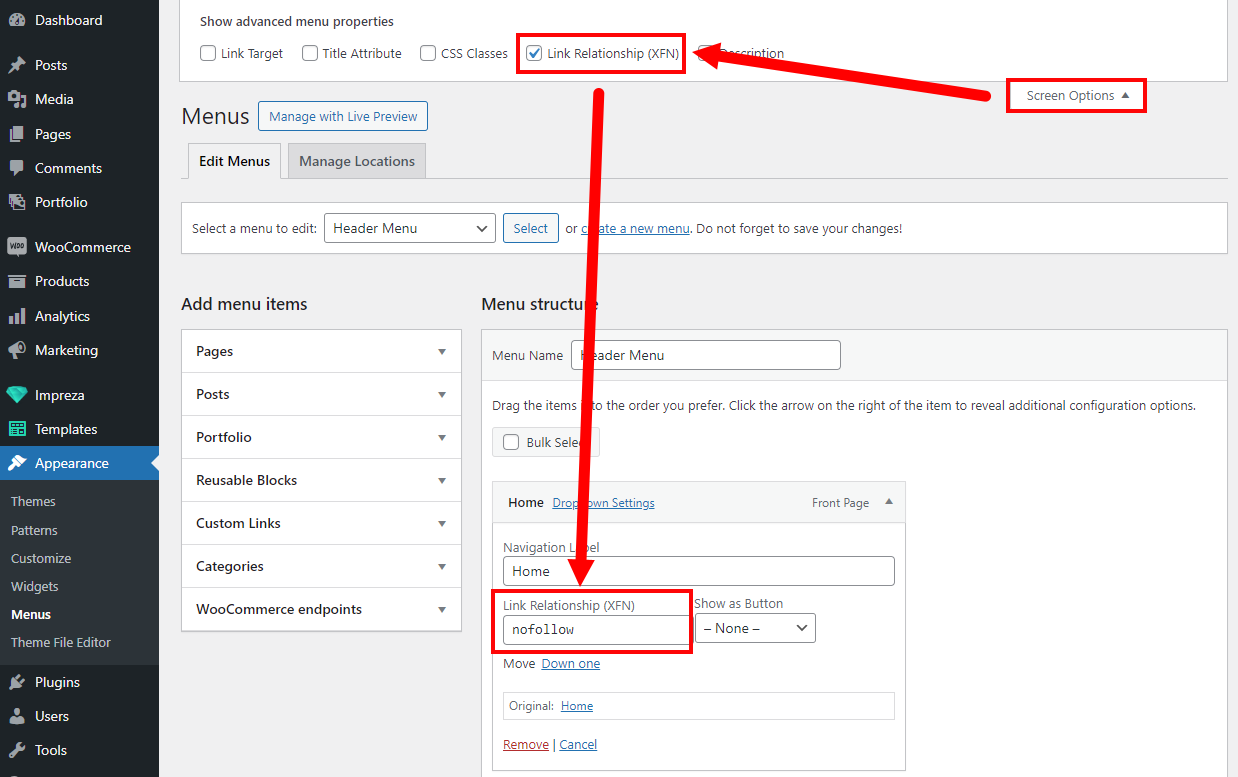
How to Add a Link Attribute to the Menu Item #
When editing the menu item at Appearance > Menus, open Screen Options and activate the "Link Relationship (XFN)" checkbox. Then, you can specify the needed attribute (for example, "nofollow").
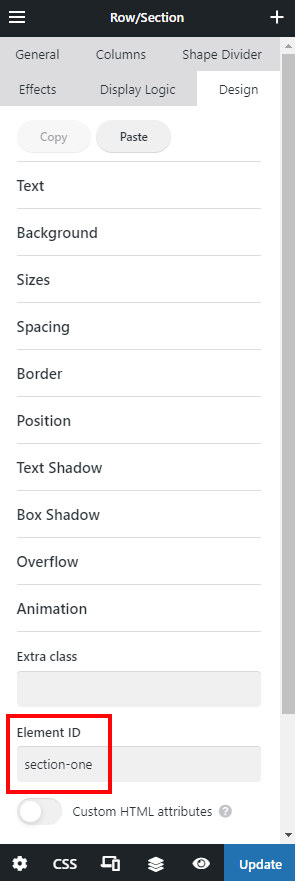
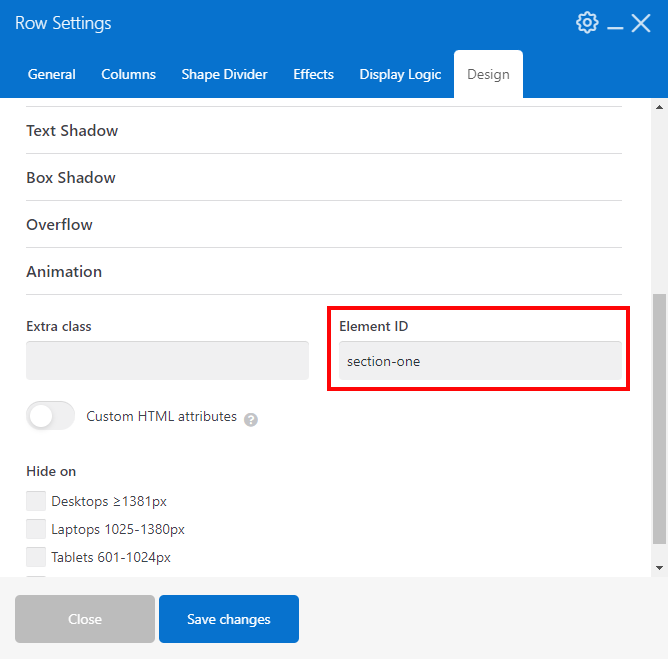
How to Create Menus with Anchor Links #
When editing the menu at Appearance > Menus, add a Custom Link item and specify an anchor link that starts with the hashtag, for example:
#section-one
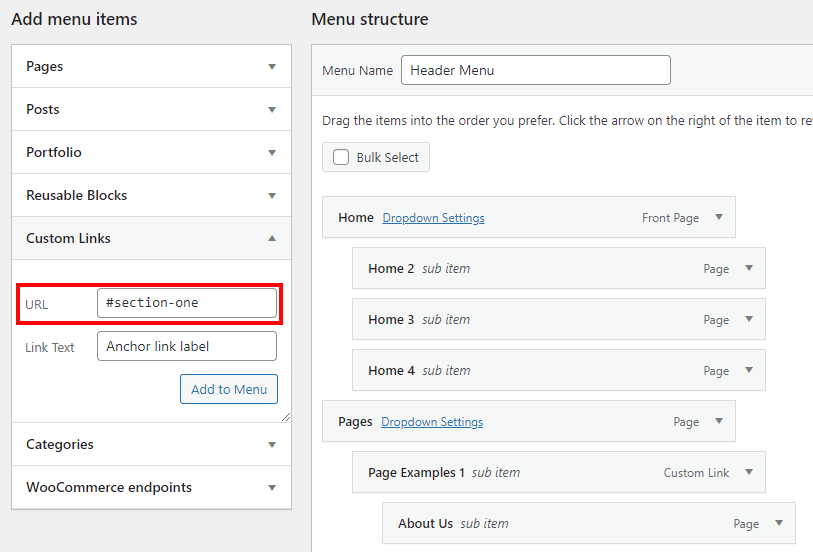
This link will scroll the page to the element with the same ID specified in its Design settings (without the hashtag).
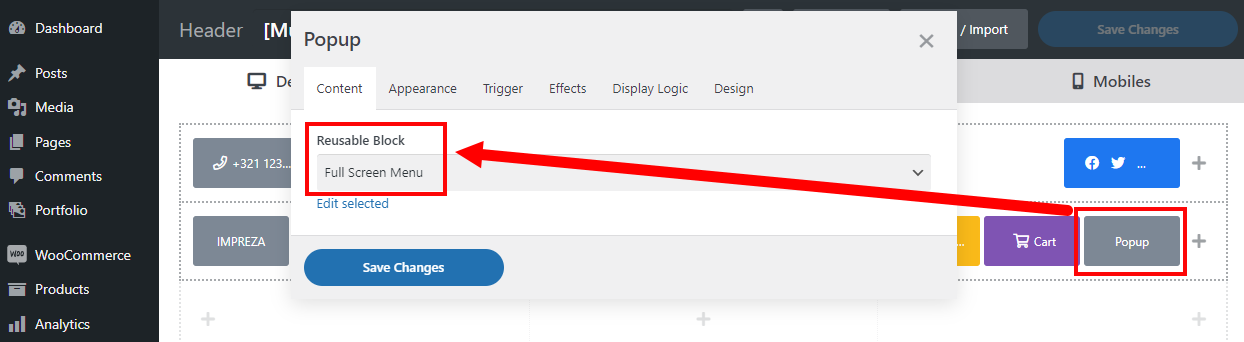
How to Show Menu in a Popup #
At Templates > Reusable Blocks, create a new block and add the needed menu content (simple menu, custom text, images, etc.)
Next, add the Popup element to the Header (or content, if needed) and set it up to show the Reusable Block created earlier.
How to Add a Menu Item without a Link #
Add a Custom Links type item to the menu and specify the # as its URL value.
